Express.js sudah berumur 14 tahun. Framework yang legendaris ini telah menjadi fondasi backend JavaScript selama lebih dari satu dekade. Tapi teknologi terus berkembang, dan di 2026 ada pilihan baru yang menawarkan sesuatu yang berbeda — ElysiaJS. Framework ini 21x lebih cepat dari Express, type-safe dari ujung ke ujung, dan memberikan developer experience yang membuat banyak developer tidak mau kembali ke cara lama.
Bagian 1: Apa itu ElysiaJS dan Kenapa Harus Belajar di 2026?
Saya Angga Risky Setiawan, Founder dan CEO BuildWithAngga. Setelah bertahun-tahun mengajar web development kepada 900.000+ students di Indonesia, saya selalu excited ketika ada teknologi baru yang genuinely better — bukan sekadar hype. ElysiaJS adalah salah satunya. Dan di artikel ini, saya akan guide kamu dari nol sampai bisa build REST API lengkap dengan framework modern ini.
Apa Sebenarnya ElysiaJS Itu?
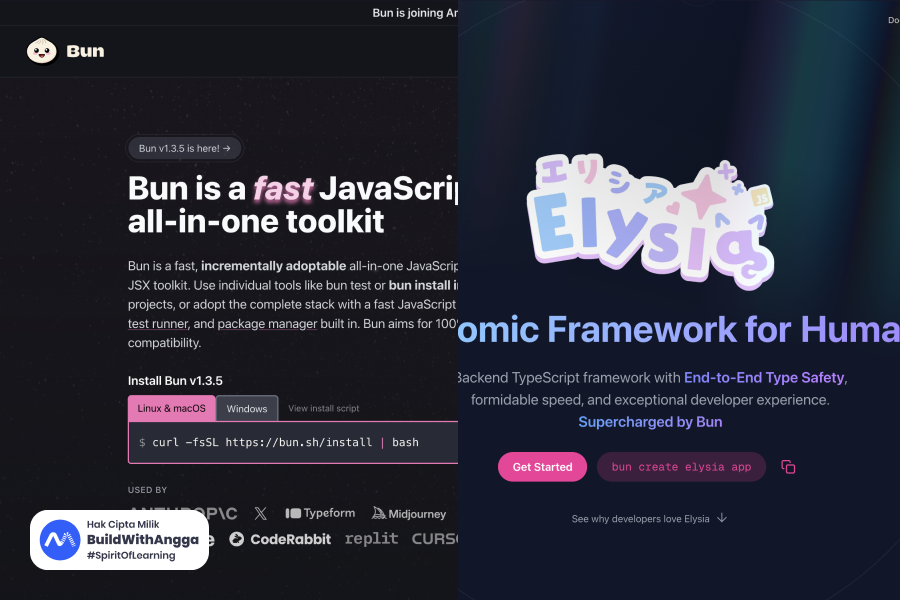
ElysiaJS adalah backend framework TypeScript yang dirancang khusus untuk Bun runtime. Framework ini dibuat oleh SaltyAom, seorang developer dari Thailand, dengan tagline yang sederhana tapi powerful: "Ergonomic Framework for Humans."
Kata kunci di sini adalah "ergonomic" — ElysiaJS didesain supaya developer bisa fokus ke business logic, bukan boilerplate code. Type safety, validation, dan dokumentasi API semuanya handled secara otomatis oleh framework.
ElysiaJS pertama kali release versi 1.0 di Maret 2024, dan sejak itu berkembang sangat pesat. Di December 2025, ElysiaJS sudah mencapai versi 1.4.19 dengan fitur-fitur yang mature dan production-ready.
Kenapa ElysiaJS Berbeda dari Express atau Fastify?
Untuk memahami kenapa ElysiaJS worth untuk dipelajari, mari kita bandingkan langsung dengan Express — framework yang kemungkinan besar sudah kamu kenal.
| Aspect | Express.js | ElysiaJS |
|---|---|---|
| Performance | ~15,000 req/sec | ~300,000 req/sec |
| Type Safety | Manual, butuh setup | Otomatis dari code |
| Validation | Middleware terpisah (Joi, Zod) | Built-in TypeBox |
| API Documentation | Manual setup Swagger | Auto-generated |
| Runtime | Node.js | Bun-first (support Node juga) |
| Learning Curve | Familiar | Sedikit berbeda, tapi intuitive |
| Boilerplate | Banyak | Minimal |
Perbedaan performance 21x bukan angka marketing — ini hasil benchmark TechEmpower Round 23 (February 2025). ElysiaJS bahkan bisa compete dengan framework Golang dan Rust dalam hal raw performance.
Tapi performance bukan satu-satunya alasan. Yang membuat ElysiaJS special adalah kombinasi antara kecepatan dan developer experience yang excellent.
Keunggulan Utama ElysiaJS di 2026
1. End-to-End Type Safety
Bayangkan kamu define schema untuk request body. Di Express, kamu perlu manually create TypeScript interface, setup validation middleware, dan pastikan semuanya sync. Di ElysiaJS, kamu define sekali — dan framework otomatis:
- Validate request di runtime
- Infer TypeScript types
- Generate OpenAPI documentation
Ini seperti tRPC, tapi tanpa code generation dan setup yang complex.
2. Standard Schema Support (Baru di v1.4!)
Sejak ElysiaJS 1.4 (September 2025), kamu tidak terikat dengan TypeBox saja. Framework sekarang support Standard Schema — artinya kamu bisa pakai validator favorit seperti Zod, Valibot, ArkType, Effect, Yup, atau Joi. Semua dengan type inference yang sama baiknya.
3. OpenAPI/Swagger Otomatis
Satu line code untuk generate dokumentasi API lengkap. Tidak perlu annotations, tidak perlu maintain manual. Documentation selalu sync dengan code karena generated dari TypeScript types.
4. Plugin Ecosystem yang Growing
JWT authentication, CORS, static files, WebSocket — semua tersedia sebagai official plugins yang well-maintained. Community plugins juga berkembang pesat untuk integrasi dengan Prisma, Drizzle, tRPC, GraphQL, dan banyak lagi.
5. Multi-Runtime Support
Meskipun designed untuk Bun, ElysiaJS 1.2+ sudah support Node.js adapter. Kamu juga bisa deploy ke Cloudflare Workers, Vercel Edge Functions, dan runtime lain yang support Web Standards.
Siapa yang Cocok Belajar ElysiaJS?
ElysiaJS cocok untuk kamu kalau:
- Sudah familiar dengan JavaScript atau TypeScript
- Pernah build REST API sebelumnya (dengan framework apapun)
- Mau explore modern backend development
- Frustrated dengan boilerplate Express yang repetitive
- Butuh performance tinggi tanpa pindah ke bahasa lain
- Appreciate good developer experience
ElysiaJS mungkin kurang cocok kalau:
- Baru pertama kali belajar programming (better start dengan fundamentals dulu)
- Project kamu heavily dependent pada Node.js ecosystem yang belum support Bun
- Tim kamu tidak familiar dengan TypeScript sama sekali
Prerequisites Sebelum Mulai
Untuk mengikuti tutorial ini dengan lancar, pastikan kamu sudah punya:
Wajib:
- JavaScript fundamentals (variables, functions, async/await)
- Basic understanding REST API (HTTP methods, status codes)
- Terminal/command line basics
- Code editor (VS Code recommended)
Recommended:
- TypeScript basics (types, interfaces)
- Pernah pakai Express atau framework backend lain
- Familiar dengan JSON
Kalau kamu belum confident dengan prerequisites di atas, BuildWithAngga punya kelas gratis untuk JavaScript dan TypeScript fundamentals. Invest waktu di sana dulu, baru lanjut ke sini.
Apa yang Akan Kamu Pelajari
Di artikel ini, kita akan build REST API dari nol dengan ElysiaJS. Specifically:
- Setup development environment dengan Bun dan ElysiaJS
- Memahami routing dan HTTP methods
- Implement validation dengan TypeBox
- Build complete CRUD API (Todo App)
- Generate Swagger documentation otomatis
- Best practices dan tips untuk production
Di akhir artikel, kamu akan punya working REST API yang bisa kamu expand untuk project sendiri. Source code lengkap juga akan tersedia.
Mari kita mulai dengan setup environment.
Bagian 2: Setup Environment — Install Bun dan ElysiaJS
Sebelum mulai coding, kita perlu setup environment dulu. ElysiaJS berjalan di atas Bun runtime, jadi langkah pertama adalah install Bun di komputer kamu.
Apa itu Bun?
Bun adalah JavaScript runtime yang dirancang untuk kecepatan. Berbeda dari Node.js yang menggunakan V8 engine, Bun menggunakan JavaScriptCore (engine yang sama dengan Safari). Hasilnya? Startup time yang jauh lebih cepat dan performance yang impressive.
Tapi Bun bukan cuma runtime. Ia juga sekaligus:
- Package manager (pengganti npm/yarn/pnpm)
- Bundler (pengganti webpack/esbuild)
- Test runner (pengganti Jest/Vitest)
- TypeScript transpiler (tanpa perlu ts-node)
Ini artinya kamu tidak perlu install banyak tools terpisah. Satu command bun bisa handle semuanya.
Di December 2025, Bun sudah mencapai versi 1.3.4 dengan fitur-fitur production-ready seperti built-in PostgreSQL client, Redis client, dan S3 support.
Install Bun
macOS dan Linux:
Buka terminal dan jalankan:
curl -fsSL <https://bun.sh/install> | bash
Setelah selesai, restart terminal atau jalankan:
source ~/.bashrc
# atau untuk zsh
source ~/.zshrc
Windows:
Buka PowerShell sebagai Administrator dan jalankan:
powershell -c "irm bun.sh/install.ps1|iex"
Verify Installation:
Pastikan Bun terinstall dengan benar:
bun --version
Kamu harusnya melihat output seperti 1.3.4 atau versi terbaru.
Create Project ElysiaJS
Ada dua cara untuk membuat project ElysiaJS baru.
Cara 1: Menggunakan Template (Recommended)
bun create elysia my-first-api
cd my-first-api
Command ini akan create project dengan struktur yang sudah siap pakai.
Cara 2: Manual Setup
Kalau mau lebih control atau understand prosesnya:
# Buat folder project
mkdir my-first-api
cd my-first-api

# Initialize project
bun init

# Install ElysiaJS
bun add elysia
Saat menjalankan bun init, kamu akan ditanya beberapa pertanyaan. Untuk sekarang, tekan Enter untuk semua default options.
Project Structure
Setelah setup, project kamu akan terlihat seperti ini:
my-first-api/
├── src/
│   └── index.ts      # Entry point
├── package.json      # Dependencies dan scripts
├── tsconfig.json     # TypeScript configuration
└── bun.lock          # Lock file (seperti package-lock.json)
Kalau menggunakan bun create elysia, file src/index.ts sudah berisi starter code. Kalau manual, kita perlu buat sendiri.
Hello World dengan ElysiaJS
Buka atau buat file src/index.ts dan tulis code berikut:
import { Elysia } from 'elysia'

const app = new Elysia()
  .get('/', () => 'Hello ElysiaJS!')
  .listen(3000)

console.log(`🦊 Elysia is running at <http://localhost>:${app.server?.port}`)
Mari breakdown code ini:
import { Elysia } from 'elysia'— Import class Elysia dari packageconst app = new Elysia()— Buat instance baru dari Elysia.get('/', () => 'Hello ElysiaJS!')— Define route GET untuk path "/".listen(3000)— Start server di port 3000console.log(...)— Print message ke terminal
Perhatikan bahwa kita menggunakan method chaining — setiap method return instance Elysia sehingga bisa di-chain. Ini bukan cuma style preference, tapi penting untuk type inference yang akan kita bahas nanti.
Menjalankan Development Server
Untuk menjalankan aplikasi:
bun run src/index.ts
Atau kalau sudah setup script di package.json:
bun run dev
Kamu akan melihat output:
🦊 Elysia is running at <http://localhost:3000>
Buka browser dan akses http://localhost:3000. Kamu akan melihat text "Hello ElysiaJS!".
Hot Reload dengan Bun
Salah satu keunggulan Bun adalah hot reload yang sangat cepat. Untuk enable hot reload, jalankan dengan flag --watch:
bun --watch src/index.ts
Sekarang setiap kali kamu save file, server akan otomatis restart. Dan yang impressive — restart-nya hampir instant, tidak seperti nodemon yang butuh beberapa detik.
Untuk kemudahan, tambahkan script di package.json:
{
  "scripts": {
    "dev": "bun --watch src/index.ts",
    "start": "bun src/index.ts"
  }
}
Sekarang kamu bisa jalankan:
bun run dev
TypeScript Tanpa Build Step
Salah satu hal yang membuat development dengan Bun sangat nyaman adalah kamu tidak perlu compile TypeScript terlebih dahulu. Bun bisa langsung menjalankan file .ts tanpa transpilation step.
Ini berbeda dengan Node.js dimana kamu perlu:
- Install TypeScript
- Install ts-node atau tsx
- Setup tsconfig.json dengan benar
- Kadang masih error karena ESM/CommonJS issues
Dengan Bun, semua itu tidak perlu. Just write TypeScript and run.
Test Endpoint dengan cURL
Selain browser, kamu bisa test endpoint dengan cURL di terminal:
curl <http://localhost:3000>
Output:
Hello ElysiaJS!
Atau dengan verbose mode untuk melihat headers:
curl -v <http://localhost:3000>
Return JSON Response
Dalam REST API, biasanya kita return JSON bukan plain text. ElysiaJS handle ini secara otomatis:
import { Elysia } from 'elysia'

const app = new Elysia()
  .get('/', () => {
    return {
      message: 'Hello ElysiaJS!',
      version: '1.0.0',
      timestamp: new Date().toISOString()
    }
  })
  .listen(3000)

console.log(`🦊 Elysia is running at <http://localhost>:${app.server?.port}`)
Sekarang akses http://localhost:3000 dan kamu akan melihat:
{
  "message": "Hello ElysiaJS!",
  "version": "1.0.0",
  "timestamp": "2025-12-20T10:30:00.000Z"
}
ElysiaJS otomatis:
- Set
Content-Type: application/json - Serialize object ke JSON string
- Handle proper encoding
Kamu tidak perlu manually call JSON.stringify() atau set headers.
Environment Ready!
Sekarang environment kamu sudah siap untuk development. Kamu punya:
- Bun runtime terinstall
- Project ElysiaJS yang bisa run
- Hot reload untuk development yang cepat
- Basic endpoint yang return JSON
Di bagian selanjutnya, kita akan deep dive ke routing — bagaimana handle berbagai HTTP methods, path parameters, query strings, dan request body.
Bagian 3: Routing dan HTTP Methods — Fondasi REST API
Routing adalah jantung dari setiap REST API. Di bagian ini, kita akan explore bagaimana ElysiaJS handle berbagai HTTP methods, path parameters, query strings, request body, dan route grouping.
Basic HTTP Methods
REST API menggunakan HTTP methods untuk membedakan jenis operasi. ElysiaJS menyediakan method untuk setiap HTTP verb:
import { Elysia } from 'elysia'

const app = new Elysia()
  // GET - Mengambil data
  .get('/users', () => 'Get all users')

  // POST - Membuat data baru
  .post('/users', () => 'Create new user')

  // PUT - Update seluruh data
  .put('/users/1', () => 'Update user 1')

  // PATCH - Update sebagian data
  .patch('/users/1', () => 'Partial update user 1')

  // DELETE - Menghapus data
  .delete('/users/1', () => 'Delete user 1')

  .listen(3000)
Setiap method menerima dua parameter utama:
- Path — URL endpoint (string)
- Handler — Function yang akan dieksekusi
Handler function menerima satu parameter yang disebut Context. Context berisi semua informasi tentang request dan tools untuk memanipulasi response.
Path Parameters
Path parameters digunakan untuk mengambil nilai dinamis dari URL. Di ElysiaJS, gunakan syntax :paramName:
const app = new Elysia()
  // Single parameter
  .get('/users/:id', ({ params }) => {
    return `User ID: ${params.id}`
  })

  // Multiple parameters
  .get('/posts/:postId/comments/:commentId', ({ params }) => {
    return {
      postId: params.postId,
      commentId: params.commentId
    }
  })

  .listen(3000)
Test dengan cURL:
curl <http://localhost:3000/users/42>
# Output: User ID: 42

curl <http://localhost:3000/posts/10/comments/5>
# Output: {"postId":"10","commentId":"5"}
Perhatikan bahwa params selalu berupa string. Nanti di bagian validation, kita akan belajar cara auto-convert ke number.
Query Parameters
Query parameters adalah data yang dikirim via URL setelah tanda ?. Contoh: /search?q=elysiajs&limit=10
const app = new Elysia()
  .get('/search', ({ query }) => {
    return {
      keyword: query.q,
      limit: query.limit,
      page: query.page
    }
  })
  .listen(3000)
Test:
curl "<http://localhost:3000/search?q=elysiajs&limit=10&page=1>"
# Output: {"keyword":"elysiajs","limit":"10","page":"1"}
Query parameters juga selalu string. Undefined kalau tidak dikirim.
Request Body
Untuk POST, PUT, dan PATCH requests, data biasanya dikirim via request body dalam format JSON:
const app = new Elysia()
  .post('/users', ({ body }) => {
    return {
      message: 'User created',
      data: body
    }
  })
  .listen(3000)
Test dengan cURL:
curl -X POST <http://localhost:3000/users> \\
  -H "Content-Type: application/json" \\
  -d '{"name": "John Doe", "email": "[email protected]"}'
Output:
{
  "message": "User created",
  "data": {
    "name": "John Doe",
    "email": "[email protected]"
  }
}
ElysiaJS otomatis parse JSON body. Tidak perlu middleware seperti express.json().
Headers dan Cookies
Akses request headers dan cookies juga mudah:
const app = new Elysia()
  .get('/protected', ({ headers, cookie }) => {
    // Akses specific header
    const authHeader = headers.authorization
    const userAgent = headers['user-agent']

    // Akses cookie
    const sessionId = cookie.session?.value

    return {
      auth: authHeader,
      userAgent: userAgent,
      session: sessionId
    }
  })
  .listen(3000)
Test:
curl <http://localhost:3000/protected> \\
  -H "Authorization: Bearer token123"
Setting Response Status dan Headers
Untuk mengubah status code atau menambah response headers, gunakan set dari context:
const app = new Elysia()
  .post('/users', ({ body, set }) => {
    // Set status code 201 Created
    set.status = 201

    // Set custom header
    set.headers['X-Custom-Header'] = 'my-value'

    return {
      message: 'User created',
      data: body
    }
  })

  .get('/not-found-example', ({ set }) => {
    set.status = 404
    return { error: 'Resource not found' }
  })

  .listen(3000)
Route Grouping
Saat API berkembang, kamu akan punya banyak routes. Grouping membantu mengorganisir routes berdasarkan resource:
const app = new Elysia()
  // Group untuk users
  .group('/api/v1/users', app => app
    .get('/', () => 'List all users')
    .get('/:id', ({ params }) => `Get user ${params.id}`)
    .post('/', ({ body }) => ({ created: body }))
    .put('/:id', ({ params, body }) => ({ updated: params.id, data: body }))
    .delete('/:id', ({ params }) => ({ deleted: params.id }))
  )

  // Group untuk posts
  .group('/api/v1/posts', app => app
    .get('/', () => 'List all posts')
    .get('/:id', ({ params }) => `Get post ${params.id}`)
    .post('/', ({ body }) => ({ created: body }))
  )

  .listen(3000)
Dengan grouping, routes menjadi lebih readable dan maintainable. Prefix /api/v1/users otomatis ditambahkan ke semua routes di dalam group tersebut.
Memisahkan Routes ke File Terpisah
Untuk project yang lebih besar, best practice adalah memisahkan routes ke file terpisah:
// src/routes/users.ts
import { Elysia } from 'elysia'

export const userRoutes = new Elysia({ prefix: '/users' })
  .get('/', () => 'List all users')
  .get('/:id', ({ params }) => `Get user ${params.id}`)
  .post('/', ({ body }) => ({ created: body }))
  .put('/:id', ({ params, body }) => ({ updated: params.id }))
  .delete('/:id', ({ params }) => ({ deleted: params.id }))
// src/routes/posts.ts
import { Elysia } from 'elysia'

export const postRoutes = new Elysia({ prefix: '/posts' })
  .get('/', () => 'List all posts')
  .get('/:id', ({ params }) => `Get post ${params.id}`)
  .post('/', ({ body }) => ({ created: body }))
// src/index.ts
import { Elysia } from 'elysia'
import { userRoutes } from './routes/users'
import { postRoutes } from './routes/posts'

const app = new Elysia()
  .get('/', () => ({ message: 'API v1.0' }))
  .group('/api/v1', app => app
    .use(userRoutes)
    .use(postRoutes)
  )
  .listen(3000)

console.log(`🦊 Elysia is running at <http://localhost>:${app.server?.port}`)
Method .use() digunakan untuk "mount" routes dari file lain. Ini membuat code modular dan mudah di-maintain.
Pentingnya Method Chaining
Satu hal yang sangat penting di ElysiaJS adalah method chaining. Perhatikan perbedaan berikut:
// ✅ BENAR - dengan method chaining
const app = new Elysia()
  .get('/', () => 'Home')
  .get('/about', () => 'About')
  .post('/users', ({ body }) => body)
  .listen(3000)

// ❌ SALAH - tanpa method chaining
const app = new Elysia()
app.get('/', () => 'Home')
app.get('/about', () => 'About')
app.post('/users', ({ body }) => body)
app.listen(3000)
Secara fungsional, keduanya bekerja. Tapi cara kedua akan kehilangan type inference. ElysiaJS menggunakan TypeScript generics yang complex untuk track semua routes dan types. Tanpa chaining, TypeScript tidak bisa infer types dengan benar.
Ini bukan bug atau limitasi — ini by design untuk achieve end-to-end type safety yang menjadi keunggulan utama ElysiaJS.
Context Object Lengkap
Untuk referensi, ini adalah properties yang tersedia di context object:
| Property | Description |
|---|---|
params | Path parameters |
query | Query string parameters |
body | Request body |
headers | Request headers |
cookie | Cookies |
set | Object untuk set response (status, headers) |
path | Current request path |
request | Raw Request object |
store | Shared state antar routes |
Di bagian selanjutnya, kita akan belajar validation — bagaimana memastikan data yang masuk sesuai dengan yang kita harapkan, dengan type safety yang automatic.
Bagian 4: Validation dengan TypeBox — Type Safety di Runtime
Validation adalah salah satu fitur paling powerful di ElysiaJS. Dengan validation, kamu bisa memastikan data yang masuk ke API sesuai dengan yang diharapkan — dan mendapat TypeScript types secara otomatis tanpa menulis interface terpisah.
Kenapa Validation Penting?
Tanpa validation, API kamu rentan terhadap:
- Invalid data masuk ke database — User bisa kirim string untuk field yang harusnya number
- Security vulnerabilities — Input tidak di-sanitize bisa menyebabkan injection
- Runtime errors — Code crash karena data tidak sesuai ekspektasi
- Poor error messages — Client tidak tahu apa yang salah dengan request mereka
Di Express, kamu perlu install library terpisah seperti Joi, Yup, atau Zod, lalu setup middleware. Di ElysiaJS, validation sudah built-in menggunakan TypeBox.
TypeBox Basics
TypeBox adalah schema builder yang mirip dengan Zod, tapi dengan performance yang lebih baik karena compile-time optimization. ElysiaJS mengekspos TypeBox melalui t:
import { Elysia, t } from 'elysia'

const app = new Elysia()
  .post('/users', ({ body }) => {
    // body sudah validated DAN typed!
    // TypeScript tahu body.name adalah string
    // TypeScript tahu body.email adalah string
    // TypeScript tahu body.age adalah number
    return {
      message: 'User created',
      data: body
    }
  }, {
    body: t.Object({
      name: t.String(),
      email: t.String(),
      age: t.Number()
    })
  })
  .listen(3000)
Perhatikan parameter ketiga di .post() — ini adalah options object yang berisi schema untuk validation.
Test dengan valid data:
curl -X POST <http://localhost:3000/users> \\
  -H "Content-Type: application/json" \\
  -d '{"name": "John", "email": "[email protected]", "age": 25}'
Response:
{
  "message": "User created",
  "data": {
    "name": "John",
    "email": "[email protected]",
    "age": 25
  }
}
Test dengan invalid data:
curl -X POST <http://localhost:3000/users> \\
  -H "Content-Type: application/json" \\
  -d '{"name": "John", "email": "[email protected]", "age": "twenty-five"}'
Response (otomatis 400 Bad Request):
{
  "type": "validation",
  "on": "body",
  "message": "Expected number",
  "expected": {
    "age": "number"
  }
}
ElysiaJS otomatis return error yang descriptive. Client langsung tahu field age harusnya number.
Common TypeBox Types
Berikut types yang paling sering digunakan:
Primitive Types:
import { t } from 'elysia'

t.String()     // string
t.Number()     // number
t.Boolean()    // boolean
t.Null()       // null
Types dengan Constraints:
// String constraints
t.String({ minLength: 3 })                    // minimal 3 karakter
t.String({ maxLength: 100 })                  // maksimal 100 karakter
t.String({ minLength: 3, maxLength: 50 })     // antara 3-50 karakter
t.String({ pattern: '^[a-z]+$' })             // regex pattern

// Number constraints
t.Number({ minimum: 0 })                      // >= 0
t.Number({ maximum: 100 })                    // <= 100
t.Number({ minimum: 1, maximum: 10 })         // 1-10
t.Number({ multipleOf: 5 })                   // kelipatan 5

// Format validation (untuk strings)
t.String({ format: 'email' })                 // valid email
t.String({ format: 'uuid' })                  // valid UUID
t.String({ format: 'date-time' })             // ISO datetime
t.String({ format: 'uri' })                   // valid URL
Complex Types:
// Object
t.Object({
  name: t.String(),
  age: t.Number()
})

// Array
t.Array(t.String())                           // string[]
t.Array(t.Number())                           // number[]
t.Array(t.Object({ id: t.Number() }))         // { id: number }[]

// Array dengan constraints
t.Array(t.String(), { minItems: 1 })          // minimal 1 item
t.Array(t.String(), { maxItems: 10 })         // maksimal 10 items

// Optional (bisa undefined)
t.Optional(t.String())                        // string | undefined

// Nullable (bisa null)
t.Nullable(t.String())                        // string | null

// Union (salah satu dari beberapa types)
t.Union([t.String(), t.Number()])             // string | number

// Literal (nilai exact)
t.Literal('active')                           // hanya terima "active"
t.Literal(42)                                 // hanya terima 42

// Enum-like dengan Union of Literals
t.Union([
  t.Literal('admin'),
  t.Literal('user'),
  t.Literal('guest')
])                                            // 'admin' | 'user' | 'guest'
Validate Path Parameters
Path parameters secara default adalah string. Gunakan t.Numeric() untuk auto-convert ke number:
const app = new Elysia()
  .get('/users/:id', ({ params }) => {
    // params.id sekarang number, bukan string!
    const userId = params.id
    return { userId, type: typeof userId }
  }, {
    params: t.Object({
      id: t.Numeric()  // Auto convert string "123" ke number 123
    })
  })
  .listen(3000)
Test:
curl <http://localhost:3000/users/42>
# Output: {"userId":42,"type":"number"}

curl <http://localhost:3000/users/abc>
# Output: 400 Bad Request - validation error
Validate Query Parameters
Query parameters juga default string. Validate dan convert sesuai kebutuhan:
const app = new Elysia()
  .get('/search', ({ query }) => {
    return {
      keyword: query.q,
      limit: query.limit,    // number
      page: query.page,      // number
      active: query.active   // boolean
    }
  }, {
    query: t.Object({
      q: t.String({ minLength: 1 }),
      limit: t.Optional(t.Numeric({ default: 10 })),
      page: t.Optional(t.Numeric({ default: 1 })),
      active: t.Optional(t.BooleanString({ default: true }))
    })
  })
  .listen(3000)
Test:
curl "<http://localhost:3000/search?q=elysiajs>"
# Output: {"keyword":"elysiajs","limit":10,"page":1,"active":true}

curl "<http://localhost:3000/search?q=elysiajs&limit=20&page=2&active=false>"
# Output: {"keyword":"elysiajs","limit":20,"page":2,"active":false}
Response Validation
Selain validate input, kamu juga bisa validate output. Ini berguna untuk memastikan API selalu return structure yang konsisten:
const app = new Elysia()
  .get('/users/:id', ({ params }) => {
    // TypeScript akan error kalau return tidak sesuai schema
    return {
      id: params.id,
      name: 'John Doe',
      email: '[email protected]',
      createdAt: new Date().toISOString()
    }
  }, {
    params: t.Object({
      id: t.Numeric()
    }),
    response: t.Object({
      id: t.Number(),
      name: t.String(),
      email: t.String(),
      createdAt: t.String()
    })
  })
  .listen(3000)
Response validation juga membantu generate OpenAPI documentation yang akurat.
Custom Error Messages
Default error messages dari TypeBox sudah cukup informatif. Tapi kalau mau customize:
const app = new Elysia()
  .post('/register', ({ body }) => {
    return { success: true, data: body }
  }, {
    body: t.Object({
      username: t.String({
        minLength: 3,
        maxLength: 20,
        error: 'Username harus 3-20 karakter'
      }),
      email: t.String({
        format: 'email',
        error: 'Format email tidak valid'
      }),
      password: t.String({
        minLength: 8,
        error: 'Password minimal 8 karakter'
      }),
      age: t.Number({
        minimum: 17,
        error: 'Umur minimal 17 tahun'
      })
    })
  })
  .listen(3000)
Standard Schema Support (ElysiaJS 1.4+)
Sejak versi 1.4, ElysiaJS support Standard Schema. Artinya kamu bisa pakai validator lain seperti Zod jika sudah familiar:
import { Elysia } from 'elysia'
import { z } from 'zod'

// Define schema dengan Zod
const CreateUserSchema = z.object({
  name: z.string().min(3, 'Name minimal 3 karakter'),
  email: z.string().email('Email tidak valid'),
  age: z.number().min(17, 'Umur minimal 17')
})

const app = new Elysia()
  .post('/users', ({ body }) => {
    // body tetap fully typed!
    return { created: body }
  }, {
    body: CreateUserSchema  // Zod schema works!
  })
  .listen(3000)
Kamu bahkan bisa mix TypeBox dan Zod dalam satu project:
import { Elysia, t } from 'elysia'
import { z } from 'zod'

const app = new Elysia()
  // Route dengan TypeBox
  .get('/users/:id', ({ params }) => ({ id: params.id }), {
    params: t.Object({ id: t.Numeric() })
  })

  // Route dengan Zod
  .post('/users', ({ body }) => ({ created: body }), {
    body: z.object({
      name: z.string(),
      email: z.string().email()
    })
  })
  .listen(3000)
Standard Schema juga support Valibot, ArkType, Effect Schema, Yup, dan Joi.
Reusable Schemas
Untuk schema yang dipakai berulang, define terpisah:
import { Elysia, t } from 'elysia'

// Define reusable schemas
const UserSchema = t.Object({
  id: t.Number(),
  name: t.String(),
  email: t.String({ format: 'email' }),
  role: t.Union([t.Literal('admin'), t.Literal('user')])
})

const CreateUserSchema = t.Omit(UserSchema, ['id'])  // Tanpa id
const UpdateUserSchema = t.Partial(CreateUserSchema)  // Semua optional

const app = new Elysia()
  .get('/users/:id', ({ params }) => ({
    id: params.id,
    name: 'John',
    email: '[email protected]',
    role: 'user'
  }), {
    params: t.Object({ id: t.Numeric() }),
    response: UserSchema
  })

  .post('/users', ({ body }) => ({
    id: 1,
    ...body
  }), {
    body: CreateUserSchema,
    response: UserSchema
  })

  .patch('/users/:id', ({ params, body }) => ({
    id: params.id,
    name: body.name ?? 'John',
    email: body.email ?? '[email protected]',
    role: body.role ?? 'user'
  }), {
    params: t.Object({ id: t.Numeric() }),
    body: UpdateUserSchema,
    response: UserSchema
  })
  .listen(3000)
TypeBox menyediakan utility types seperti:
t.Omit(schema, ['field'])— Hapus fields tertentut.Pick(schema, ['field'])— Ambil fields tertentu sajat.Partial(schema)— Jadikan semua fields optionalt.Required(schema)— Jadikan semua fields required
Type Inference Magic
Salah satu hal paling impressive dari ElysiaJS adalah type inference. Perhatikan:
const app = new Elysia()
  .post('/users', ({ body }) => {
    // Hover di body di VS Code
    // TypeScript tahu: body: { name: string; email: string; age: number }

    const name = body.name      // string
    const email = body.email    // string
    const age = body.age        // number

    // TypeScript error kalau akses field yang tidak ada
    // const invalid = body.invalid  // Error!

    return { created: body }
  }, {
    body: t.Object({
      name: t.String(),
      email: t.String(),
      age: t.Number()
    })
  })
Kamu tidak perlu menulis interface TypeScript terpisah. Schema adalah single source of truth untuk:
- Runtime validation
- TypeScript types
- OpenAPI documentation
Ini adalah true end-to-end type safety yang menjadi keunggulan utama ElysiaJS dibanding framework lain.
Di bagian selanjutnya, kita akan apply semua yang sudah dipelajari untuk build complete CRUD API — Todo App dengan semua operasi Create, Read, Update, Delete.
Bagian 5: Build Complete CRUD API — Todo App
Sekarang saatnya apply semua yang sudah dipelajari. Kita akan build REST API lengkap untuk Todo App dengan operasi Create, Read, Update, dan Delete. API ini akan menjadi fondasi yang bisa kamu expand untuk project sendiri.
Project Structure
Pertama, mari setup struktur project yang proper:
todo-api/
├── src/
│   ├── index.ts          # Entry point
│   ├── routes/
│   │   └── todos.ts      # Todo routes
│   ├── types/
│   │   └── todo.ts       # Type definitions
│   └── data/
│       └── store.ts      # In-memory data store
├── package.json
└── tsconfig.json
Buat folder dan files:
mkdir -p src/routes src/types src/data
touch src/index.ts src/routes/todos.ts src/types/todo.ts src/data/store.ts
Step 1: Define Types
Mulai dengan mendefinisikan type untuk Todo:
// src/types/todo.ts
export interface Todo {
  id: number
  title: string
  completed: boolean
  createdAt: string
  updatedAt: string
}
Step 2: Create Data Store
Untuk tutorial ini, kita gunakan in-memory store. Di real project, kamu akan pakai database seperti PostgreSQL dengan Drizzle ORM.
// src/data/store.ts
import type { Todo } from '../types/todo'

// In-memory database
export const todos: Todo[] = [
  {
    id: 1,
    title: 'Belajar ElysiaJS',
    completed: false,
    createdAt: new Date().toISOString(),
    updatedAt: new Date().toISOString()
  },
  {
    id: 2,
    title: 'Build REST API',
    completed: false,
    createdAt: new Date().toISOString(),
    updatedAt: new Date().toISOString()
  }
]

// Auto-increment ID
let nextId = 3

export const getNextId = () => nextId++
Step 3: Build Todo Routes
Sekarang bagian utama — routes untuk CRUD operations:
// src/routes/todos.ts
import { Elysia, t } from 'elysia'
import { todos, getNextId } from '../data/store'
import type { Todo } from '../types/todo'

// Reusable schemas
const TodoSchema = t.Object({
  id: t.Number(),
  title: t.String(),
  completed: t.Boolean(),
  createdAt: t.String(),
  updatedAt: t.String()
})

const CreateTodoSchema = t.Object({
  title: t.String({ minLength: 1, maxLength: 200 })
})

const UpdateTodoSchema = t.Object({
  title: t.Optional(t.String({ minLength: 1, maxLength: 200 })),
  completed: t.Optional(t.Boolean())
})

export const todoRoutes = new Elysia({ prefix: '/todos' })

  // ============================================
  // GET /todos - Get all todos
  // ============================================
  .get('/', ({ query }) => {
    let result = [...todos]

    // Filter by completed status if provided
    if (query.completed !== undefined) {
      result = result.filter(todo => todo.completed === query.completed)
    }

    // Sort by createdAt descending (newest first)
    result.sort((a, b) =>
      new Date(b.createdAt).getTime() - new Date(a.createdAt).getTime()
    )

    return {
      data: result,
      total: result.length
    }
  }, {
    query: t.Object({
      completed: t.Optional(t.BooleanString())
    }),
    detail: {
      summary: 'Get all todos',
      description: 'Retrieve a list of all todo items. Can filter by completed status.'
    }
  })

  // ============================================
  // GET /todos/:id - Get single todo
  // ============================================
  .get('/:id', ({ params, set }) => {
    const todo = todos.find(t => t.id === params.id)

    if (!todo) {
      set.status = 404
      return {
        error: 'Not Found',
        message: `Todo with id ${params.id} not found`
      }
    }

    return { data: todo }
  }, {
    params: t.Object({
      id: t.Numeric()
    }),
    detail: {
      summary: 'Get todo by ID',
      description: 'Retrieve a specific todo item by its ID'
    }
  })

  // ============================================
  // POST /todos - Create new todo
  // ============================================
  .post('/', ({ body, set }) => {
    const now = new Date().toISOString()

    const newTodo: Todo = {
      id: getNextId(),
      title: body.title.trim(),
      completed: false,
      createdAt: now,
      updatedAt: now
    }

    todos.push(newTodo)

    set.status = 201
    return {
      message: 'Todo created successfully',
      data: newTodo
    }
  }, {
    body: CreateTodoSchema,
    detail: {
      summary: 'Create new todo',
      description: 'Create a new todo item with the provided title'
    }
  })

  // ============================================
  // PUT /todos/:id - Update todo (full update)
  // ============================================
  .put('/:id', ({ params, body, set }) => {
    const index = todos.findIndex(t => t.id === params.id)

    if (index === -1) {
      set.status = 404
      return {
        error: 'Not Found',
        message: `Todo with id ${params.id} not found`
      }
    }

    const updatedTodo: Todo = {
      ...todos[index],
      title: body.title.trim(),
      completed: body.completed,
      updatedAt: new Date().toISOString()
    }

    todos[index] = updatedTodo

    return {
      message: 'Todo updated successfully',
      data: updatedTodo
    }
  }, {
    params: t.Object({
      id: t.Numeric()
    }),
    body: t.Object({
      title: t.String({ minLength: 1, maxLength: 200 }),
      completed: t.Boolean()
    }),
    detail: {
      summary: 'Update todo',
      description: 'Update an existing todo item (full update)'
    }
  })

  // ============================================
  // PATCH /todos/:id - Partial update todo
  // ============================================
  .patch('/:id', ({ params, body, set }) => {
    const index = todos.findIndex(t => t.id === params.id)

    if (index === -1) {
      set.status = 404
      return {
        error: 'Not Found',
        message: `Todo with id ${params.id} not found`
      }
    }

    const updatedTodo: Todo = {
      ...todos[index],
      ...(body.title && { title: body.title.trim() }),
      ...(body.completed !== undefined && { completed: body.completed }),
      updatedAt: new Date().toISOString()
    }

    todos[index] = updatedTodo

    return {
      message: 'Todo updated successfully',
      data: updatedTodo
    }
  }, {
    params: t.Object({
      id: t.Numeric()
    }),
    body: UpdateTodoSchema,
    detail: {
      summary: 'Partial update todo',
      description: 'Update specific fields of an existing todo item'
    }
  })

  // ============================================
  // DELETE /todos/:id - Delete todo
  // ============================================
  .delete('/:id', ({ params, set }) => {
    const index = todos.findIndex(t => t.id === params.id)

    if (index === -1) {
      set.status = 404
      return {
        error: 'Not Found',
        message: `Todo with id ${params.id} not found`
      }
    }

    const deletedTodo = todos.splice(index, 1)[0]

    return {
      message: 'Todo deleted successfully',
      data: deletedTodo
    }
  }, {
    params: t.Object({
      id: t.Numeric()
    }),
    detail: {
      summary: 'Delete todo',
      description: 'Delete an existing todo item'
    }
  })

  // ============================================
  // POST /todos/:id/toggle - Toggle completed status
  // ============================================
  .post('/:id/toggle', ({ params, set }) => {
    const index = todos.findIndex(t => t.id === params.id)

    if (index === -1) {
      set.status = 404
      return {
        error: 'Not Found',
        message: `Todo with id ${params.id} not found`
      }
    }

    todos[index] = {
      ...todos[index],
      completed: !todos[index].completed,
      updatedAt: new Date().toISOString()
    }

    return {
      message: `Todo marked as ${todos[index].completed ? 'completed' : 'incomplete'}`,
      data: todos[index]
    }
  }, {
    params: t.Object({
      id: t.Numeric()
    }),
    detail: {
      summary: 'Toggle todo status',
      description: 'Toggle the completed status of a todo item'
    }
  })
Step 4: Main Entry Point
Sekarang gabungkan semuanya di entry point:
// src/index.ts
import { Elysia } from 'elysia'
import { todoRoutes } from './routes/todos'

const app = new Elysia()
  // Health check endpoint
  .get('/', () => ({
    name: 'Todo API',
    version: '1.0.0',
    status: 'running',
    endpoints: {
      todos: '/api/v1/todos',
      docs: '/swagger'
    }
  }))

  // Mount todo routes under /api/v1
  .group('/api/v1', app => app
    .use(todoRoutes)
  )

  // Global error handler
  .onError(({ code, error, set }) => {
    console.error(`Error [${code}]:`, error.message)

    switch (code) {
      case 'VALIDATION':
        set.status = 400
        return {
          error: 'Validation Error',
          message: error.message
        }
      case 'NOT_FOUND':
        set.status = 404
        return {
          error: 'Not Found',
          message: 'The requested resource was not found'
        }
      default:
        set.status = 500
        return {
          error: 'Internal Server Error',
          message: 'Something went wrong'
        }
    }
  })

  .listen(3000)

console.log(`🦊 Todo API running at <http://localhost>:${app.server?.port}`)
console.log(`📋 Endpoints:`)
console.log(`   GET    /api/v1/todos`)
console.log(`   GET    /api/v1/todos/:id`)
console.log(`   POST   /api/v1/todos`)
console.log(`   PUT    /api/v1/todos/:id`)
console.log(`   PATCH  /api/v1/todos/:id`)
console.log(`   DELETE /api/v1/todos/:id`)
console.log(`   POST   /api/v1/todos/:id/toggle`)
Step 5: Testing dengan cURL
Jalankan server:
bun run src/index.ts
Sekarang test setiap endpoint:
Get all todos:
curl <http://localhost:3000/api/v1/todos> | jq
Get todos filtered by completed:
curl "<http://localhost:3000/api/v1/todos?completed=false>" | jq
Get single todo:
curl <http://localhost:3000/api/v1/todos/1> | jq
Create new todo:
curl -X POST <http://localhost:3000/api/v1/todos> \\
  -H "Content-Type: application/json" \\
  -d '{"title": "Learn TypeBox validation"}' | jq
Update todo (full):
curl -X PUT <http://localhost:3000/api/v1/todos/1> \\
  -H "Content-Type: application/json" \\
  -d '{"title": "Belajar ElysiaJS (updated)", "completed": true}' | jq
Partial update:
curl -X PATCH <http://localhost:3000/api/v1/todos/2> \\
  -H "Content-Type: application/json" \\
  -d '{"completed": true}' | jq
Toggle todo status:
curl -X POST <http://localhost:3000/api/v1/todos/1/toggle> | jq
Delete todo:
curl -X DELETE <http://localhost:3000/api/v1/todos/3> | jq
Test validation error:
curl -X POST <http://localhost:3000/api/v1/todos> \\
  -H "Content-Type: application/json" \\
  -d '{"title": ""}' | jq
Test not found:
curl <http://localhost:3000/api/v1/todos/999> | jq
API Response Format
Semua responses mengikuti format konsisten:
Success response:
{
  "message": "Todo created successfully",
  "data": {
    "id": 3,
    "title": "Learn TypeBox validation",
    "completed": false,
    "createdAt": "2025-12-20T10:30:00.000Z",
    "updatedAt": "2025-12-20T10:30:00.000Z"
  }
}
List response:
{
  "data": [...],
  "total": 3
}
Error response:
{
  "error": "Not Found",
  "message": "Todo with id 999 not found"
}
Konsistensi format membuat API lebih mudah di-consume oleh frontend.
Kamu sekarang punya working REST API! Di bagian selanjutnya, kita akan tambahkan Swagger documentation supaya API bisa di-explore dengan UI yang interaktif.
Bagian 6: Swagger Documentation Otomatis
Salah satu fitur paling impressive dari ElysiaJS adalah kemampuannya generate dokumentasi API secara otomatis dari TypeScript code. Tidak perlu annotations manual atau maintain file OpenAPI terpisah — documentation selalu sync dengan code.
Install Swagger Plugin
Pertama, install official Swagger plugin:
bun add @elysiajs/swagger
Setup Swagger
Update src/index.ts untuk menambahkan Swagger:
// src/index.ts
import { Elysia } from 'elysia'
import { swagger } from '@elysiajs/swagger'
import { todoRoutes } from './routes/todos'

const app = new Elysia()
  // Swagger documentation
  .use(swagger({
    path: '/swagger',
    documentation: {
      info: {
        title: 'Todo API Documentation',
        version: '1.0.0',
        description: 'REST API untuk Todo App dengan ElysiaJS dan Bun',
        contact: {
          name: 'API Support',
          email: '[email protected]'
        }
      },
      tags: [
        { name: 'Todos', description: 'Todo CRUD operations' },
        { name: 'Health', description: 'API health check' }
      ]
    }
  }))

  // Health check endpoint
  .get('/', () => ({
    name: 'Todo API',
    version: '1.0.0',
    status: 'running',
    endpoints: {
      todos: '/api/v1/todos',
      docs: '/swagger'
    }
  }), {
    detail: {
      tags: ['Health'],
      summary: 'API Health Check',
      description: 'Check if the API is running and get basic information'
    }
  })

  // Mount todo routes
  .group('/api/v1', app => app
    .use(todoRoutes)
  )

  // Error handler
  .onError(({ code, error, set }) => {
    switch (code) {
      case 'VALIDATION':
        set.status = 400
        return { error: 'Validation Error', message: error.message }
      case 'NOT_FOUND':
        set.status = 404
        return { error: 'Not Found', message: 'Resource not found' }
      default:
        set.status = 500
        return { error: 'Internal Server Error', message: 'Something went wrong' }
    }
  })

  .listen(3000)

console.log(`🦊 Todo API running at <http://localhost>:${app.server?.port}`)
console.log(`📚 Swagger docs at <http://localhost>:${app.server?.port}/swagger`)
Access Swagger UI
Jalankan server dan buka browser:
<http://localhost:3000/swagger>
Kamu akan melihat Swagger UI yang interaktif dengan semua endpoints ter-dokumentasi lengkap dengan:
- Request parameters
- Request body schemas
- Response schemas
- Try it out functionality
Menambahkan Detail ke Routes
Untuk documentation yang lebih informatif, tambahkan detail di setiap route. Update src/routes/todos.ts:
// Di setiap route, tambahkan detail object
.get('/', ({ query }) => {
  // ... handler code
}, {
  query: t.Object({
    completed: t.Optional(t.BooleanString())
  }),
  detail: {
    tags: ['Todos'],
    summary: 'Get all todos',
    description: 'Retrieve a list of all todo items. Supports filtering by completed status.',
    responses: {
      200: {
        description: 'List of todos retrieved successfully'
      }
    }
  }
})

.post('/', ({ body, set }) => {
  // ... handler code
}, {
  body: CreateTodoSchema,
  detail: {
    tags: ['Todos'],
    summary: 'Create new todo',
    description: 'Create a new todo item. Title is required and must be 1-200 characters.',
    responses: {
      201: { description: 'Todo created successfully' },
      400: { description: 'Validation error - invalid input' }
    }
  }
})
Property detail mendukung semua OpenAPI specification fields:
tags— Grouping di Swagger UIsummary— Deskripsi singkatdescription— Penjelasan detailresponses— Dokumentasi possible responsesdeprecated— Tandai endpoint sebagai deprecatedsecurity— Security requirements
Response Schemas Otomatis
Karena kita sudah define response validation di Bagian 4, Swagger otomatis menampilkan response schema:
.get('/:id', ({ params, set }) => {
  // ... handler
}, {
  params: t.Object({
    id: t.Numeric()
  }),
  response: {
    200: t.Object({
      data: TodoSchema
    }),
    404: t.Object({
      error: t.String(),
      message: t.String()
    })
  },
  detail: {
    tags: ['Todos'],
    summary: 'Get todo by ID'
  }
})
Dengan multiple response schemas, Swagger akan menampilkan semua possible responses.
Customize Swagger UI
Swagger plugin mendukung berbagai customization:
.use(swagger({
  path: '/swagger',

  // Swagger UI configuration
  swaggerOptions: {
    persistAuthorization: true  // Remember auth token
  },

  // Documentation metadata
  documentation: {
    info: {
      title: 'Todo API',
      version: '1.0.0',
      description: `
## Overview
REST API untuk manajemen todo items.

## Authentication
API ini saat ini tidak memerlukan authentication.

## Rate Limiting
Tidak ada rate limiting untuk development.
      `,
      license: {
        name: 'MIT',
        url: '<https://opensource.org/licenses/MIT>'
      }
    },

    // Server information
    servers: [
      {
        url: '<http://localhost:3000>',
        description: 'Development server'
      },
      {
        url: '<https://api.example.com>',
        description: 'Production server'
      }
    ],

    // Tags for grouping
    tags: [
      {
        name: 'Todos',
        description: 'Todo item management',
        externalDocs: {
          description: 'Learn more',
          url: '<https://example.com/docs/todos>'
        }
      }
    ]
  }
}))
Export OpenAPI Specification
Selain Swagger UI, kamu juga bisa akses raw OpenAPI JSON spec:
<http://localhost:3000/swagger/json>
File JSON ini bisa digunakan untuk:
- Generate client SDK
- Import ke Postman
- Generate documentation di platform lain
- API testing tools
Swagger vs OpenAPI Plugin
ElysiaJS juga punya @elysiajs/openapi plugin yang lebih advanced:
bun add @elysiajs/openapi
import { openapi } from '@elysiajs/openapi'

const app = new Elysia()
  .use(openapi({
    documentation: {
      info: { title: 'Todo API', version: '1.0.0' }
    }
  }))
OpenAPI plugin bisa generate documentation dari TypeScript types menggunakan fromTypes():
import { openapi, fromTypes } from '@elysiajs/openapi'

.use(openapi({
  documentation: {
    info: { title: 'Todo API', version: '1.0.0' }
  },
  // Generate dari TypeScript types
  references: fromTypes()
}))
Untuk kebanyakan kasus, @elysiajs/swagger sudah cukup. Gunakan @elysiajs/openapi kalau butuh fitur advanced.
Keuntungan Auto Documentation
Dengan approach ini, kamu mendapat:
- Always in sync — Documentation generated dari code, tidak bisa outdated
- Zero maintenance — Tidak perlu update manual saat code berubah
- Type-safe — Schema dari TypeBox langsung jadi OpenAPI schema
- Interactive — Swagger UI untuk testing langsung dari browser
- Exportable — OpenAPI JSON untuk tools lain
Bandingkan dengan Express dimana kamu perlu:
- Install swagger-jsdoc
- Install swagger-ui-express
- Tulis JSDoc comments di setiap route
- Maintain OpenAPI spec terpisah
- Manually keep sync
Di ElysiaJS, semua itu tidak perlu. Define schema sekali, dapat validation, types, dan documentation sekaligus.
Di bagian terakhir, kita akan bahas tips, best practices, dan langkah selanjutnya untuk melanjutkan journey ElysiaJS kamu.
Bagian 7: Tips, Best Practices, dan Next Steps
Kamu sudah berhasil build REST API lengkap dengan ElysiaJS! Di bagian terakhir ini, kita akan bahas best practices untuk production, common plugins yang berguna, dan langkah selanjutnya untuk melanjutkan learning journey.
Project Structure Best Practice
Untuk project yang lebih besar, struktur yang scalable sangat penting:
src/
├── index.ts              # Entry point, minimal code
├── app.ts                # Elysia app configuration
├── routes/
│   ├── index.ts          # Export semua routes
│   ├── users.ts          # User routes
│   ├── posts.ts          # Post routes
│   └── todos.ts          # Todo routes
├── services/
│   ├── user.service.ts   # User business logic
│   ├── post.service.ts   # Post business logic
│   └── todo.service.ts   # Todo business logic
├── repositories/
│   ├── user.repo.ts      # User database operations
│   └── todo.repo.ts      # Todo database operations
├── schemas/
│   ├── user.schema.ts    # User validation schemas
│   └── todo.schema.ts    # Todo validation schemas
├── middleware/
│   ├── auth.ts           # Authentication middleware
│   └── logger.ts         # Request logging
├── plugins/
│   └── database.ts       # Database connection plugin
├── types/
│   └── index.ts          # Shared TypeScript types
├── utils/
│   └── helpers.ts        # Helper functions
└── config/
    └── index.ts          # Configuration management
Prinsip utama:
- Separation of concerns — Routes handle HTTP, services handle logic
- Single responsibility — Setiap file punya satu job
- Dependency injection — Gunakan plugin system untuk share dependencies
Error Handling yang Proper
Error handling yang baik penting untuk debugging dan user experience:
// src/middleware/error-handler.ts
import { Elysia } from 'elysia'

// Custom error classes
export class AppError extends Error {
  constructor(
    public statusCode: number,
    public message: string,
    public code?: string
  ) {
    super(message)
  }
}

export class NotFoundError extends AppError {
  constructor(resource: string, id: string | number) {
    super(404, `${resource} with id ${id} not found`, 'NOT_FOUND')
  }
}

export class ValidationError extends AppError {
  constructor(message: string) {
    super(400, message, 'VALIDATION_ERROR')
  }
}

// Error handler plugin
export const errorHandler = new Elysia()
  .onError(({ code, error, set }) => {
    // Log error untuk debugging
    console.error(`[${new Date().toISOString()}] Error:`, {
      code,
      message: error.message,
      stack: process.env.NODE_ENV === 'development' ? error.stack : undefined
    })

    // Handle custom errors
    if (error instanceof AppError) {
      set.status = error.statusCode
      return {
        error: error.code || 'ERROR',
        message: error.message
      }
    }

    // Handle Elysia built-in errors
    switch (code) {
      case 'VALIDATION':
        set.status = 400
        return {
          error: 'VALIDATION_ERROR',
          message: error.message
        }

      case 'NOT_FOUND':
        set.status = 404
        return {
          error: 'NOT_FOUND',
          message: 'The requested endpoint does not exist'
        }

      case 'PARSE':
        set.status = 400
        return {
          error: 'PARSE_ERROR',
          message: 'Invalid request body'
        }

      default:
        set.status = 500
        return {
          error: 'INTERNAL_ERROR',
          message: process.env.NODE_ENV === 'development'
            ? error.message
            : 'An unexpected error occurred'
        }
    }
  })
Environment Variables
Bun mendukung .env files secara native:
# .env
PORT=3000
NODE_ENV=development
DATABASE_URL=postgresql://user:pass@localhost:5432/mydb
JWT_SECRET=your-super-secret-key
// src/config/index.ts
export const config = {
  port: Number(process.env.PORT) || 3000,
  nodeEnv: process.env.NODE_ENV || 'development',
  isDev: process.env.NODE_ENV === 'development',
  isProd: process.env.NODE_ENV === 'production',
  database: {
    url: process.env.DATABASE_URL!
  },
  jwt: {
    secret: process.env.JWT_SECRET!
  }
}

// Validate required env vars
const required = ['DATABASE_URL', 'JWT_SECRET']
for (const key of required) {
  if (!process.env[key]) {
    throw new Error(`Missing required environment variable: ${key}`)
  }
}
CORS Setup
Untuk API yang di-consume oleh frontend di domain berbeda:
bun add @elysiajs/cors
import { cors } from '@elysiajs/cors'

const app = new Elysia()
  .use(cors())  // Allow all origins (development)

  // Atau dengan configuration
  .use(cors({
    origin: ['<http://localhost:5173>', '<https://myapp.com>'],
    methods: ['GET', 'POST', 'PUT', 'PATCH', 'DELETE'],
    allowedHeaders: ['Content-Type', 'Authorization'],
    credentials: true
  }))
Common Plugins
ElysiaJS punya ecosystem plugin yang growing. Berikut yang paling sering digunakan:
| Plugin | Use Case | Install |
|---|---|---|
| @elysiajs/swagger | API documentation | bun add @elysiajs/swagger |
| @elysiajs/cors | Cross-origin requests | bun add @elysiajs/cors |
| @elysiajs/jwt | JWT authentication | bun add @elysiajs/jwt |
| @elysiajs/cookie | Cookie handling | bun add @elysiajs/cookie |
| @elysiajs/bearer | Bearer token auth | bun add @elysiajs/bearer |
| @elysiajs/static | Serve static files | bun add @elysiajs/static |
| @elysiajs/html | Return HTML responses | bun add @elysiajs/html |
Contoh JWT Authentication:
import { Elysia } from 'elysia'
import { jwt } from '@elysiajs/jwt'

const app = new Elysia()
  .use(jwt({
    name: 'jwt',
    secret: process.env.JWT_SECRET!
  }))

  .post('/login', async ({ body, jwt }) => {
    // Validate credentials...

    const token = await jwt.sign({
      userId: 1,
      email: body.email
    })

    return { token }
  })

  .get('/protected', async ({ jwt, headers, set }) => {
    const auth = headers.authorization?.replace('Bearer ', '')

    if (!auth) {
      set.status = 401
      return { error: 'Unauthorized' }
    }

    const payload = await jwt.verify(auth)

    if (!payload) {
      set.status = 401
      return { error: 'Invalid token' }
    }

    return { user: payload }
  })
Performance Tips
- Gunakan method chaining — Penting untuk type inference dan internal optimization
- Avoid blocking operations — Gunakan async/await untuk database calls
- Leverage static analysis — ElysiaJS melakukan AOT optimization, jangan bypass dengan dynamic code
- Use appropriate response types — Return objects untuk JSON, strings untuk text
- Enable compression untuk production:
import { compression } from 'elysia-compress'

app.use(compression())
Testing dengan bun:test
Bun punya built-in test runner:
// src/routes/todos.test.ts
import { describe, test, expect, beforeAll, afterAll } from 'bun:test'
import { Elysia } from 'elysia'
import { todoRoutes } from './todos'

const app = new Elysia()
  .use(todoRoutes)

describe('Todo Routes', () => {
  test('GET /todos returns array', async () => {
    const response = await app
      .handle(new Request('<http://localhost/todos>'))
      .then(res => res.json())

    expect(response.data).toBeArray()
  })

  test('POST /todos creates todo', async () => {
    const response = await app
      .handle(new Request('<http://localhost/todos>', {
        method: 'POST',
        headers: { 'Content-Type': 'application/json' },
        body: JSON.stringify({ title: 'Test todo' })
      }))
      .then(res => res.json())

    expect(response.data.title).toBe('Test todo')
    expect(response.data.completed).toBe(false)
  })

  test('POST /todos with empty title fails', async () => {
    const response = await app
      .handle(new Request('<http://localhost/todos>', {
        method: 'POST',
        headers: { 'Content-Type': 'application/json' },
        body: JSON.stringify({ title: '' })
      }))

    expect(response.status).toBe(400)
  })
})
Run tests:
bun test
Next Steps untuk Belajar
Setelah menguasai basics di artikel ini, berikut langkah selanjutnya:
1. Database Integration
Pelajari cara integrate dengan database menggunakan Drizzle ORM:
- Type-safe queries
- Migrations
- Drizzle-TypeBox integration untuk auto schema
2. Authentication
Implement authentication lengkap:
- JWT dengan refresh tokens
- OAuth (Google, GitHub)
- Session-based auth
- Better Auth library
3. Eden Treaty
Pelajari Eden untuk end-to-end type safety dengan frontend:
- Type sharing tanpa code generation
- Auto-completion di client
- Error handling yang typed
4. Testing
Tulis comprehensive tests:
- Unit tests untuk services
- Integration tests untuk routes
- E2E tests
5. Deployment
Deploy ke production:
- Docker containerization
- Railway, Fly.io, atau DigitalOcean
- Cloudflare Workers
- Environment configuration
Resources untuk Lanjut Belajar
Official Resources:
- ElysiaJS Documentation: elysiajs.com
- ElysiaJS GitHub: github.com/elysiajs/elysia
- Bun Documentation: bun.sh/docs
Community:
- ElysiaJS Discord
- Bun Discord
- Twitter: @saltyAom (creator)
BuildWithAngga:
Untuk belajar lebih structured dengan project-based approach, kamu bisa explore kelas gratis di BuildWithAngga. Ada berbagai track untuk web development — dari fundamentals sampai advanced topics.
Untuk mempercepat development, kamu bisa download source code gratis dari real projects di shaynakit.com. Ada templates dan starters yang bisa langsung kamu customize, termasuk untuk backend projects.
Closing
Kamu sudah belajar banyak di artikel ini:
- Apa itu ElysiaJS dan kenapa worth dipelajari
- Setup environment dengan Bun
- Routing dan HTTP methods
- Validation dengan TypeBox
- Build complete CRUD API
- Auto-generate Swagger documentation
- Best practices untuk production
ElysiaJS menawarkan developer experience yang exceptional dengan performance yang luar biasa. Framework ini masih relatively baru, tapi sudah production-ready dan community-nya growing fast.
Yang penting sekarang adalah practice. Ambil project Todo API yang sudah kamu buat, dan expand:
- Tambahkan authentication
- Integrate dengan database
- Deploy ke production
- Build frontend dengan Eden Treaty
Setiap tambahan fitur akan menguatkan pemahaman kamu tentang ElysiaJS.
Happy coding! 🦊