Panduan lengkap cara connect TablePlus ke MySQL Docker container di DigitalOcean Droplet production menggunakan SSH tunnel. Berdasarkan pengalaman nyata saat develop projek streaming film.
Saya Angga Risky Setiawan, Founder dan CEO BuildWithAngga. Artikel ini saya tulis berdasarkan masalah yang baru saja saya hadapi di projek nyata — dan saya yakin banyak developer yang akan mengalami hal serupa.
Bagian 1: Masalah yang Saya Hadapi
Konteks Projek
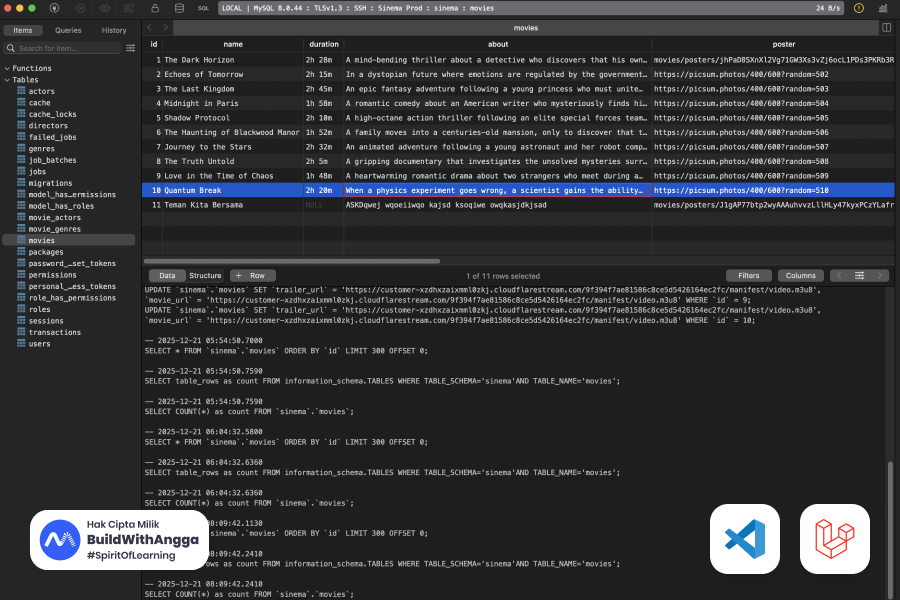
Saya sedang develop projek streaming film — platform nonton film seperti Netflix versi sederhana. Tech stack yang digunakan:
- Backend: Laravel 11
- Database: MySQL 8.0
- Container: Docker + Docker Compose
- Server: DigitalOcean Droplet (Ubuntu 24.04)
- Local: MacBook dengan TablePlus
Semua services running di Docker container pada production server. Aplikasi Laravel connect ke MySQL melalui Docker internal network — dan ini bekerja dengan baik.
Masalah Muncul
Saya ingin manage database langsung dari MacBook menggunakan TablePlus. Ini penting untuk:
- Debug data user yang bermasalah
- Check subscription status secara visual
- Verify movie metadata
- Export data untuk analytics
- Quick fixes tanpa harus SSH dan ketik query manual
Setup yang saya coba di TablePlus:
| Field | Value |
|---|---|
| Host | 127.0.0.1 |
| Port | 3306 |
| User | laravel |
| Password | ******** |
| SSH Host | (IP Droplet) |
| SSH User | root |
| SSH Key | ~/.ssh/id_rsa |
Hasilnya: Connection refused. Timeout. Tidak bisa connect.
Yang membingungkan:
- SSH ke droplet works ✅
- MySQL container running ✅
- Laravel app bisa connect ke MySQL ✅
- TablePlus gagal ❌
Diagnosis
Pertama, saya pastikan container running:
ssh root@YOUR_DROPLET_IP "docker ps | grep database"
Output:
ee19fa79bbcb mysql:8.0 "docker-entrypoint.s…" 4 days ago Up 4 days 3306/tcp, 33060/tcp streaming-database
Container running. Tapi perhatikan bagian port: 3306/tcp, 33060/tcp.
Ini masalahnya.
Bandingkan dengan output jika port di-expose:
ee19fa79bbcb mysql:8.0 ... 0.0.0.0:3306->3306/tcp streaming-database
Perbedaannya:
3306/tcp= Port internal only, TIDAK exposed ke host0.0.0.0:3306->3306/tcp= Port exposed, bisa diakses dari host
Root Cause
Untuk memahami masalahnya, lihat diagram ini:
┌──────────────────────────────────────────────────────────────┐
│                         YOUR MACBOOK                          │
│                                                               │
│   TablePlus ─────────────────────┐                           │
│                                  │                           │
└──────────────────────────────────│───────────────────────────┘
                                   │
                                   │ SSH Tunnel (port 22)
                                   │
┌──────────────────────────────────▼───────────────────────────┐
│                    DROPLET HOST (Ubuntu)                      │
│                                                               │
│   ┌─────────────────────────────────────────────────────┐    │
│   │              127.0.0.1:3306 ❌ NOTHING HERE          │    │
│   │         (MySQL tidak listen di host network)        │    │
│   └─────────────────────────────────────────────────────┘    │
│                                                               │
│   ┌─────────────────────────────────────────────────────┐    │
│   │              DOCKER NETWORK (172.18.0.0/16)          │    │
│   │                                                      │    │
│   │   ┌──────────────────────────────────────────────┐  │    │
│   │   │         MySQL Container (172.18.0.2)          │  │    │
│   │   │              Port 3306 ✅ ACTIVE              │  │    │
│   │   └──────────────────────────────────────────────┘  │    │
│   │                                                      │    │
│   │   ┌──────────────────────────────────────────────┐  │    │
│   │   │       Laravel Container (172.18.0.3)          │  │    │
│   │   │         Bisa connect ke 172.18.0.2 ✅         │  │    │
│   │   └──────────────────────────────────────────────┘  │    │
│   │                                                      │    │
│   └─────────────────────────────────────────────────────┘    │
│                                                               │
└───────────────────────────────────────────────────────────────┘
Penjelasan:
- SSH tunnel membawa koneksi TablePlus ke host network (Droplet Ubuntu)
- Di host network, tidak ada yang listen di port 3306
- MySQL hanya listen di Docker internal network (172.18.0.x)
- Laravel bisa connect karena dia juga ada di Docker network yang sama
- TablePlus tidak bisa reach Docker network dari host
Solusi
Ada dua cara menyelesaikan ini:
- Gunakan Docker Container IP — Recommended, tidak perlu ubah server
- Expose Port ke Localhost — Alternative, perlu update docker-compose
💡 Mini Tips: Jika docker ps menunjukkan port tanpa -> (contoh: 3306/tcp), port tidak exposed ke host. Kamu harus pakai Docker IP atau expose port di docker-compose.
Bagian 2: Solusi 1 — Gunakan Docker Container IP (Recommended)
Ini solusi yang saya pakai. Tidak perlu mengubah apapun di production server.
Step 1: Dapatkan Docker Container IP
# SSH ke droplet
ssh root@YOUR_DROPLET_IP

# Inspect container untuk dapat IP
docker inspect streaming-database --format '{{range .NetworkSettings.Networks}}{{.IPAddress}}{{end}}'
Output:
172.18.0.2
Atau cara lebih detail:
docker inspect streaming-database | grep -A 20 "Networks"
Output:
"Networks": {
    "streaming-network": {
        "IPAMConfig": null,
        "Links": null,
        "Aliases": [
            "streaming-database",
            "database"
        ],
        "NetworkID": "abc123...",
        "EndpointID": "def456...",
        "Gateway": "172.18.0.1",
        "IPAddress": "172.18.0.2",  // <-- INI YANG KITA BUTUHKAN
        "IPPrefixLen": 16,
        ...
    }
}
Step 2: Konfigurasi TablePlus
Buka TablePlus → Create New Connection → MySQL
Tab "Connection":
| Field | Value | Penjelasan |
|---|---|---|
| Name | Streaming Production | Nama bebas |
| Host | 172.18.0.2 | Docker container IP |
| Port | 3306 | MySQL default port |
| User | laravel | Database user |
| Password | ******** | Database password |
| Database | streaming | Nama database |
Tab "Over SSH" (scroll ke bawah, enable toggle):
| Field | Value | Penjelasan |
|---|---|---|
| SSH Host | YOUR_DROPLET_IP | IP publik droplet |
| SSH Port | 22 | Default SSH port |
| SSH User | root | Atau user lain yang punya akses |
| Use SSH Key | ✅ | Centang ini |
| Private Key | ~/.ssh/id_rsa | Path ke SSH private key |
Step 3: Test Connection
- Klik tombol "Test" di pojok kanan bawah
- Tunggu beberapa detik
- Harus muncul "Connection is OK" dengan centang hijau
- Klik "Connect"
Step 4: Verify
Setelah connected, kamu harusnya bisa:
- Lihat semua tables di sidebar kiri
- Browse data dengan double-click table
- Run SQL queries di tab baru
- Export/import data
Kenapa Ini Works?
┌─────────────────────────────────────────────────────────────┐
│                                                              │
│   TablePlus                                                  │
│       │                                                      │
│       │ SSH Tunnel ke Droplet                                │
│       ▼                                                      │
│   Droplet Host                                               │
│       │                                                      │
│       │ Connect ke 172.18.0.2:3306                          │
│       │ (Host BISA reach Docker network)                    │
│       ▼                                                      │
│   MySQL Container ✅ CONNECTED!                              │
│                                                              │
└─────────────────────────────────────────────────────────────┘
SSH tunnel membawa kita ke Droplet host. Dari host, kita bisa reach IP manapun di Docker network karena host adalah "gateway" untuk Docker network tersebut.
Kelebihan Solusi Ini
| Kelebihan | Penjelasan |
|---|---|
| Tidak perlu ubah server | Production config tetap sama |
| Zero downtime | Tidak perlu restart container |
| Lebih secure | MySQL port tidak exposed ke host |
| Works immediately | Langsung bisa dipakai |
Kekurangan
| Kekurangan | Penjelasan |
|---|---|
| IP bisa berubah | Jika container di-recreate, IP bisa berbeda |
| Perlu tahu Docker IP | Harus inspect container dulu |
| Tidak intuitive | 172.x.x.x looks weird di config |
Handling IP Changes
Docker IP biasanya stabil selama container tidak di-delete dan di-create ulang. Tapi untuk jaga-jaga:
# Simpan command ini sebagai alias di ~/.bashrc atau ~/.zshrc
alias get-db-ip='ssh root@YOUR_DROPLET_IP "docker inspect streaming-database --format \\"{{range .NetworkSettings.Networks}}{{.IPAddress}}{{end}}\\""'

# Usage
get-db-ip
# Output: 172.18.0.2
💡 Mini Tips: Docker IP stabil selama container tidak di-recreate. Untuk projek saya, IP tidak berubah selama berminggu-minggu. Tapi tetap simpan command docker inspect untuk jaga-jaga.
Bagian 3: Solusi 2 — Expose Port ke Localhost
Jika kamu prefer menggunakan 127.0.0.1 yang lebih familiar dan stabil, kamu bisa expose MySQL port ke host. Tapi ada trade-offs yang perlu dipahami.
Update docker-compose.yml
# docker-compose.yml
version: '3.8'

services:
  # Laravel App
  app:
    build:
      context: .
      dockerfile: Dockerfile
    container_name: streaming-app
    restart: unless-stopped
    volumes:
      - ./:/var/www/html
    networks:
      - streaming-network
    depends_on:
      database:
        condition: service_healthy

  # MySQL Database
  database:
    image: mysql:8.0
    container_name: streaming-database
    restart: unless-stopped
    environment:
      MYSQL_ROOT_PASSWORD: ${DB_ROOT_PASSWORD}
      MYSQL_DATABASE: ${DB_DATABASE}
      MYSQL_USER: ${DB_USERNAME}
      MYSQL_PASSWORD: ${DB_PASSWORD}
    volumes:
      - mysql_data:/var/lib/mysql
      - ./docker/mysql/my.cnf:/etc/mysql/conf.d/my.cnf
    ports:
      - "127.0.0.1:3306:3306"  # ← TAMBAHKAN INI
    networks:
      - streaming-network
    healthcheck:
      test: ["CMD", "mysqladmin", "ping", "-h", "localhost", "-u", "root", "-p${DB_ROOT_PASSWORD}"]
      interval: 10s
      timeout: 5s
      retries: 5
      start_period: 30s

  # Nginx
  webserver:
    image: nginx:alpine
    container_name: streaming-webserver
    restart: unless-stopped
    ports:
      - "80:80"
      - "443:443"
    volumes:
      - ./:/var/www/html
      - ./docker/nginx/conf.d:/etc/nginx/conf.d
    networks:
      - streaming-network
    depends_on:
      - app

volumes:
  mysql_data:
    driver: local

networks:
  streaming-network:
    driver: bridge
Perhatikan baris ini:
ports:
  - "127.0.0.1:3306:3306"
Apply Changes
# SSH ke droplet
ssh root@YOUR_DROPLET_IP

# Navigate ke project directory
cd /var/www/streaming

# Restart dengan config baru
docker compose up -d

# Verify port exposed
docker ps | grep database
Output seharusnya menunjukkan:
... 127.0.0.1:3306->3306/tcp ...
Ada -> yang artinya port sudah di-map dari host ke container.
TablePlus Configuration
Sekarang kamu bisa pakai 127.0.0.1:
| Field | Value |
|---|---|
| Host | 127.0.0.1 |
| Port | 3306 |
| User | laravel |
| Password | ******** |
| Database | streaming |
| SSH Host | YOUR_DROPLET_IP |
| SSH User | root |
| SSH Key | ~/.ssh/id_rsa |
⚠️ CRITICAL: Memahami Port Binding Options
Ini bagian paling penting. Ada 3 cara bind port di Docker:
Option 1: Bind ke Localhost Only (RECOMMENDED untuk Production)
ports:
  - "127.0.0.1:3306:3306"
Artinya:
- MySQL hanya bisa diakses dari
127.0.0.1(localhost) di host - Tidak bisa diakses langsung dari internet
- Harus pakai SSH tunnel untuk akses dari luar
- ✅ AMAN untuk production
Option 2: Bind ke Semua Interface (BERBAHAYA!)
ports:
  - "3306:3306"
# Atau explicit:
  - "0.0.0.0:3306:3306"
Artinya:
- MySQL bisa diakses dari IP manapun
- Termasuk dari INTERNET!
- Siapapun yang tahu IP droplet kamu bisa coba connect
- ❌ JANGAN GUNAKAN untuk production
Option 3: Tidak ada ports (Current/Default)
# Tidak ada section ports:
Artinya:
- MySQL hanya bisa diakses dari Docker network
- Paling secure, tapi susah untuk debugging
- ✅ Paling aman, tapi kurang praktis
Visualisasi Perbedaan
┌────────────────────────────────────────────────────────────────┐
│                                                                 │
│   127.0.0.1:3306:3306 (RECOMMENDED)                            │
│   ─────────────────────────────────                            │
│                                                                 │
│   Internet ──X──> Droplet:3306 (BLOCKED)                       │
│                                                                 │
│   SSH Tunnel ────> localhost:3306 ────> MySQL ✅               │
│                                                                 │
├────────────────────────────────────────────────────────────────┤
│                                                                 │
│   0.0.0.0:3306:3306 (DANGEROUS!)                               │
│   ──────────────────────────────                               │
│                                                                 │
│   Internet ────> Droplet:3306 ────> MySQL ⚠️ EXPOSED!          │
│                                                                 │
│   Hacker bisa bruteforce password                              │
│   Bot scanning bisa menemukan MySQL                            │
│   Data breach risk tinggi                                      │
│                                                                 │
└────────────────────────────────────────────────────────────────┘
💡 Mini Tips: SELALU gunakan 127.0.0.1: prefix saat expose database port di production. Tanpa prefix ini, Docker akan bind ke 0.0.0.0 yang artinya accessible dari internet.
Bagian 4: Best Practices & Security
Arsitektur yang Benar
Untuk production environment, ini adalah setup yang saya rekomendasikan:
# docker-compose.yml - Production Best Practice

version: '3.8'

services:
  app:
    image: your-app:latest
    container_name: streaming-app
    restart: unless-stopped
    environment:
      DB_HOST: database          # Gunakan service name, bukan IP
      DB_PORT: 3306
      DB_DATABASE: streaming
      DB_USERNAME: laravel
      DB_PASSWORD: ${DB_PASSWORD}
    networks:
      - streaming-network
    depends_on:
      database:
        condition: service_healthy

  database:
    image: mysql:8.0
    container_name: streaming-database
    restart: unless-stopped
    environment:
      MYSQL_ROOT_PASSWORD: ${DB_ROOT_PASSWORD}
      MYSQL_DATABASE: streaming
      MYSQL_USER: laravel
      MYSQL_PASSWORD: ${DB_PASSWORD}
    volumes:
      - mysql_data:/var/lib/mysql
    # PILIH SALAH SATU:
    # Option A: Tidak expose (paling secure)
    # ports: (tidak ada)

    # Option B: Expose ke localhost only (untuk debugging)
    ports:
      - "127.0.0.1:3306:3306"
    networks:
      - streaming-network
    healthcheck:
      test: ["CMD", "mysqladmin", "ping", "-h", "localhost"]
      interval: 10s
      timeout: 5s
      retries: 5

networks:
  streaming-network:
    driver: bridge

volumes:
  mysql_data:
Security Checklist
| Practice | Status | Penjelasan |
|---|---|---|
| SSH Key Authentication | ✅ | Jangan pakai password untuk SSH |
| MySQL User bukan Root | ✅ | Buat dedicated user dengan limited privileges |
| Strong Passwords | ✅ | Gunakan password generator, minimal 20 karakter |
| Port tidak exposed ke 0.0.0.0 | ✅ | Selalu 127.0.0.1: atau tidak expose sama sekali |
| Firewall aktif | ✅ | UFW atau iptables, block semua kecuali yang perlu |
| Regular backups | ✅ | Automated backup ke external storage |
| SSL/TLS untuk MySQL | ⚡ | Optional tapi recommended untuk sensitive data |
MySQL User Best Practice
Jangan pakai root untuk aplikasi. Buat user khusus dengan limited privileges:
-- Connect ke MySQL sebagai root
-- docker exec -it streaming-database mysql -u root -p

-- Buat user untuk aplikasi (limited privileges)
CREATE USER 'laravel'@'%' IDENTIFIED BY 'StrongPassword123!@#';
GRANT SELECT, INSERT, UPDATE, DELETE, CREATE, DROP, INDEX, ALTER
ON streaming.* TO 'laravel'@'%';
FLUSH PRIVILEGES;

-- Buat user untuk backup (read-only)
CREATE USER 'backup'@'localhost' IDENTIFIED BY 'BackupPassword456!@#';
GRANT SELECT, LOCK TABLES, SHOW VIEW ON streaming.* TO 'backup'@'localhost';
FLUSH PRIVILEGES;

-- Buat user untuk debugging via TablePlus (limited)
CREATE USER 'debug'@'%' IDENTIFIED BY 'DebugPassword789!@#';
GRANT SELECT ON streaming.* TO 'debug'@'%';
FLUSH PRIVILEGES;
Bahaya Expose Port ke 0.0.0.0
Jika kamu expose MySQL ke 0.0.0.0:3306:3306, ini yang bisa terjadi:
1. Bot Scanning
Ada ribuan bot yang scan internet 24/7 mencari MySQL servers.
Port 3306 adalah target favorit.
Dalam hitungan menit setelah expose, server kamu akan di-scan.
2. Brute Force Attack
Bot akan mencoba kombinasi username/password umum:
- root / root
- root / password
- root / 123456
- mysql / mysql
- admin / admin
... dan ribuan kombinasi lainnya
3. Jika Berhasil Masuk
- Data dicuri (users, emails, passwords)
- Database di-encrypt (ransomware)
- Server dijadikan bot untuk attack server lain
- Crypto mining malware di-install
4. Real Case: Ransomware
Ini pesan yang saya pernah lihat di server yang compromised:
Your database has been backed up to our servers.
To recover your data, send 0.5 BTC to: bc1q...
After payment, email: recovery@...
You have 72 hours before we delete your data permanently.

- All your tables have been dropped
- We have copies of: users, payments, subscriptions
Jangan sampai ini terjadi pada projek kamu.
Firewall Configuration
Pastikan firewall aktif dan hanya allow yang diperlukan:
# SSH ke droplet
ssh root@YOUR_DROPLET_IP

# Check status
ufw status

# Jika belum aktif, setup firewall
ufw default deny incoming
ufw default allow outgoing

# Allow SSH (PENTING! Jangan sampai lock yourself out)
ufw allow 22/tcp

# Allow HTTP/HTTPS
ufw allow 80/tcp
ufw allow 443/tcp

# JANGAN allow 3306 dari luar!
# ufw allow 3306/tcp  ← JANGAN LAKUKAN INI

# Enable firewall
ufw enable

# Verify
ufw status
Output yang benar:
Status: active

To                         Action      From
--                         ------      ----
22/tcp                     ALLOW       Anywhere
80/tcp                     ALLOW       Anywhere
443/tcp                    ALLOW       Anywhere
22/tcp (v6)                ALLOW       Anywhere (v6)
80/tcp (v6)                ALLOW       Anywhere (v6)
443/tcp (v6)               ALLOW       Anywhere (v6)
Perhatikan: 3306 TIDAK ada di list. Ini benar.
💡 Mini Tips: Sebelum enable UFW, PASTIKAN kamu sudah ufw allow 22/tcp. Kalau tidak, kamu akan lock yourself out dari server dan harus akses via DigitalOcean console.
Bagian 5: Troubleshooting & Quick Reference
Common Errors dan Solusinya
Error 1: "Connection refused"
Kemungkinan penyebab:
- Docker IP salah
- Container tidak running
- Port typo
Solusi:
# Verify container running
docker ps | grep database

# Get correct IP
docker inspect streaming-database --format '{{range .NetworkSettings.Networks}}{{.IPAddress}}{{end}}'

# Test dari dalam server
docker exec -it streaming-database mysql -u laravel -p
Error 2: "Access denied for user 'laravel'@'172.x.x.x'"
Penyebab: MySQL user tidak allow dari IP tersebut
Solusi:
# Masuk sebagai root
docker exec -it streaming-database mysql -u root -p

# Grant akses dari any host
GRANT ALL PRIVILEGES ON streaming.* TO 'laravel'@'%' IDENTIFIED BY 'password';
FLUSH PRIVILEGES;
Error 3: "SSH connection failed"
Kemungkinan penyebab:
- SSH key permission salah
- Wrong key
- SSH port berbeda
Solusi:
# Fix permission
chmod 600 ~/.ssh/id_rsa
chmod 644 ~/.ssh/id_rsa.pub

# Test SSH manually
ssh -i ~/.ssh/id_rsa root@YOUR_DROPLET_IP

# Jika pakai custom port
ssh -p 2222 root@YOUR_DROPLET_IP
Error 4: "Host 'x.x.x.x' is not allowed to connect"
Penyebab: MySQL bind-address restriction
Solusi:
Check MySQL config:
docker exec -it streaming-database cat /etc/mysql/my.cnf | grep bind-address
Jika ada bind-address = 127.0.0.1, MySQL hanya accept local connections. Untuk Docker, ini biasanya bukan masalah karena container network berbeda.
Quick Reference Card
┌─────────────────────────────────────────────────────────────────┐
│           TablePlus + Docker MySQL + SSH Tunnel                  │
├─────────────────────────────────────────────────────────────────┤
│                                                                  │
│  STEP 1: DIAGNOSIS                                               │
│  ────────────────────────────────────────────────────────────   │
│  $ ssh root@DROPLET_IP                                          │
│  $ docker ps | grep mysql                                        │
│                                                                  │
│  Output: "3306/tcp" = NOT exposed (pakai Docker IP)             │
│  Output: "127.0.0.1:3306->3306/tcp" = Exposed (pakai 127.0.0.1) │
│                                                                  │
├─────────────────────────────────────────────────────────────────┤
│                                                                  │
│  STEP 2: GET DOCKER IP (jika tidak exposed)                     │
│  ────────────────────────────────────────────────────────────   │
│  $ docker inspect CONTAINER \\                                    │
│      --format '{{range .NetworkSettings.Networks}}              │
│                {{.IPAddress}}{{end}}'                           │
│                                                                  │
├─────────────────────────────────────────────────────────────────┤
│                                                                  │
│  STEP 3: TABLEPLUS CONFIG                                        │
│  ────────────────────────────────────────────────────────────   │
│                                                                  │
│  OPTION A: Docker IP (no server changes)                        │
│  ┌──────────────────────────────────────┐                       │
│  │ Host: 172.18.0.x (dari inspect)      │                       │
│  │ Port: 3306                            │                       │
│  │ User: laravel                         │                       │
│  │ Pass: ********                        │                       │
│  │ ──────────────────────────────────── │                       │
│  │ SSH Host: DROPLET_IP                  │                       │
│  │ SSH User: root                        │                       │
│  │ SSH Key: ~/.ssh/id_rsa               │                       │
│  └──────────────────────────────────────┘                       │
│                                                                  │
│  OPTION B: Localhost (if port exposed)                          │
│  ┌──────────────────────────────────────┐                       │
│  │ Host: 127.0.0.1                       │                       │
│  │ Port: 3306                            │                       │
│  │ (SSH settings sama)                   │                       │
│  └──────────────────────────────────────┘                       │
│                                                                  │
├─────────────────────────────────────────────────────────────────┤
│                                                                  │
│  ⚠️  SECURITY REMINDERS                                          │
│  ────────────────────────────────────────────────────────────   │
│                                                                  │
│  ✅ SAFE:    ports: "127.0.0.1:3306:3306"                       │
│  ❌ DANGER:  ports: "3306:3306"                                  │
│  ❌ DANGER:  ports: "0.0.0.0:3306:3306"                          │
│                                                                  │
│  Never expose database to 0.0.0.0 in production!                │
│                                                                  │
└─────────────────────────────────────────────────────────────────┘
Comparison Table
| Aspect | Docker IP | Expose to Localhost |
|---|---|---|
| Server changes | ❌ Tidak perlu | ✅ Perlu update compose |
| Downtime | ❌ None | ⚡ Brief restart |
| Host stability | ⚡ Bisa berubah | ✅ Stabil (127.0.0.1) |
| Security level | ✅ Lebih secure | ✅ Cukup secure |
| Setup complexity | ✅ Simple | ✅ Simple |
| Team sharing | ⚡ Perlu share IP | ✅ Standard config |
Rekomendasi:
- One-time debugging: Pakai Docker IP
- Regular access: Expose ke localhost
- Team access: Expose ke localhost + dokumentasi
Checklist Sebelum Connect
PRE-FLIGHT CHECKLIST
────────────────────

□ SSH ke droplet works
  $ ssh root@DROPLET_IP "echo ok"

□ Docker container running
  $ docker ps | grep database

□ Tahu host yang benar
  □ Docker IP: 172.x.x.x, atau
  □ Localhost: 127.0.0.1 (jika exposed)

□ Credentials benar
  $ docker exec -it CONTAINER mysql -u USER -p

□ SSH key permission correct
  $ ls -la ~/.ssh/id_rsa
  # Should be: -rw------- (600)

□ TablePlus SSH toggle enabled
  # "Over SSH" section, toggle ON
Penutup
Problem ini sangat common — hampir setiap developer yang deploy Docker ke VPS akan mengalaminya. Sekarang kamu sudah paham:
- Kenapa gagal: Docker container punya network sendiri, SSH tunnel hanya sampai ke host
- Solusi 1: Gunakan Docker container IP (172.x.x.x)
- Solusi 2: Expose port ke localhost (
127.0.0.1:3306:3306) - Security: JANGAN pernah expose ke
0.0.0.0
Untuk projek streaming film saya, sekarang workflow-nya jadi jauh lebih smooth:
- Debug user subscription issues → langsung query di TablePlus
- Check movie metadata → browse table dengan GUI
- Export reports → satu klik export ke CSV
- Emergency fixes → update data langsung tanpa SSH
Semua dari MacBook dengan TablePlus, secure via SSH tunnel.
Resources:
Untuk belajar Docker, deployment, dan security lebih dalam, explore kelas gratis di BuildWithAngga. Ada track lengkap dari Docker basics sampai production deployment dengan best practices.
💡 Mini Tips: Bookmark artikel ini dan share ke tim. Problem yang sama akan muncul di projek lain, di server lain, dengan database lain (PostgreSQL, MongoDB, Redis). Konsepnya tetap sama: Docker network isolation + SSH tunnel + correct host configuration.


.png)

