Bagian 1: Apa Itu Clay dan Kenapa Ini Game Changer untuk GTM Engineer
apa-itu-clay-dan-cara-pakai-untuk-gtm-engineer-dari-nol
Bayangkan kalian punya asisten research yang bisa:
- Cari 1000 leads dalam waktu yang sama kalian cari 1 lead
- Enrichment data dari 50+ sumber sekaligus
- Tulis personalized opening line untuk setiap prospect
- Dan semua itu jalan otomatis tanpa kalian harus klik satu-satu
That's Clay.
Saya nggak lebay. Sejak pakai Clay, cara saya approach prospecting dan lead enrichment berubah total. Yang dulu butuh waktu berhari-hari sekarang bisa selesai dalam hitungan jam.
Di bagian pertama ini, saya mau kasih kalian pemahaman solid tentang apa sebenarnya Clay itu, dimana posisinya di GTM tech stack, dan kenapa ini worth banget untuk dipelajari.
Apa Itu Clay Sebenarnya?
Cara paling simple untuk jelasin Clay: spreadsheet dengan superpowers.
Secara tampilan, Clay mirip spreadsheet biasa. Ada rows, ada columns, bisa input data. Tapi bedanya, columns di Clay bisa "hidup" — mereka bisa otomatis pull data dari puluhan external sources.
Lebih spesifik lagi, Clay adalah platform untuk:
Data Enrichment Kalian punya email doang? Clay bisa kasih kalian nama lengkap, job title, company, LinkedIn URL, phone number, dan banyak lagi. Punya company domain doang? Clay bisa kasih industry, employee count, funding history, tech stack yang mereka pakai.
Prospecting dan Research Mau cari decision makers di target companies? Clay bisa find contacts berdasarkan job title, seniority, department. Mau research account sebelum meeting? Clay bisa compile semua info yang kalian butuhkan.
Automation dan AI Processing Clay bukan cuma pull data — bisa process data juga. Pakai AI untuk kategorisasi leads, generate personalized content, atau extract insights dari raw data.
Kalau mau satu kalimat: Clay mengubah manual research yang makan waktu berjam-jam jadi automated process yang jalan dalam menit.
Dimana Clay Sits di GTM Tech Stack?
Ini penting untuk dipahami karena banyak orang bingung Clay itu kategori tool apa.
Clay BUKAN CRM. CRM (HubSpot, Salesforce, Pipedrive) adalah tempat kalian manage relationships dan track deals. Clay bukan untuk itu.
Clay BUKAN outreach tool. Tools kayak Lemlist, Instantly, Apollo (outreach side) untuk kirim emails dan sequences. Clay bukan untuk itu juga.
Clay adalah "data layer".
Posisinya di antara data source dan action tools:
[Data Source] → [CLAY: Enrich & Process] → [CRM/Outreach Tool] → [Action]

Contoh flow:
LinkedIn Sales Nav → Clay enrichment → HubSpot CRM → Lemlist outreach
Clay adalah tempat dimana data mentah diubah jadi data yang actionable. Setelah di-process di Clay, baru data itu dipush ke tools lain untuk di-action.
Ini kenapa GTM Engineer perlu banget kuasai Clay — karena ini adalah tool yang bikin semua tools lain bekerja lebih efektif.
5 Use Cases Utama Clay
Biar lebih konkret, ini use cases yang paling umum:
1. Lead Enrichment
Paling basic dan paling sering dipakai. Kalian punya list email atau company domains, Clay mengubahnya jadi full profiles.
Contoh: Marketing dapat 500 leads dari webinar. Cuma ada nama dan email. Dengan Clay, dalam 30 menit semua leads udah punya job title, company name, company size, industry, LinkedIn URL — siap untuk di-segment dan di-prioritize.
2. Prospecting — Find Contacts at Target Companies
Kalian punya list target companies tapi nggak tau siapa yang harus di-contact. Clay bisa find decision makers berdasarkan criteria yang kalian set.
Contoh: Sales mau approach 100 target accounts. Butuh VP of Engineering di setiap company. Clay finds contacts, enriches data mereka, dan output list siap untuk outreach.
3. Account Research dan Intelligence
Sebelum big meeting atau untuk ABM campaigns, kalian butuh deep research tentang accounts. Clay bisa compile semua intel di satu tempat.
Contoh: Mau pitch ke enterprise prospect. Clay compiles: company overview, recent news, tech stack, key stakeholders, potential pain points — semua dalam satu table.
4. Data Cleaning dan Standardization
CRM kalian berantakan? Data inconsistent? Clay bisa bantu clean up.
Contoh: Company names di CRM ada yang "Google", "Google Inc", "Google LLC", "google". Clay standardize semuanya, identify duplicates, dan fix inconsistencies.
5. Personalization at Scale
Ini yang powerful banget dengan AI columns. Generate custom content untuk setiap prospect berdasarkan data mereka.
Contoh: Mau kirim cold email ke 500 prospects dengan opening line yang personalized untuk setiap orang. Clay AI generates unique first lines based on their LinkedIn headline, company info, dan recent activities.
Kenapa Clay Populer Sekarang?
Clay bukan tools baru, tapi adoption-nya meledak dalam 1-2 tahun terakhir. Kenapa?
AI Integration yang Powerful
Clay integrate AI (GPT) langsung di platform. Ini game changer karena sekarang bukan cuma enrichment — kalian bisa generate, categorize, dan process data dengan AI. Sebelumnya ini butuh custom development.
Waterfall Enrichment
Ini salah satu killer feature. Instead of relying on satu data provider, Clay bisa query multiple providers sequentially. Provider A nggak punya data? Otomatis try Provider B. This maximizes coverage significantly.
No-Code Friendly tapi Powerful untuk Technical Users
Interface-nya accessible untuk non-technical people, tapi juga punya depth untuk power users. Bisa pakai formulas, API calls, custom integrations.
Pricing yang Lebih Accessible
Dulu tools enrichment enterprise itu mahal banget. Clay pricing model (credit-based) lebih accessible, dan free tier-nya cukup untuk learning dan small-scale operations.
Clay vs Alternatives
Biar kalian punya context, ini perbandingan dengan tools lain:
Clay vs Apollo
Apollo itu database + outreach tool. Mereka punya database contacts yang bisa kalian search dan langsung outreach dari platform mereka.
Clay beda — Clay bukan database, tapi enrichment layer. Clay aggregate data dari multiple sources (termasuk Apollo sebagai salah satu provider). Clay lebih flexible tapi nggak punya built-in outreach.
Kapan pakai Apollo: Mau all-in-one solution untuk prospecting + outreach. Kapan pakai Clay: Mau maximum data coverage dan flexibility dalam workflow.
Clay vs Clearbit
Clearbit adalah data provider — satu source of enrichment data. High quality tapi single source.
Clay aggregate multiple providers termasuk Clearbit. Jadi Clay bisa kasih coverage lebih baik karena kalau Clearbit nggak punya, Clay bisa fallback ke provider lain.
Kapan pakai Clearbit: Udah happy dengan coverage mereka dan mau direct integration. Kapan pakai Clay: Mau maximize coverage dengan multiple providers.
Clay vs Manual Research
Ini perbandingan yang paling stark. Manual research untuk satu prospect bisa makan waktu 10-15 menit kalau thorough. Multiply dengan 100 prospects = 25 jam kerja.
Dengan Clay, 100 prospects bisa di-research dalam 30 menit sampai 1 jam. Dan konsistensinya lebih bagus karena automated.
Red Flags dan Misconceptions
Sebelum dive deeper, saya mau clear up beberapa misconceptions:
"Clay itu cuma buat sales outbound"
Salah. Clay valuable untuk banyak use case:
- Marketing untuk lead enrichment dan segmentation
- Ops untuk data cleaning dan management
- Research untuk competitive intelligence
- Recruiting untuk candidate enrichment
Jangan limit diri kalian.
"Data dari Clay pasti akurat 100%"
Nope. No enrichment tool punya 100% accuracy. Data bisa outdated (orang pindah kerja), incomplete, atau kadang salah.
Always verify critical data, especially sebelum high-stakes outreach. Clay significantly better than manual, tapi bukan perfect.
"Clay mahal dan cuma untuk enterprise"
Misconception yang common. Clay punya free tier yang cukup generous untuk learning. Dan paid tiers mulai dari affordable untuk individuals dan small teams.
Buat learning dan small-scale use, kalian nggak perlu bayar mahal.
"Butuh technical background untuk pakai Clay"
Nggak juga. Interface Clay designed untuk accessible. Kalau kalian bisa pakai spreadsheet, kalian bisa pakai Clay basic features.
Advanced features (APIs, custom integrations) memang butuh technical knowledge, tapi untuk 80% use cases, no coding required.
Apa yang Bakal Kalian Pelajari di Artikel Ini
Setelah complete artikel ini, kalian bakal bisa:
- Setup dan navigate Clay dengan confident
- Import data dari berbagai sources
- Run basic dan waterfall enrichment
- Create AI columns untuk personalization dan categorization
- Build complete GTM workflows dari nol
- Integrate Clay dengan tools lain di stack kalian
Ini bukan theoretical knowledge — setiap bagian ada hands-on exercises yang bisa kalian langsung praktekin.
Checklist Pemahaman Bagian 1
Sebelum lanjut, pastikan kalian:
- [ ] Bisa explain Clay ke orang awam dalam 1 menit — "Clay adalah spreadsheet dengan superpowers untuk enrichment dan automation"
- [ ] Paham dimana Clay sits di GTM tech stack — data layer antara source dan action
- [ ] Tau minimal 3 use cases yang relevant untuk situasi kalian
- [ ] Clear tentang apa yang Clay bisa dan nggak bisa lakukan
Kalau semua kecentang, let's move on ke setup dan mulai hands-on dengan Clay.
Bagian 2: Setup Awal dan Navigasi Interface Clay
Oke, sekarang saatnya hands-on. Di bagian ini kalian bakal setup account Clay dan familiarisasi dengan interface-nya.
Saya tau banyak orang yang skip bagian "tour interface" karena ngerasa bisa figure out sendiri. Tapi trust me, spend 15-20 menit untuk beneran paham layout Clay bakal save kalian banyak waktu dan confusion nanti.
Step-by-Step Signup Process
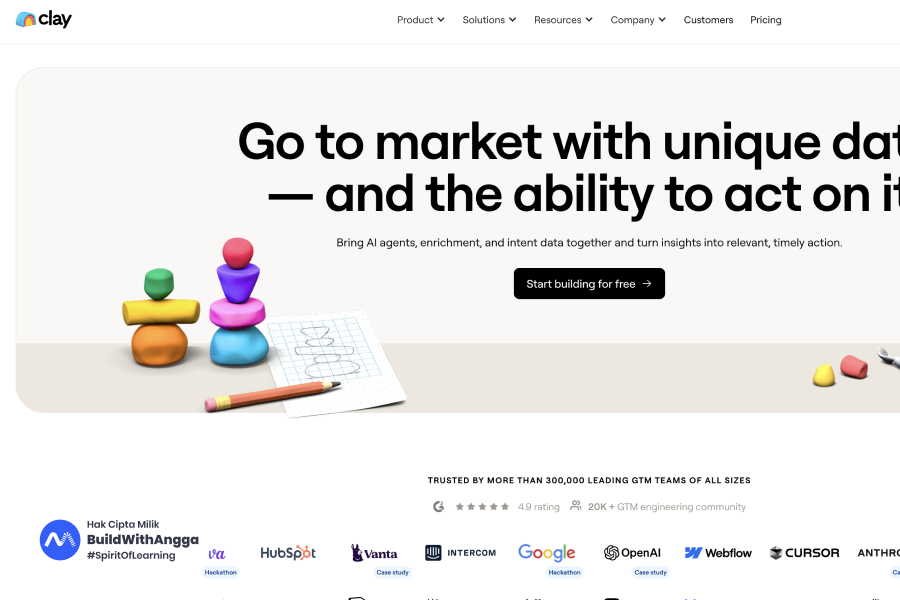
Step 1: Buka clay.com
Langsung ke website utama Clay. Kalian bakal lihat homepage dengan tagline tentang data enrichment dan GTM automation.
Step 2: Klik "Get Started" atau "Sign Up"
Biasanya ada di pojok kanan atas. Kalian bakal dibawa ke signup page.
Step 3: Pilih metode signup
Bisa pakai:
- Google account (recommended untuk kemudahan)
- Email dan password manual
Pro tip: Kalau bisa, pakai work email (email dengan domain company kalian, bukan gmail/yahoo). Kenapa? Beberapa enrichment features works better ketika Clay bisa verify kalian dari legitimate business. Ini subtle tapi bisa affect hasil enrichment.
Step 4: Verify email
Kalau signup pakai email manual, kalian perlu verify. Check inbox (dan spam folder) untuk verification link.
Step 5: Initial onboarding
Clay bakal tanya beberapa questions:
- Role kalian (Sales, Marketing, Ops, etc.)
- Company size
- Primary use case
Jawab dengan jujur — ini helps Clay customize experience dan recommendations. Tapi kalau mau skip juga bisa.
Step 6: Welcome to Clay!
Setelah onboarding, kalian masuk ke dashboard. Selamat, account kalian udah ready.
Memahami Pricing dan Credits
Sebelum explore lebih jauh, penting untuk paham gimana pricing Clay works. Ini beda dari typical SaaS subscription.
Credit-Based System
Clay pakai sistem credits. Setiap action yang "consume" external data atau AI processing butuh credits. Contoh:
- Enrich satu email → X credits
- Find contacts di company → X credits
- Run AI column → X credits
Credit costs vary tergantung jenis enrichment dan provider yang dipakai.
Pricing Tiers:
Free Tier
- Limited credits per bulan (cukup untuk learning dan small experiments)
- Access ke basic features
- Perfect untuk: Learning, testing, very small scale operations
Starter
- More credits
- More features unlocked
- Perfect untuk: Individual users, freelancers
Explorer / Pro
- Significant credits
- Advanced features
- Team collaboration
- Perfect untuk: Growing teams, agencies, serious GTM operations
Enterprise
- Custom pricing
- Unlimited atau very high credits
- Premium support
- Perfect untuk: Large organizations
Tips untuk pemula:
- Mulai dengan free tier. Seriously, cukup banget untuk learning.
- Monitor credit usage dari awal. Gampang kehabisan kalau nggak aware.
- Test enrichment di small batches sebelum run di large datasets.
Tour Interface Clay
Sekarang mari explore interface-nya. Saya breakdown per section:
1. Left Sidebar — Navigation
Ini main navigation kalian. Biasanya ada:
- Home / Dashboard — Overview workspace, recent tables, quick stats
- Tables — List semua tables yang kalian buat. Ini "spreadsheets" kalian.
- Sources — Manage data sources dan integrations untuk import
- Templates — Pre-built workflows yang bisa kalian clone dan customize
- Settings — Account settings, billing, team management
2. Main Workspace Area
Ini area utama dimana kalian kerja. Ketika buka table, di sinilah kalian lihat data dalam format spreadsheet-like.
- Rows = Records (satu row = satu person/company/entity)
- Columns = Fields (bisa static data atau enrichment columns)
- Toolbar di atas untuk actions (add column, add row, filter, sort, etc.)
3. Right Panel — Column Configuration
Ketika kalian click atau setup column, panel di kanan muncul untuk configuration:
- Column type selection
- Enrichment provider selection
- Field mapping
- AI prompt configuration (untuk AI columns)
4. Top Bar
- Table name dan navigation breadcrumbs
- Search functionality
- Credit usage indicator (penting untuk monitor!)
- Account menu
Konsep Dasar yang Wajib Paham
Sebelum mulai bikin apapun, pastikan kalian crystal clear dengan konsep-konsep ini:
Table
Think of it as satu spreadsheet atau satu project. Setiap table punya purpose tertentu. Contoh:
- "Q1 Outbound Prospects" — table untuk prospecting campaign
- "Webinar Leads Jan 2025" — table untuk leads dari specific event
- "Target Accounts Research" — table untuk ABM research
Best practice: Satu table untuk satu purpose. Jangan campur aduk.
Row
Satu record dalam table. Biasanya represent:
- Satu person (untuk people-focused tables)
- Satu company (untuk account-focused tables)
- Satu entity lain tergantung use case
Column
Field data dalam table. Ada dua jenis utama:
Static Column — Data yang kalian input manual atau import. Nggak berubah kecuali kalian edit.
- Contoh: First Name, Email, Company (yang kalian input sendiri)
Enrichment Column — Data yang di-pull otomatis dari external sources. "Magic" columns.
- Contoh: Job Title (enriched from email), Company Size (enriched from domain)
Enrichment
Proses pull data dari external sources. Ini core feature Clay.
- Input: Data minimal yang kalian punya (email, domain, LinkedIn URL)
- Process: Clay query external providers
- Output: Additional data fields
Credits
Currency dalam Clay. Setiap enrichment action consume credits.
- Different actions = different credit costs
- Monitor usage untuk avoid surprise
- Optimize dengan test small batches first
Hands-On Exercise: Setup Pertama
Sekarang let's do something. Ikuti step-by-step:
Step 1: Create New Table
- Di sidebar, click "Tables" atau "+" untuk new table
- Beri nama: "My First Clay Table" (atau apapun)
- Click create
Step 2: Add Columns Manually
Kita mulai dengan static columns dulu:
- Click "+" di header untuk add column
- Pilih "Text" sebagai column type
- Beri nama: "Full Name"
- Repeat untuk: "Email", "Company"
Sekarang kalian punya table dengan 3 columns.
Step 3: Add Sample Data
Add 5 rows dengan dummy data. Bisa pakai data fictional:
| Full Name | Company | |
|---|---|---|
| John Doe | [email protected] | Acme Corp |
| Jane Smith | [email protected] | Tech Startup |
| Bob Wilson | [email protected] | Big Company Inc |
| Sarah Lee | [email protected] | Innovate Co |
| Mike Chen | [email protected] | Global Tech |
(Note: Ini dummy data untuk learning. Di real use case, kalian bakal import real data.)
Step 4: Explore Interface
Sekarang dengan table yang ada data:
- Try click di different cells — lihat gimana editing works
- Try click column header — lihat options yang available
- Lihat di top bar — ada apa aja?
- Check credit indicator — berapa credits kalian punya?
Step 5: Save dan Organize
- Table auto-save, tapi good habit untuk verify
- Kalau mau organize, bisa create folders untuk tables
Selamat! Kalian udah punya first Clay table. Masih basic, tapi ini foundation untuk everything else.
Tips Navigasi
Keyboard Shortcuts yang Useful:
Cmd/Ctrl + K— Quick search / command paletteTab— Move ke next cellEnter— Edit cell / confirmEscape— Cancel / close panel
(Check Clay's help untuk full shortcut list)
Organizing Tables:
Kalau mulai punya banyak tables:
- Create folders untuk organize by project atau client
- Use clear naming conventions: "[Client] - [Purpose] - [Date]"
- Archive tables yang udah nggak active
Naming Conventions Recommended:
Bad: "New Table", "Test", "Untitled" Good: "Q1 2025 - SaaS Prospects - SEA Region", "Client ABC - Lead Enrichment - Jan"
Trust me, future you bakal grateful kalau tables well-organized.
Common Mistakes di Setup Phase
Mistake 1: Signup dengan personal email
Beberapa Clay features dan enrichment results bisa lebih limited kalau signup dengan gmail/yahoo. Kalau kalian punya work email, use it.
Mistake 2: Skip onboarding tutorial
Clay punya built-in onboarding yang actually helpful untuk first-timers. Kalau kalian skip dan langsung explore sendiri, mungkin miss beberapa useful tips.
Mistake 3: Nggak perhatiin credit usage
Easy to get excited dan run enrichments tanpa sadar credits habis. Make it habit untuk selalu check credit indicator sebelum run anything di large scale.
Mistake 4: Nggak setup organization dari awal
Mulai dengan mindset organized. Create folders, use clear names. Kalau nanti tables udah banyak dan berantakan, painful untuk cleanup.
Checklist Setup
Sebelum lanjut ke bagian berikutnya:
- [ ] Account Clay created dan verified
- [ ] Udah login dan bisa access dashboard
- [ ] Paham pricing tiers dan credit system
- [ ] Familiar dengan main interface sections (sidebar, workspace, panels)
- [ ] Udah create first table dengan sample data
- [ ] Tau dimana lihat credit usage
Kalau semua kecentang, kalian ready untuk mulai import real data ke Clay.
Bagian 3: Import Data ke Clay — Berbagai Metode dan Best Practices
Data adalah bahan bakar Clay. Tanpa data yang masuk, semua fitur enrichment dan AI jadi useless.
Di bagian ini, saya bakal cover semua cara untuk memasukkan data ke Clay — dari yang paling simple sampai yang paling advanced. Plus best practices biar data kalian clean dari awal dan nggak buang-buang credits.
Overview Metode Import
Clay punya beberapa cara untuk import data:
- Manual Entry — Ketik langsung di table
- CSV Upload — Upload file spreadsheet
- Copy-Paste — Langsung dari Google Sheets/Excel
- Native Integrations — Sync dari CRM dan tools lain
- Find Companies/People — Prospecting langsung di Clay
- Webhook/API — Real-time data dari external sources
Masing-masing punya use case yang tepat. Let me break down satu-satu.
Method 1: Manual Entry
Kapan pakai:
- Quick testing dengan beberapa records
- Add individual contacts yang ketemu ad-hoc
- Very small datasets (under 10 records)
Cara pakai:
- Buka table yang udah ada atau create new table
- Click di cell yang mau diisi
- Ketik data
- Enter untuk confirm, Tab untuk pindah ke cell selanjutnya
Limitations:
- Nggak scalable sama sekali
- Prone to typos
- Time-consuming untuk anything more than few records
Verdict: Cuma untuk testing atau one-off additions. Untuk real work, pakai method lain.
Method 2: CSV Upload
Ini method paling common untuk bulk import dari existing data.
Kapan pakai:
- Import leads dari event/webinar
- Migrate data dari other tools
- Bulk import dari spreadsheet yang udah ada
- Any dataset yang udah dalam spreadsheet format
Step-by-step:
Step 1: Prepare CSV file
Sebelum upload, pastikan CSV kalian clean:
✅ Good CSV structure:
first_name,last_name,email,company,website
John,Doe,[email protected],Acme Corp,acme.com
Jane,Smith,[email protected],Tech Inc,tech.io

❌ Bad CSV structure:
First Name,Last Name,Email Address,Company Name,Company Website
John,Doe,[email protected],Acme Corp,acme.com
,,[email protected],,  ← incomplete data
John,DOE,[email protected],acme corp,www.acme.com  ← duplicate, inconsistent
Best practices untuk CSV prep:
- Headers di row pertama, clean dan simple (no spaces, no special characters)
- Consistent formatting dalam setiap column
- Remove obvious duplicates sebelum import
- Remove rows dengan data critical yang kosong (e.g., no email)
- Save as UTF-8 encoding untuk avoid character issues
Step 2: Upload ke Clay
- Buka table (existing atau create new)
- Click "Add rows" atau "Import"
- Select "Import CSV"
- Drag & drop file atau browse untuk select
- Clay bakal preview data kalian
Step 3: Map Columns
Ini step penting. Clay bakal tanya: "Column X di CSV kalian mau jadi column apa di Clay?"
- Clay biasanya auto-detect kalau header names match
- Double check setiap mapping
- Bisa skip columns yang nggak perlu
- Bisa create new columns kalau belum ada
Step 4: Review dan Confirm
- Preview beberapa rows untuk verify mapping benar
- Check total row count
- Confirm import
Pro tips:
- Start dengan small CSV (100 rows) untuk test mapping
- Kalau mapping salah, lebih baik delete dan re-import daripada fix manually
- Keep original CSV sebagai backup
Method 3: Copy-Paste dari Spreadsheet
Kadang kalian nggak mau repot export CSV. Copy-paste langsung bisa jadi faster.
Kapan pakai:
- Quick transfer dari Google Sheets yang lagi dibuka
- Ad-hoc additions dari spreadsheet
- When CSV export feels like overkill
Cara pakai:
- Di Google Sheets/Excel, select data yang mau di-copy (include headers)
- Ctrl+C / Cmd+C
- Di Clay, click di cell pojok kiri atas dimana mau paste
- Ctrl+V / Cmd+V
- Clay bakal parse dan create rows/columns
Tips:
- Include header row untuk auto-mapping
- Paste di empty area untuk avoid overwriting existing data
- Works best untuk smaller datasets (under 500 rows)
Gotcha:
- Formatting bisa messy kalau spreadsheet punya merged cells atau complex formatting
- Better untuk simple, flat data
Method 4: Native Integrations
Clay punya direct integrations dengan banyak tools. Ini powerful untuk ongoing workflows.
Available integrations include:
- CRMs: HubSpot, Salesforce, Pipedrive
- Spreadsheets: Google Sheets, Airtable
- Other tools: LinkedIn Sales Navigator, Apollo, etc.
Kapan pakai:
- Sync existing database dari CRM
- Ongoing workflow yang perlu fresh data
- Large datasets yang already live di other tools
Example: Import dari HubSpot
Step 1: Connect HubSpot
- Go to Sources atau Integrations di Clay
- Find HubSpot
- Click connect
- Authorize Clay untuk access HubSpot data
Step 2: Configure Import
- Select object type: Contacts, Companies, atau Deals
- Set filters (optional): "Status = Active", "Created last 30 days", etc.
- Select fields yang mau di-import
Step 3: Map Fields
- HubSpot fields → Clay columns
- Verify mapping correct
Step 4: Run Import
- One-time import atau setup ongoing sync
- Review results
Pro tips:
- Use filters untuk import hanya data yang relevant (save time, save credits later)
- Start dengan subset untuk test before full import
- Be mindful of data volume — importing 100k contacts mungkin overkill
Method 5: Find Companies/People (Prospecting)
Ini unique feature Clay — kalian bisa build lists from scratch tanpa punya data awal.
Kapan pakai:
- Building prospecting list untuk outbound
- Finding contacts di target accounts
- Research untuk new market atau segment
Find Companies:
Clay bisa search companies berdasarkan criteria:
- Industry / sector
- Company size (employee count)
- Location / HQ
- Technologies they use
- Funding stage
- And more
Step-by-step:
- Create new table atau add ke existing
- Click "Add rows" → "Find Companies"
- Set criteria:
- Industry: "Software / SaaS"
- Employees: "50-200"
- Location: "Singapore"
- Tech stack: "Uses Salesforce"
- Preview results
- Select how many to add
- Confirm
Find People at Companies:
Kalau udah punya company list, Clay bisa find contacts di companies tersebut.
- Dengan table yang ada company data
- Add enrichment column → "Find People"
- Specify criteria:
- Job titles: "VP Marketing", "Head of Marketing", "CMO"
- Or departments: "Marketing"
- Seniority: "Director and above"
- Run enrichment
- Clay finds matching contacts
Important notes:
- Prospecting features use credits — sometimes significant amounts
- Quality varies by region dan industry
- Always verify critical contacts sebelum outreach
Method 6: Webhook / API
Untuk real-time data ingestion dari external sources.
Kapan pakai:
- Form submissions langsung masuk Clay
- Trigger-based workflows
- Integration dengan tools yang nggak punya native Clay integration
- Custom applications
Basic Webhook Setup:
Step 1: Create table dengan expected structure
- Add columns untuk setiap field yang bakal masuk
- Contoh: Name, Email, Company, Source
Step 2: Get Webhook URL
- Di table settings atau integrations
- Clay provides unique webhook URL untuk table tersebut
Step 3: Configure External Source
- Di form tool (Typeform, Tally, etc.), set webhook destination
- Paste Clay webhook URL
- Map form fields ke expected format
Step 4: Test
- Submit test entry dari form
- Verify data appears di Clay table
Example Flow:
User fills Typeform → Typeform sends webhook → Clay receives data
→ New row created in Clay → Enrichment triggers → Ready for action
API Usage:
Untuk more advanced use cases, Clay juga punya API:
- Programmatic table creation
- Bulk data operations
- Custom integrations
API documentation available di Clay's developer docs. Ini more advanced dan beyond scope artikel ini.
Data Hygiene Best Practices
Garbage in, garbage out. Clean data = better enrichment results = less wasted credits.
Before Import:
1. Deduplicate Remove duplicate entries sebelum import. Enriching same person twice = wasted credits.
Check for:
- Exact email duplicates
- Same person different email variations ([email protected] vs [email protected])
- Same company different formats
2. Validate Email Format Invalid emails bakal fail enrichment anyway. Remove obviously bad ones:
- Missing @ symbol
- Invalid domains
- Placeholder emails ([email protected], [email protected])
3. Standardize Company Names Inconsistent company names bikin deduplication susah dan bisa cause duplicate enrichments.
Standardize:
"Google" / "Google Inc" / "Google LLC" / "google" → "Google"
"Acme Corp." / "ACME Corp" / "Acme Corporation" → "Acme Corp"
4. Remove Incomplete Critical Data Kalau row nggak punya data yang critical untuk enrichment (e.g., no email AND no LinkedIn), consider removing. Nggak bisa di-enrich anyway.
5. Check for Obvious Bad Data
- Fake names ("Test User", "Asdf Asdf")
- Generic emails (info@, support@, sales@)
- Placeholder data
After Import:
- Spot check beberapa rows untuk verify import correctly
- Check column mappings actually worked
- Remove any rows yang obviously shouldn't be there
Hands-On Exercise: Import Data
Let's practice dengan real import.
Option A: CSV Import
- Download atau create simple CSV dengan 20-30 rows:
- Columns: first_name, last_name, email, company, website
- Bisa pakai dummy data atau real data yang kalian punya
- Create new table di Clay: "Import Practice"
- Import CSV:
- Click "Add rows" → "Import CSV"
- Upload file
- Map columns
- Complete import
- Verify:
- All rows imported?
- Columns mapped correctly?
- Data looks right?
Option B: Find Companies
- Create new table: "Prospecting Practice"
- Use Find Companies:
- Industry: Pick something relevant untuk kalian
- Size: 10-100 employees
- Location: Your country
- Add 20 companies
- Use Find People:
- Add enrichment untuk find "Marketing" roles
- See what contacts Clay finds
- Review results:
- Coverage rate?
- Data quality?
Option C: Copy-Paste (Quick)
- Open Google Sheet dengan some data (atau create quick one)
- Select data including headers
- Copy
- Create new Clay table
- Paste
- Verify hasil
Common Mistakes saat Import
Mistake 1: Import dirty data
Masukin data tanpa cleaning dulu. Result: wasted credits untuk enriching bad/duplicate data.
Fix: Always clean sebelum import. Extra 30 menit untuk cleaning bisa save hours dan significant credits.
Mistake 2: Wrong column mapping
Nggak double-check mapping, email masuk ke company column, etc.
Fix: Always review mapping preview. Test dengan small batch first.
Mistake 3: No filters saat import dari CRM
Import semua 50,000 contacts padahal cuma butuh 500 yang qualified.
Fix: Use filters aggressively. Import only what you need.
Mistake 4: Importing everything "just in case"
"Mungkin nanti perlu" — import all fields, all records.
Fix: Be intentional. Import what you need now. Bisa always re-import kalau butuh more.
Mistake 5: Nggak backup original data
Import terus original CSV hilang atau overwritten.
Fix: Keep original files. Name dengan dates. Never modify original.
Checklist Import Data
Sebelum lanjut ke enrichment:
- [ ] Berhasil import data via at least satu method (CSV, copy-paste, atau integration)
- [ ] Data clean — no obvious duplicates, formatting consistent
- [ ] Column mapping verified dan correct
- [ ] Paham kapan pakai method mana
- [ ] Aware bahwa "Find Companies/People" uses credits
Ready untuk mulai enrichment? Let's make that data come alive.
Bagian 4: Basic Enrichment — Mengubah Data Minimal Jadi Profile Lengkap
Ini dia core feature yang bikin Clay powerful. Enrichment.
Kalian punya email doang? Clay bisa kasih full profile orangnya. Punya domain company doang? Clay bisa kasih semua info tentang company tersebut.
Di bagian ini, saya bakal deep dive ke basic enrichment — cara kerja, jenis-jenisnya, dan gimana prakteknya step-by-step.
Apa Itu Enrichment dalam Context Clay?
Enrichment adalah proses menambahkan data dari external sources ke data yang udah kalian punya.
Simple formula:
Data Minimal (yang kalian punya) + Enrichment (Clay magic) = Data Lengkap (actionable)
Contoh konkret:
Input kalian:
Setelah enrichment:
| Full Name | Job Title | Company | Phone | ||
|---|---|---|---|---|---|
| [email protected] | John Smith | Senior Account Executive | Salesforce | linkedin.com/in/johnsmith | +1-xxx-xxx |
Dari 1 data point jadi 6+ data points. That's the power of enrichment.
Konsep "Enrichment Providers"
Penting untuk paham ini: Clay sendiri bukan data provider.
Clay adalah aggregator yang connect ke 50+ external data providers. Ketika kalian run enrichment, Clay query provider-provider ini untuk get data.
Beberapa providers yang di-aggregate Clay:
- Apollo
- Clearbit
- Hunter
- Lusha
- ZoomInfo
- BuiltWith
- Crunchbase
- Dan banyak lagi
Kenapa ini penting?
Setiap provider punya:
- Coverage berbeda — Provider A mungkin kuat di US, lemah di Asia
- Data types berbeda — Provider B bagus untuk emails, Provider C bagus untuk phone numbers
- Accuracy berbeda — Some more reliable than others
- Pricing berbeda — Some cheaper, some premium
Clay let you leverage multiple providers tanpa harus subscribe ke semuanya individually.
Jenis Enrichment yang Paling Umum
1. Person Enrichment (dari Email)
Input: Work email Output: Everything about the person
Data yang bisa di-dapat:
- Full name
- Job title
- Department
- Seniority level
- Company name
- LinkedIn URL
- Phone number (direct/mobile)
- Location
- Work history (kadang)
Use case: Kalian dapat list emails dari webinar, mau tau siapa mereka sebelum follow-up.
2. Company Enrichment (dari Domain)
Input: Company domain/website Output: Everything about the company
Data yang bisa di-dapat:
- Company legal name
- Industry / sector
- Employee count
- Revenue range
- Funding info (rounds, total raised, investors)
- HQ location
- Technologies used (tech stack)
- Social media links
- Company description
Use case: Research target accounts, segment companies by size/industry.
3. LinkedIn Enrichment (dari LinkedIn URL)
Input: LinkedIn profile URL Output: Detailed profile information
Data yang bisa di-dapat:
- Full profile info
- Current position details
- Work history
- Education
- Skills
- Connection count
- Recent posts/activity (sometimes)
Use case: Deep research on specific high-value prospects.
4. Email Finding (dari Name + Company)
Input: Person's name + company domain Output: Work email
Use case: Kalian tau siapa yang mau di-contact tapi nggak punya email mereka.
5. Phone Enrichment
Input: Email atau LinkedIn Output: Phone numbers (direct, mobile)
Use case: Sales team butuh phone untuk direct outreach.
Step-by-Step: Menambah Enrichment Column
Let's get practical. Saya walk through cara add enrichment column.
Step 1: Buka Table dengan Data
Pastikan kalian udah punya table dengan data yang mau di-enrich. Minimal harus ada "input" data — email untuk person enrichment, domain untuk company enrichment.
Step 2: Add New Column
- Click "+" icon di header (sebelah column terakhir)
- Atau right-click di header area → "Add column"
Step 3: Choose Enrichment Type
Menu muncul dengan options. Untuk enrichment, cari:
- "Enrich Person" / "Person Enrichment"
- "Enrich Company" / "Company Enrichment"
- Atau browse "Enrichment" category
Clay interface might vary, tapi general flow sama.
Step 4: Select Source Column
Clay tanya: "Data mana yang mau dijadiin input?"
- Untuk person enrichment → select email column
- Untuk company enrichment → select domain/website column
- Untuk LinkedIn enrichment → select LinkedIn URL column
Step 5: Choose Output Fields
Kalian bisa pilih specific fields yang mau di-extract:
- All fields (comprehensive tapi more credits)
- Selected fields only (lebih efficient)
Recommendation: Start dengan essential fields aja. Bisa always add more later.
Essential untuk Person:
- Full name
- Job title
- Company
- LinkedIn URL
Essential untuk Company:
- Company name
- Industry
- Employee count
- Location
Step 6: Configure Provider (Optional)
Depending on Clay's interface, kalian mungkin bisa:
- Let Clay auto-select provider
- Choose specific provider
- Setup waterfall (covered di bagian selanjutnya)
Untuk basic enrichment, auto-select usually fine.
Step 7: Run Enrichment
- Click "Run" atau "Enrich"
- Choose: Run on all rows atau selected rows
- Important: Untuk pertama kali, run on small subset dulu (5-10 rows) untuk test
Step 8: Wait dan Review
- Enrichment takes few seconds to few minutes depending on volume
- Progress indicator biasanya ada
- Once done, review results
Contoh Praktis: Person Enrichment dari Email
Let's do real example.
Scenario: Kalian punya 10 email addresses, mau tau siapa orangnya.
Starting data:
...
Step 1: Buka table dengan data ini
Step 2: Add column → Enrich Person
Step 3: Select "Email" as source column
Step 4: Select output fields:
- Full Name
- Job Title
- LinkedIn URL
Step 5: Run on all rows
Result:
| Full Name | Job Title | LinkedIn URL | |
|---|---|---|---|
| [email protected] | Sarah Johnson | Product Manager | linkedin.com/in/sarahj |
| [email protected] | Mike Chen | Engineering Lead | linkedin.com/in/mikechen |
| [email protected] | Lisa Park | Design Director | linkedin.com/in/lisapark |
| ... | ... | ... | ... |
Data yang tadinya cuma email sekarang jadi actionable profiles.
Contoh Praktis: Company Enrichment dari Domain
Scenario: Kalian punya list company websites, mau research sebelum outreach.
Starting data:
Website
...
Step 1: Add column → Enrich Company
Step 2: Select "Website" as source column
Step 3: Select output fields:
- Company Name
- Industry
- Employee Count
- HQ Location
- Funding Total
Step 4: Run enrichment
Result:
| Website | Company Name | Industry | Employees | HQ | Funding |
|---|---|---|---|---|---|
| stripe.com | Stripe, Inc. | Fintech | 7000+ | San Francisco | $8.7B |
| notion.so | Notion Labs | Productivity Software | 500+ | San Francisco | $343M |
| figma.com | Figma, Inc. | Design Software | 800+ | San Francisco | $333M |
| ... | ... | ... | ... | ... | ... |
Sekarang kalian tau company size, industry, funding — perfect untuk segmentation dan prioritization.
Understanding Enrichment Results
Setelah run enrichment, penting untuk paham hasilnya.
Coverage Rate
Nggak semua rows bakal successfully enriched. Ini normal.
- 100% coverage = unrealistic expectation
- 70-85% coverage = pretty good
- 50-70% coverage = acceptable untuk some data types
- Below 50% = mungkin data input quality issue
Kenapa some rows nggak ke-enrich?
- Email/domain nggak ada di provider databases
- Person udah leave company
- Small/new company yang belum indexed
- Invalid input data
- Regional limitations (some providers weak di certain regions)
Empty vs Failed
- Empty cell = no data found, tapi lookup successful
- Error/failed = something went wrong with the lookup itself
Confidence Levels
Some enrichments come with confidence indicators:
- High confidence = data likely accurate
- Low confidence = data might be outdated atau less reliable
Data Freshness
Enrichment data bisa outdated. Person mungkin udah pindah kerja, company mungkin udah berubah size.
- For critical outreach, consider manual verification
- Recent data (from recent activities) usually more reliable
Credits dan Cost Awareness
Enrichment costs credits. Penting untuk aware sebelum run.
Different enrichments = different credit costs
Rough hierarchy (varies):
- Basic person enrichment: Lower credits
- Company enrichment: Lower-medium credits
- Phone finding: Higher credits
- Premium providers: Higher credits
Tips untuk manage credits:
1. Test Small First Never run enrichment on full dataset tanpa test. Run on 5-10 rows, verify results bagus, baru scale.
2. Select Only Needed Fields Kalau cuma butuh job title, jangan ambil semua fields. More fields sometimes = more credits.
3. Check Before Running Clay biasanya show estimated credit cost sebelum run. Selalu check.
4. Avoid Re-enriching Kalau row udah enriched, jangan run lagi kecuali emang perlu update. Duplicate enrichment = wasted credits.
5. Clean Data First Enriching bad emails atau invalid domains = wasted credits. Clean before enrich.
Hands-On Exercise: Basic Enrichment
Time to practice.
Exercise A: Person Enrichment
- Create new table atau use existing dengan email data
- Kalau belum ada data, add 10 rows dengan real work emails (bisa colleagues, public figures dengan known emails, atau test dengan your own variations)
- Add Person Enrichment column
- Select: Full Name, Job Title, LinkedIn URL
- Run on all rows
- Analyze:
- Coverage rate? (berapa yang successfully enriched)
- Data quality? (does it look accurate)
- Any surprises?
Exercise B: Company Enrichment
- Create table dengan 10 company domains
- Mix of big companies (google.com, microsoft.com)
- Medium companies
- Small/startup companies
- Add Company Enrichment column
- Select: Company Name, Industry, Employee Count, Location
- Run enrichment
- Analyze:
- Coverage rate across different company sizes?
- Which data points most complete?
Exercise C: Combined Enrichment
- Start dengan table yang punya emails
- Add Person Enrichment → get company domain dari email
- Add Company Enrichment on that domain
- Now you have both person AND company data
- See how they connect
Common Mistakes di Basic Enrichment
Mistake 1: Run on entire table tanpa test
Excited, run enrichment on 1000 rows, results jelek, credits wasted.
Fix: Always test on 5-10 rows first. Verify results. Then scale.
Mistake 2: Expect 100% coverage
Frustrated karena "kok banyak yang kosong?"
Fix: Set realistic expectations. 70-80% is good. Focus on what you got, not what's missing.
Mistake 3: Pilih all fields "just in case"
Select semua output fields padahal cuma butuh 3.
Fix: Be intentional. Select what you need. More fields bisa mean more credits dan more clutter.
Mistake 4: Nggak verify results
Assume enrichment = accurate. Langsung kirim outreach based on data.
Fix: Spot check beberapa results. Especially untuk high-stakes outreach. Data bisa outdated.
Mistake 5: Enrich unsuitable data
Try to enrich personal emails (gmail, yahoo) atau invalid formats.
Fix: Work emails give best results. Clean data sebelum enrich.
Checklist Basic Enrichment
Sebelum lanjut ke waterfall enrichment:
- [ ] Berhasil add dan run person enrichment dari email
- [ ] Berhasil add dan run company enrichment dari domain
- [ ] Paham coverage rate dan realistic expectations
- [ ] Aware of credit costs dan gimana manage
- [ ] Spot-checked results untuk verify accuracy
Kalau semua kecentang, kalian udah bisa enrichment basic. Tapi wait — ada cara untuk significantly improve coverage. That's waterfall enrichment, dan itu topik bagian selanjutnya.
Bagian 5: Waterfall Enrichment — Maximize Data Coverage dengan Multiple Providers
Di bagian sebelumnya, kalian udah bisa run basic enrichment. Tapi mungkin kalian notice: coverage rate-nya nggak 100%. Ada rows yang kosong.
Nah, waterfall enrichment adalah teknik untuk significantly improve coverage. Ini salah satu fitur paling powerful di Clay yang bedain dari single-provider tools.
Apa Itu Waterfall Enrichment?
Konsepnya simple: instead of relying on satu provider, kalian setup multiple providers yang jalan sequentially.
Flow Waterfall:
Email → Provider A → Got data? ✓ Done!
                   → No data? → Try Provider B → Got data? ✓ Done!
                                              → No data? → Try Provider C → ...
Analogi gampang:
Bayangkan kalian cari nomor telepon teman lama. Kalian tanya:
- Teman A — "Nggak tau"
- Teman B — "Nggak tau juga"
- Teman C — "Oh, gue punya!"
Waterfall enrichment works the same way. Kalau Provider A nggak punya data, otomatis try Provider B, dan seterusnya sampai dapat atau semua providers exhausted.
Kenapa Waterfall Penting?
No single provider has complete data.
Ini fact yang harus di-accept. Setiap data provider punya:
- Geographic strengths — Provider A mungkin 90% coverage di US, tapi cuma 40% di Southeast Asia
- Industry strengths — Provider B bagus untuk tech companies, weak untuk manufacturing
- Company size strengths — Provider C kuat di enterprise, lemah di SMBs
- Data type strengths — Provider D best untuk emails, Provider E best untuk phones
Dengan waterfall, kalian leverage the best of all worlds.
Real impact:
| Approach | Typical Coverage |
|---|---|
| Single provider | 50-65% |
| Waterfall (3 providers) | 75-85% |
| Waterfall (5+ providers) | 85-95% |
That extra 20-30% coverage bisa mean hundreds of additional prospects yang sebelumnya "invisible".
Cara Kerja Waterfall di Clay
The Logic:
- Kalian define list of providers dalam priority order
- Clay runs first provider
- If result found → stop, use that result
- If no result → automatically try next provider
- Continue sampai result found atau all providers tried
- Only charged for successful enrichment (mostly)
Visual:
┌─────────────────────────────────────────────────────────────┐
│                    WATERFALL ENRICHMENT                      │
├─────────────────────────────────────────────────────────────┤
│                                                              │
│  Email: [email protected]                               │
│                                                              │
│  ┌──────────┐    ┌──────────┐    ┌──────────┐              │
│  │ Apollo   │ →  │ Clearbit │ →  │ Hunter   │              │
│  │ ❌ Empty │    │ ❌ Empty │    │ ✓ Found! │              │
│  └──────────┘    └──────────┘    └──────────┘              │
│                                                              │
│  Result: Data from Hunter                                    │
│  Credits charged: Only for Hunter (successful lookup)        │
│                                                              │
└─────────────────────────────────────────────────────────────┘
Step-by-Step Setup Waterfall Enrichment
Step 1: Add Enrichment Column
Same as basic enrichment:
- Click "+" untuk add column
- Select enrichment type (Person, Company, etc.)
Step 2: Select "Waterfall" Option
Instead of picking single provider, look for:
- "Waterfall" option
- "Multiple providers"
- "Enrich with waterfall"
(Interface terminology mungkin vary)
Step 3: Add Providers in Order
Kalian bakal see interface untuk add providers:
- Click "Add provider" atau "+"
- Select first provider
- Add second provider
- Add third, dst.
Order matters! Provider di atas di-try duluan.
Step 4: Configure Each Provider (if needed)
Some providers punya additional settings:
- Specific data fields to retrieve
- Filters atau conditions
- Quality thresholds
For most cases, defaults work fine.
Step 5: Set Success Criteria
Define what counts as "success":
- Any data returned = success
- Specific field must be filled = success
- Minimum confidence level = success
Step 6: Select Source Column
Same as basic — pilih column mana yang jadi input (email, domain, etc.)
Step 7: Test on Small Batch
Before running on all data:
- Select 10-20 rows
- Run waterfall
- Verify results
- Check which providers were used
Step 8: Run on Full Dataset
Once validated:
- Run on all rows
- Monitor progress
- Review final coverage
Recommended Waterfall Configurations
Ini configurations yang generally work well. Adjust based on your specific needs.
For Person/Email Enrichment:
Priority Order:
1. Apollo — Good coverage, fast, cost-effective
2. Clearbit — High quality, especially for enterprise
3. Hunter — Good for email validation
4. Lusha — Strong phone data, decent email
5. (Optional) Cognism — European coverage
Rationale:
- Apollo first karena balance of coverage dan cost
- Clearbit second untuk catch enterprise contacts Apollo missed
- Hunter untuk validate dan catch remaining
- Lusha sebagai backup dengan different data sources
For Company Enrichment:
Priority Order:
1. Clearbit — Comprehensive company data
2. Apollo — Good coverage
3. Crunchbase — Funding dan startup info
4. BuiltWith — Tech stack (kalau perlu)
Rationale:
- Clearbit punya most comprehensive company profiles
- Apollo untuk additional coverage
- Crunchbase kalau funding info penting
- BuiltWith specifically untuk tech stack data
For Phone Numbers:
Priority Order:
1. Lusha — Generally best for direct dials
2. Apollo — Good secondary source
3. Cognism — Strong in certain regions
4. ZoomInfo — Premium tapi high quality
Phones are tricky — coverage varies significantly. Expect lower rates than email enrichment.
For LinkedIn URLs:
Priority Order:
1. Apollo — Fast LinkedIn matching
2. Clearbit — Good backup
3. (Direct LinkedIn search kalau available)
Real Example: Before vs After Waterfall
Let me show concrete impact.
Scenario: 100 leads dari event, mau enrich person data dari email.
Single Provider (Apollo only):
| Total Leads | Enriched | Empty | Coverage |
|---|---|---|---|
| 100 | 62 | 38 | 62% |
38 leads dengan zero data. That's significant missed opportunity.
Waterfall (Apollo → Clearbit → Hunter):
| Total Leads | Enriched | Empty | Coverage |
|---|---|---|---|
| 100 | 84 | 16 | 84% |
Breakdown by provider:
- Apollo: 62 (first try success)
- Clearbit: 14 (caught what Apollo missed)
- Hunter: 8 (final catch)
- Still empty: 16
Impact: 22 additional leads dengan full data. Kalau conversion rate 5%, itu potentially extra 1 customer dari leads yang sebelumnya bakal diabaikan.
Advanced Waterfall Strategies
Once kalian comfortable dengan basic waterfall, these advanced strategies bisa optimize further.
Strategy 1: Conditional Waterfall
Different providers for different segments.
If company_size > 500:
  → Clearbit → ZoomInfo (enterprise-focused providers)

If company_size < 100:
  → Apollo → Hunter → Lusha (SMB-focused)

If region = "Europe":
  → Cognism → Apollo (European coverage)
How to implement: Use Clay's conditional logic atau create separate columns dengan different waterfalls, then combine.
Strategy 2: Field-Specific Waterfall
Different waterfalls for different data points.
For email enrichment:
  → Apollo → Hunter → Clearbit

For phone enrichment (separate column):
  → Lusha → Cognism → Apollo

For LinkedIn:
  → Apollo → Clearbit
Rationale: Providers have different strengths per data type. Optimize each separately.
Strategy 3: Cost-Optimized Waterfall
Cheaper providers first, expensive last.
1. Free/cheap tier providers
2. Mid-tier providers
3. Premium providers (only if others fail)
This maximizes coverage while minimizing cost. Tapi tradeoff: might get lower quality data first.
Strategy 4: Quality-First Waterfall
Highest quality providers first, regardless of cost.
1. Premium/highest accuracy providers
2. Mid-tier
3. Budget options as last resort
Use this for high-stakes campaigns where data quality critical.
Cost Considerations
Waterfall can use more credits than single provider. Here's how to think about it.
How Charging Works:
- Most waterfalls only charge for successful lookups
- If Provider A finds nothing → no charge
- If Provider B finds data → charged for Provider B only
- Different providers have different credit costs
Cost vs Coverage Tradeoff:
More providers in waterfall → Higher potential coverage
                           → Higher potential cost
                           → Diminishing returns after 4-5 providers
Optimization Tips:
1. Don't over-stuff waterfall 3-4 providers usually optimal. Adding 10 providers ≠ 10x better results.
2. Order by cost-effectiveness Put best value providers first. Only hit expensive ones when needed.
3. Set appropriate success criteria If you only need email, don't "succeed" on just having a name. Be specific.
4. Segment your data High-value prospects → premium waterfall Lower priority → basic waterfall
5. Monitor provider performance Track which providers actually contributing. Remove underperformers.
Hands-On Exercise: Waterfall Enrichment
Exercise: Compare Single vs Waterfall
Step 1: Prepare Data
- Create table dengan 30 email addresses
- Mix of: big company emails, small company emails, various regions
Step 2: Single Provider Column
- Add person enrichment column
- Use single provider (Apollo atau Clearbit)
- Run enrichment
- Note coverage rate: ____%
Step 3: Waterfall Column
- Add another person enrichment column
- Setup waterfall: Provider A → Provider B → Provider C
- Run enrichment
- Note coverage rate: ____%
Step 4: Compare Results
| Metric | Single Provider | Waterfall |
|---|---|---|
| Coverage | ____% | ____% |
| Rows enriched | ____ | ____ |
| Additional data | - | ____ rows |
Step 5: Analyze
- How much did waterfall improve coverage?
- Which provider caught the most "missed" ones?
- Was the credit cost worth the additional coverage?
Expected outcome: Waterfall should give 15-25% higher coverage. That's significant.
Common Mistakes di Waterfall
Mistake 1: Too many providers
Add 10 providers thinking "more = better".
Reality: Diminishing returns after 4-5. Plus more complexity to manage.
Fix: Stick to 3-5 well-chosen providers.
Mistake 2: Wrong provider order
Put expensive provider first, cheap last.
Reality: Expensive provider handles bulk, credits drained fast.
Fix: Order by cost-effectiveness. Best value first, premium as fallback.
Mistake 3: No success criteria definition
Accept any data as "success" even if critical fields empty.
Reality: Row marked "enriched" tapi nggak ada email atau job title.
Fix: Define specific success criteria. "Must have job_title" atau "must have email".
Mistake 4: Never analyzing provider performance
Set and forget. Never check which providers actually contributing.
Reality: Provider C in your waterfall might have 0% hit rate. Useless.
Fix: Periodically review. Clay might show which provider succeeded per row. Analyze dan optimize.
Mistake 5: Same waterfall for all use cases
Use identical waterfall for SMB prospecting and enterprise ABM.
Reality: Different segments need different approaches.
Fix: Create purpose-specific waterfalls. Or use conditional logic.
Checklist Waterfall Enrichment
Sebelum lanjut ke AI columns:
- [ ] Successfully setup waterfall enrichment dengan 3+ providers
- [ ] Compared coverage: single provider vs waterfall
- [ ] Understand cost vs coverage tradeoff
- [ ] Know recommended provider orders untuk common use cases
- [ ] Tested dan validated waterfall results
Waterfall gets you the data. Tapi data alone isn't enough. Bagian selanjutnya, kita bakal use AI untuk transform data jadi insights dan personalized content. That's where real magic happens.
Bagian 6: AI Columns dan Formula — Automation Superpowers
Kalian udah bisa import data dan enrich dengan waterfall. Data udah lengkap. Tapi sekarang pertanyaannya: gimana transform data ini jadi something actionable?
Di sinilah AI columns masuk. Ini fitur yang bikin Clay lebih dari sekadar enrichment tool — ini yang bikin Clay jadi automation powerhouse.
Apa Itu AI Columns?
AI columns adalah columns yang pakai AI (GPT) untuk process data dan generate output.
Bedanya dengan enrichment:
- Enrichment = pull data dari external sources
- AI columns = process data yang udah ada untuk generate new insights/content
Simple example:
| Name | Job Title | Company | AI: Personalized Opener |
|---|---|---|---|
| Sarah | VP Marketing | Stripe | "Saw Stripe's recent expansion into APAC — exciting times for the marketing team..." |
| Mike | CTO | Notion | "Notion's new API features are impressive — as CTO, you must be proud of..." |
AI reads the data kalian punya, terus generate something new berdasarkan context tersebut.
Use Cases AI Columns
Ini yang bikin AI columns powerful — versatility-nya.
1. Personalized First Lines
Generate custom opening lines untuk cold emails berdasarkan prospect data.
Input: LinkedIn headline, company info, recent news Output: Unique, relevant first line untuk setiap prospect
Why it works: Generic "Hope this email finds you well" → ignored. Personalized opener based on their actual context → attention grabbed.
2. Lead Categorization / Scoring
Auto-categorize atau score leads berdasarkan criteria.
Input: Job title, company size, industry Output: Category ("Decision Maker" / "Influencer" / "End User") atau Score (1-10)
Why it works: Manual categorization = hours. AI categorization = seconds. And surprisingly accurate.
3. Company Summaries
Generate concise, relevant summaries about companies.
Input: Company description, industry, recent news Output: 2-3 sentence summary focused on what's relevant untuk kalian
Why it works: Full company descriptions too long. AI extracts what matters untuk your specific use case.
4. Pain Point Identification
Predict likely pain points berdasarkan company profile.
Input: Industry, size, tech stack, role Output: Likely challenges they're facing
Why it works: Shows you understand their world. Makes outreach more relevant.
5. Custom Research Questions
Generate discovery questions untuk sales calls.
Input: Prospect and company info Output: 3-5 relevant questions untuk ask during call
Why it works: Generic questions = boring calls. Tailored questions = productive conversations.
6. Content Suggestions
Suggest relevant content/resources untuk share.
Input: Prospect's role, challenges, interests Output: Recommendation dari your content library
Why it works: Right content to right person = value delivered.
Step-by-Step: Create AI Column
Step 1: Have Enriched Data Ready
AI columns work best dengan rich data. Make sure kalian udah punya:
- Person info (name, title, LinkedIn headline)
- Company info (name, industry, size, description)
- Any other relevant context
More context = better AI output.
Step 2: Add New Column
- Click "+" untuk add column
- Look for "AI" atau "Use AI" atau "AI Column" option
- Select it
Step 3: Write Your Prompt
Ini critical step. Prompt determines output quality.
Di prompt editor:
- Write instructions untuk AI
- Reference other columns dengan @column_name syntax
- Be specific tentang desired output
Example prompt:
Write a personalized first line for a cold email to @Full_Name.

Context:
- They are @Job_Title at @Company_Name
- Company is in @Industry industry
- Their LinkedIn headline is: @LinkedIn_Headline

Requirements:
- Keep it under 20 words
- Reference something specific about them atau their company
- Professional but friendly tone
- Do NOT use generic phrases like "Hope this finds you well"
- Do NOT start with "I"

Output only the first line, nothing else.
Step 4: Configure AI Settings (if available)
Some options kalian mungkin punya:
- Model selection (GPT-4 vs GPT-3.5)
- Temperature (higher = more creative, lower = more consistent)
- Max tokens (output length)
For most use cases, defaults work fine. Tapi untuk personalization, slightly higher temperature bisa help variety.
Step 5: Test on Few Rows First
IMPORTANT: Before running on entire dataset:
- Select 5-10 rows
- Run AI column
- Review outputs
- Refine prompt if needed
AI outputs vary. Test first, refine, then scale.
Step 6: Review and Iterate
After test run:
- Are outputs relevant?
- Are they the right length?
- Any weird outputs?
- Does tone match what you want?
If not perfect, adjust prompt dan test again.
Step 7: Run on Full Dataset
Once satisfied:
- Run on all rows
- Monitor for any outliers
- Spot check final results
Prompt Engineering untuk Clay AI
Quality of output = quality of prompt. Here's how to write effective prompts.
Principle 1: Be Specific
❌ Bad: "Write something about this person" ✅ Good: "Write a 15-word opening line for a cold email referencing their role in @Industry"
Vague prompts = vague outputs.
Principle 2: Reference Columns Explicitly
Always use @column_name untuk pull data.
❌ Bad: "Use their job title and company" ✅ Good: "Their job title is @Job_Title and company is @Company_Name"
AI needs to know exactly where to get data.
Principle 3: Give Examples
Show what good output looks like.
Write a personalized opener.

Good examples:
- "Your recent post about AI in healthcare was spot-on..."
- "Congrats on Acme's Series B — exciting milestone..."
- "Noticed your team is hiring 5 engineers — growth mode!"

Bad examples:
- "Hope this email finds you well..."
- "I wanted to reach out because..."
- "My name is John and I work at..."
Principle 4: Set Constraints
Specify what you want AND what you don't want.
Requirements:
- Under 20 words
- Professional tone
- Reference specific detail

Do NOT:
- Use generic phrases
- Start with "I"
- Be overly salesy
Principle 5: Specify Output Format
Tell AI exactly how to format output.
Output format:
- Just the first line, no additional text
- No quotes around the output
- No explanation or alternatives
Example Prompts yang Ready to Use
Personalized Cold Email Opener:
Write a personalized first line for a cold email to @Full_Name,
who is @Job_Title at @Company_Name in the @Industry industry.

Their LinkedIn headline: @LinkedIn_Headline

Requirements:
- Maximum 20 words
- Reference something specific (their role, company, or industry trend)
- Conversational, not formal
- Show you did research

Do NOT:
- Use "Hope this email finds you well"
- Start with "I"
- Be generic

Output only the opener sentence.
Lead Scoring with Rationale:
Score this lead from 1-10 for our B2B SaaS product that helps marketing teams automate workflows.

Lead info:
- Name: @Full_Name
- Title: @Job_Title
- Company: @Company_Name
- Company size: @Employee_Count employees
- Industry: @Industry

Scoring criteria:
- 9-10: Decision maker at ideal company size (100-1000), marketing role
- 7-8: Influencer at good company, relevant role
- 5-6: Right company but unclear decision power
- 3-4: Small company or less relevant role
- 1-2: Not a fit

Output format: [Score]/10 | [One sentence reason]

Example output: 8/10 | VP Marketing at mid-size SaaS company with budget authority
ICP Fit Assessment:
Assess if this company is a good fit for our ideal customer profile.

Company info:
- Name: @Company_Name
- Industry: @Industry
- Size: @Employee_Count employees
- Location: @HQ_Location
- Tech stack: @Technologies

Our ICP:
- B2B SaaS companies
- 50-500 employees
- US or Europe based
- Uses Salesforce or HubSpot

Output format:
FIT: [Strong Fit / Moderate Fit / Weak Fit / No Fit]
REASON: [One sentence explanation]
MISSING INFO: [Any data that would help assess better, or "None"]
Company One-Liner:
Write a one-sentence summary of @Company_Name that I can use in a sales email.

Company info:
- Industry: @Industry
- Description: @Company_Description
- Employee count: @Employee_Count

Requirements:
- Maximum 15 words
- Focus on what they do, not generic praise
- Factual, not opinion

Example good outputs:
- "Notion helps teams collaborate with a flexible all-in-one workspace"
- "Stripe processes payments for internet businesses globally"

Output only the one-liner.
Formula Columns (Non-AI)
Selain AI columns, Clay juga punya formula columns untuk data manipulation tanpa AI.
Kapan pakai Formula vs AI:
- Formula: Deterministic operations (math, text manipulation, logic)
- AI: Creative/interpretive tasks (writing, categorization, analysis)
Common Formula Use Cases:
1. Combine Columns
// Full name dari first + last
@First_Name + " " + @Last_Name

// Output: "John Smith"
2. Extract Domain dari Email
// Get company domain
SPLIT(@Email, "@")[1]

// Input: [email protected]
// Output: acme.com
3. Conditional Categorization
// Company size tier
IF(@Employee_Count > 1000, "Enterprise",
   IF(@Employee_Count > 200, "Mid-Market",
      IF(@Employee_Count > 50, "SMB", "Startup")))

// Output based on employee count
4. Clean/Standardize Data
// Capitalize properly
PROPER(@company_name)

// Input: "ACME CORP" atau "acme corp"
// Output: "Acme Corp"
5. Check for Missing Data
// Flag incomplete records
IF(ISBLANK(@Email) OR ISBLANK(@Job_Title), "Incomplete", "Complete")
6. Calculate Fields
// Days since signup
DATEDIFF(TODAY(), @Signup_Date, "days")
Combining AI + Formula untuk Powerful Workflows
Real power comes from combining both.
Example Workflow:
Step 1 (Formula): Categorize company size
→ @Size_Tier = IF(@Employees > 500, "Enterprise", "SMB")

Step 2 (Formula): Extract domain
→ @Domain = SPLIT(@Email, "@")[1]

Step 3 (Enrichment): Get company info dari domain

Step 4 (AI): Generate personalized opener based on size tier
→ Different prompts for Enterprise vs SMB

Step 5 (AI): Score lead
→ Consider all enriched + calculated fields

Step 6 (Formula): Final priority flag
→ IF(@Score > 7 AND @Size_Tier = "Enterprise", "High Priority", "Normal")
Each step builds on previous. Formula untuk structured operations, AI untuk creative tasks.
Hands-On Exercise: AI Columns
Exercise A: Personalized Opener
- Use table dengan enriched person data (name, title, company, LinkedIn headline)
- Add AI column
- Use personalized opener prompt dari examples above
- Run on 10 rows
- Review quality — are openers specific dan relevant?
- Refine prompt if needed
- Run on remaining rows
Exercise B: Lead Categorization
- Same table atau new one dengan company size data
- Add AI column
- Use lead scoring prompt dari examples
- Run on 10 rows
- Check if scores make sense given the data
- Adjust criteria in prompt if needed
- Run on all
Exercise C: Formula + AI Combo
- Add formula column: Company size tier (use IF statement)
- Add formula column: Domain extraction
- Add AI column: Summary berdasarkan enriched data
- See how they work together
- Add another AI column yang references your formula results
Common Mistakes dengan AI Columns
Mistake 1: Prompts terlalu vague
"Write something good about this prospect."
Result: Generic, useless outputs.
Fix: Be specific. What exactly? For what purpose? What format? What constraints?
Mistake 2: Nggak test on small batch
Run AI on 1000 rows, prompt salah, all outputs bad.
Result: Wasted credits, wasted time.
Fix: ALWAYS test on 5-10 rows first. Refine. Then scale.
Mistake 3: Nggak reference columns properly
Write prompt mentioning "their job title" tanpa @Job_Title.
Result: AI doesn't see the actual data, makes stuff up.
Fix: Always use @column_name syntax. Double check column names match.
Mistake 4: Over-relying on AI output
Take AI output as gospel, send emails without review.
Result: Occasionally weird/wrong outputs slip through. Embarrassment.
Fix: Spot check outputs. Especially untuk high-stakes outreach. AI is good, not perfect.
Mistake 5: Ignoring temperature/settings
Use same settings untuk everything.
Result: Outputs too similar (low temp) atau too random (high temp).
Fix: For personalization, slight higher temperature helps variety. For categorization, lower temperature helps consistency.
Mistake 6: Prompt too long/complex
Massive prompt dengan 10 conditions dan 5 examples.
Result: AI gets confused, outputs inconsistent.
Fix: Keep prompts focused. One clear task per AI column. Split complex tasks into multiple columns.
Checklist AI Columns
Sebelum lanjut ke building complete workflows:
- [ ] Created AI column dengan working prompt
- [ ] Tested dan refined prompt based on outputs
- [ ] Generated personalized content at scale (openers atau similar)
- [ ] Created at least one formula column
- [ ] Understand when to use AI vs Formula
- [ ] Prompt engineering basics: specific, examples, constraints, format
Sekarang kalian punya semua building blocks. Import, enrichment, waterfall, AI, formulas. Bagian terakhir, kita bakal put it all together jadi complete GTM workflows.
Bagian 7: Building Complete Workflows — Putting It All Together
Ini final bagian. Saatnya gabungkan semua yang udah kalian pelajari jadi end-to-end workflows yang actually useful.
Sampai titik ini kalian udah bisa:
- Import data dari berbagai sources
- Enrich dengan single provider dan waterfall
- Process dengan AI columns
- Manipulate dengan formulas
Sekarang, kita build real GTM workflows dari nol.
Apa Itu Clay Workflow?
Workflow adalah rangkaian steps yang transform raw input jadi actionable output.
Anatomy sebuah workflow:
[Data Source] → [Import] → [Enrich] → [AI Process] → [Filter/Score] → [Action]
Setiap step builds on previous step. End result: data yang siap untuk action — outreach, CRM update, atau analysis.
Mindset penting:
Workflow bukan tentang individual features. Workflow tentang solving business problem dengan combining features.
Jangan mikir "saya mau pakai waterfall enrichment". Mikir "saya mau dapat 200 qualified prospects dengan personalized messaging siap kirim dalam 2 jam". Terus backward engineer apa yang dibutuhkan.
Workflow 1: Outbound Prospecting Engine
Business Problem: Sales team butuh fresh prospects setiap minggu. Manual research terlalu slow. Mau sistemize prospecting.
End Goal: 150 qualified, enriched prospects dengan personalized openers, ready untuk outreach.
Let's build step-by-step.
Step 1: Define Target Companies
Mulai dengan criteria. Siapa ideal customers kalian?
Example criteria:
- Industry: SaaS / Software
- Company size: 50-500 employees
- Location: Southeast Asia
- Signals: Recently raised funding OR hiring aggressively
Di Clay:
- Create new table: "Outbound Prospecting - [Date]"
- Use "Find Companies" feature
- Set filters sesuai criteria
- Add 200 companies (buffer untuk filtering later)
Step 2: Enrich Company Data
Sebelum find people, enrich company info dulu.
Add columns:
- Company enrichment (waterfall) → industry, size, description, funding
- Tech stack enrichment → technologies they use
This helps dengan:
- Better filtering
- Context untuk personalization later
Step 3: Filter Companies
Nggak semua 200 companies bakal fit. Filter.
Add formula column: "ICP Fit"
IF(AND(@Employee_Count >= 50, @Employee_Count <= 500, NOT(ISBLANK(@Industry))), "Fit", "No Fit")
Filter view untuk show only "Fit" companies. Let's say 180 remain.
Step 4: Find Decision Makers
Now find people at these companies.
Add "Find People" enrichment:
- Job titles: "Head of Marketing", "VP Marketing", "Marketing Director", "CMO"
- Seniority: Director and above
Result: 250-400 contacts across 180 companies.
Step 5: Enrich Person Data
Setup waterfall enrichment untuk contacts:
- Email (Apollo → Hunter → Clearbit)
- LinkedIn URL
- Phone (optional: Lusha → Apollo)
Run enrichment. Expect 75-85% coverage on emails.
Step 6: Add AI Personalization
This is where magic happens.
AI Column 1: Company One-Liner
Write one sentence about what @Company_Name does based on: @Company_Description
Keep under 15 words. Factual, not salesy.
AI Column 2: Personalized Opener
Write a cold email opening line for @Full_Name, @Job_Title at @Company_Name.

Context:
- Company does: @Company_One_Liner
- Industry: @Industry
- Company size: @Employee_Count employees

Requirements:
- Under 20 words
- Reference something specific
- No generic phrases
- Professional but human

Output only the opening line.
AI Column 3: Relevance Angle
Based on @Job_Title at a @Industry company with @Employee_Count employees,
what's likely their biggest challenge that our marketing automation tool could solve?

Output: One sentence describing their likely pain point.
Step 7: Score and Prioritize
Add AI column for scoring:
Score this prospect 1-10 for our marketing automation SaaS:

- Name: @Full_Name
- Title: @Job_Title
- Company size: @Employee_Count
- Has email: @Email (blank or filled)
- Has phone: @Phone (blank or filled)

Criteria:
- 9-10: Decision maker, right size, full contact info
- 7-8: Good title, decent company, has email
- 5-6: Relevant but missing key info
- Below 5: Poor fit

Output: [Score]/10
Add formula to extract just score:
VALUE(LEFT(@Score_Column, 1))
Step 8: Final Filter and Export
Create filtered view:
- Score >= 7
- Email is not blank
- Personalized opener is not blank
This gives you final list. Let's say 150 qualified prospects.
Step 9: Prepare for Outreach
Option A: Export to CSV
- Select columns needed: Name, Email, Company, Title, Opener, Pain Point
- Export
- Import ke outreach tool (Lemlist, Instantly, etc.)
Option B: Direct Integration
- If Clay connected to outreach tool
- Push directly dengan mapped fields
Workflow Complete!
From zero to 150 qualified, personalized prospects. What would take days manually = few hours dengan Clay.
Summary Table:
| Step | Action | Output |
|---|---|---|
| 1 | Find companies | 200 companies |
| 2 | Enrich companies | Company data filled |
| 3 | Filter ICP | 180 fit companies |
| 4 | Find people | 350 contacts |
| 5 | Enrich people | 280 dengan emails |
| 6 | AI personalize | Custom content each |
| 7 | Score | Prioritized list |
| 8 | Final filter | 150 top prospects |
| 9 | Export | Ready for outreach |
Workflow 2: Inbound Lead Enrichment
Business Problem: Leads masuk dari website forms, webinars, content downloads. Data minimal. Tim sales nggak tau siapa mereka, waste time on unqualified leads.
End Goal: Every inbound lead automatically enriched, qualified, dan routed dalam minutes.
Step-by-Step Build:
Step 1: Setup Data Input
Leads bisa masuk dari:
- Website form → Webhook ke Clay
- HubSpot → Native integration
- CSV upload → Batch process
For real-time processing, webhook paling powerful.
Setup webhook:
- Create table dengan expected columns: Email, Name (optional), Source
- Get webhook URL dari Clay
- Configure form tool untuk send submissions ke webhook
Step 2: Auto-Trigger Enrichment
Setup enrichment yang auto-run on new rows.
Add columns:
- Person enrichment dari @Email → name, title, LinkedIn
- Company enrichment dari email domain → company name, size, industry
Pro tip: Extract domain first dengan formula:
SPLIT(@Email, "@")[1]
Then enrich company from domain.
Step 3: AI Qualification
Add AI column untuk assess fit:
Assess this inbound lead for our B2B software product:

Lead info:
- Email: @Email
- Name: @Full_Name
- Title: @Job_Title
- Company: @Company_Name
- Company size: @Employee_Count
- Industry: @Industry

Our ideal customer:
- B2B companies
- 50-1000 employees
- Marketing, Sales, or Ops roles

Output format:
QUALIFICATION: [Hot / Warm / Cold / Unqualified]
REASON: [One sentence]
SUGGESTED ACTION: [Immediate call / Email sequence / Nurture / Disqualify]
Step 4: Add Routing Logic
Formula column untuk route:
IF(@Qualification = "Hot", "Assign to Senior AE",
   IF(@Qualification = "Warm", "Assign to SDR",
      IF(@Qualification = "Cold", "Add to nurture", "Do not contact")))
Step 5: Create Alert for Hot Leads
Integration dengan Slack atau email:
- When new row added
- If Qualification = "Hot"
- Send alert dengan lead details
This ensures hot leads get immediate attention.
Step 6: Push to CRM
Setup integration ke HubSpot/Salesforce:
- Auto-create contact dengan enriched fields
- Set lead score berdasarkan qualification
- Set lifecycle stage
- Assign owner berdasarkan routing
Workflow Result:
Lead fills form (0:00)
     ↓
Webhook to Clay (0:01)
     ↓
Auto-enrich person + company (0:02-0:03)
     ↓
AI qualification (0:04)
     ↓
Route + alert if hot (0:05)
     ↓
Push to CRM (0:06)
     ↓
Sales notified, full context ready (< 1 minute total)
Manual equivalent? 15-30 minutes per lead. With Clay? Under 1 minute, automated.
Workflow 3: Account Research untuk ABM
Business Problem: Sales mau do account-based approach untuk 50 high-value targets. Need deep research tapi no time untuk manual research on each.
End Goal: Comprehensive account intelligence package untuk setiap target, dengan key contacts identified.
Step-by-Step Build:
Step 1: Import Target Account List
Start dengan table of target companies:
- Company names atau domains
- Bisa dari sales team, CRM export, atau manually curated
Example: 50 target accounts.
Step 2: Deep Company Enrichment
This time, go deeper than basic enrichment.
Columns to add:
- Basic company info (name, industry, size, location)
- Funding history (Crunchbase enrichment)
- Tech stack (BuiltWith enrichment)
- Recent news (news enrichment jika available)
- LinkedIn company page
Step 3: Find Buying Committee
For ABM, kalian butuh multiple contacts per account.
Add multiple "Find People" enrichments:
- Marketing leadership: "VP Marketing", "CMO", "Head of Marketing"
- Sales leadership: "VP Sales", "CRO", "Head of Sales"
- Operations: "VP Operations", "COO", "Head of Ops"
- Technical: "CTO", "VP Engineering" (if relevant)
Result: 5-10 contacts per account.
Step 4: Enrich All Contacts
Waterfall enrichment for each contact:
- Phone (jika budget allows)
Step 5: AI-Generated Account Brief
For each company, generate summary:
Create an account brief for @Company_Name for our sales team.

Company info:
- Industry: @Industry
- Size: @Employee_Count employees
- Location: @HQ_Location
- Description: @Company_Description
- Tech stack: @Technologies
- Recent funding: @Funding_Info

Generate:
1. COMPANY OVERVIEW (2 sentences)
2. WHY THEY MIGHT NEED US (1-2 sentences based on their profile)
3. POTENTIAL CHALLENGES (2-3 bullet points)
4. CONVERSATION STARTERS (2-3 relevant topics to discuss)

Keep total output under 150 words.
Step 6: Contact-Specific Insights
For each contact, add AI column:
Generate talking points for meeting with @Full_Name, @Job_Title at @Company_Name.

Their likely priorities based on role and company stage.
Their potential concerns about solutions like ours.
One specific question to ask them.

Output as 3 bullet points, 1 sentence each.
Step 7: Organize Output
Create views:
- By company (see all contacts under each account)
- By role (see all CMOs, all VPs Sales, etc.)
- By priority (if kalian scored accounts)
Step 8: Export Account Packages
Option A: Export per account
- Filter by company
- Export dengan all contacts and briefs
Option B: Master spreadsheet
- All accounts, all contacts
- Formatted untuk sales team reference
Option C: Push to CRM
- Create company records
- Create contacts under companies
- Add research notes ke CRM fields
Workflow Result:
For each of 50 accounts:
- Full company intelligence
- 5-10 key contacts with full profiles
- AI-generated account brief
- Contact-specific talking points
- Ready for strategic outreach
Manual research time per account: 1-2 hours Clay workflow: 15-20 minutes setup, then automated processing
50 accounts × 1.5 hours = 75 hours saved.
Integration dengan Tools Lain
Clay powerful sendiri, tapi lebih powerful ketika connected ke tools lain.
CRM Integration (HubSpot, Salesforce)
Push enriched data ke CRM:
- Auto-create contacts
- Update existing records
- Sync scores dan qualifications
- Add enrichment data sebagai properties
Setup:
- Connect CRM di Clay integrations
- Map Clay columns ke CRM fields
- Set trigger: push on new row atau on filter match
- Test dengan few records first
Outreach Tools (Lemlist, Instantly, Outreach.io)
Push ready-to-contact lists:
- Prospects dengan emails
- Include personalized fields
- Map ke outreach variables
Setup:
- Connect outreach tool atau export CSV
- Map: Email, Name, Company, Personalized fields
- Import ke outreach campaign
- Use personalization tokens
Zapier/Make Integration
For tools tanpa native Clay integration:
- Clay webhook out → Zapier → Other tool
- Other tool → Zapier → Clay webhook in
Possibilities:
- New deal closed in CRM → trigger enrichment of similar companies
- New competitor mention → add to Clay for research
- And more
Slack Notifications
Real-time alerts:
- Hot lead masuk → Slack notification to sales
- Big company sign up → Alert to leadership
- Score above threshold → Ping AE
Google Sheets Sync
For teams yang prefer spreadsheets:
- Two-way sync Clay ↔ Google Sheets
- Collaborate on data
- Run enrichment from Clay, view in Sheets
Automating Workflows (Claymations)
For workflows yang perlu jalan recurring atau triggered.
Scheduled Runs:
- Weekly prospecting refresh
- Daily inbound processing
- Monthly database cleanup
Trigger-Based:
- New row added → run enrichment sequence
- Field updated → recalculate score
- Score threshold → push to CRM
Setup varies by Clay plan dan interface. Check Clay docs for current automation capabilities.
Optimization Tips
1. Start Simple, Then Iterate
Don't build 15-step workflow on day one. Start dengan:
- Basic import
- Single enrichment
- Simple output
Then add complexity incrementally. Easier to debug.
2. Validate Each Step
Before adding next step, verify current step works:
- Data flowing correctly?
- Enrichment coverage acceptable?
- AI outputs make sense?
Broken step early = broken everything downstream.
3. Monitor Credit Usage
Complex workflows eat credits fast. Track:
- Credits per run
- Credits per record
- ROI (value generated vs credits spent)
Optimize high-credit steps kalau ROI nggak make sense.
4. Document Your Workflows
Future you (or teammates) will thank you.
Document:
- Purpose of workflow
- Each step and why
- Expected inputs/outputs
- How to troubleshoot common issues
5. Create Templates
If kalian run similar workflows often:
- Save as template
- Duplicate dan modify
- Share dengan team
6. Regular Maintenance
Workflows bisa "rot":
- Providers change
- AI prompts need tuning
- Criteria become outdated
Schedule monthly review untuk ensure workflows still performing.
Hands-On Exercise: Build Your Own Workflow
Option A: Mini Outbound Workflow
Build simplified version of Workflow 1:
- Find 20 companies dengan criteria kalian pilih
- Find 1-2 contacts per company
- Enrich dengan email
- Add AI personalized opener
- Add simple score
- Export top 10
Total time: 30-45 minutes
Option B: Mini Inbound Workflow
Build simplified version of Workflow 2:
- Create table dengan 10 sample "leads" (manually add)
- Setup enrichment untuk auto-fill dari email
- Add AI qualification
- Add routing formula
- Create filtered views by qualification
Total time: 20-30 minutes
Option C: Design Your Own
Think about a real problem kalian face:
- What data do you start with?
- What do you need to know?
- What's the end action?
Design workflow to solve it. Build in Clay.
Final Checklist: Clay Intermediate Level Complete
Congratulations untuk sampai di sini! Let's verify kalian've mastered intermediate Clay:
Data Import ✓
- [ ] Can import dari CSV, copy-paste, atau integration
- [ ] Understand data hygiene best practices
- [ ] Know when to use which import method
Basic Enrichment ✓
- [ ] Can setup person enrichment dari email
- [ ] Can setup company enrichment dari domain
- [ ] Understand coverage rates dan expectations
Waterfall Enrichment ✓
- [ ] Can setup waterfall dengan multiple providers
- [ ] Improved coverage vs single provider
- [ ] Understand cost vs coverage tradeoff
AI Columns ✓
- [ ] Can write effective prompts
- [ ] Generated personalized content at scale
- [ ] Know prompt engineering basics
Formula Columns ✓
- [ ] Can create basic formulas
- [ ] Can combine data dari multiple columns
- [ ] Can create conditional logic
Complete Workflows ✓
- [ ] Built at least one end-to-end workflow
- [ ] Can connect multiple features together
- [ ] Understand integration options
Mindset ✓
- [ ] Think workflow first, features second
- [ ] Always test before scaling
- [ ] Monitor credits dan optimize
Penutup
Kalian udah cover a lot of ground.
Dari "apa itu Clay" sampai building complete GTM workflows. Dari confused dengan interface sampai confidently setup waterfalls dan AI columns.
Ini bukan end — ini foundation.
What's Next untuk Kalian:
Practice
- Build more workflows
- Experiment dengan different use cases
- Break things dan learn dari fixing them
Go Deeper
- Clay API untuk custom integrations
- Advanced Claymation automations
- Complex multi-table workflows
Apply to Real Work
- Identify real problems di job kalian
- Build Clay solutions
- Measure impact
Build Services
- Clay skills sangat marketable
- Freelance Clay setup untuk clients
- Add ke portfolio
Join Community
- Clay community active dan helpful
- Learn dari others' workflows
- Share what u hve built
Clay adalah salah satu tools paling powerful di GTM stack modern. Dan sekarang kalian bisa use it.
Yang bedain kalian dari orang yang cuma "tau Clay" adalah kalian udah actually build things. Udah enriched real data. Udah written prompts that work. Udah troubleshoot issues.
That's practical knowledge yang nggak bisa di-fake.
Sekarang go build something useful. And welcome to the world of GTM Engineering.
🚀

.png)