Dua bulan lalu, saya kedatangan seorang student untuk private class vibe coding.
Sebut saja namanya Budi — junior developer dengan sekitar 1 tahun pengalaman, mostly di HTML, CSS, dan sedikit JavaScript. Dia baru saja discover vibe coding setelah lihat video-video di YouTube tentang "build website dalam 30 menit dengan AI".
Excited-nya luar biasa.
"Mas Angga, saya mau build portfolio website yang keren. Ada blog, ada project showcase, dark mode, animasi, contact form yang connect ke email. Kalau pakai AI kan cepet ya? Mungkin weekend ini selesai!"
Saya senyum. Bukan senyum meremehkan — tapi senyum "I've seen this before".
Satu minggu kemudian, Budi chat saya lagi:
"Mas, saya stuck. Code-nya berantakan, banyak error yang gak ngerti, mau nambahin fitur malah rusak yang lain. Ini vibe coding-nya kok gak se-smooth di video ya? 😭"
Sound familiar?
Perkenalan Dulu
Hai! Saya Angga Risky Setiawan, AI Product Engineer dan Founder BuildWithAngga.
Selain menjalankan platform edukasi dengan 900.000+ students, saya juga aktif mengajar private class — terutama untuk vibe coding dan AI-powered development. Di private class inilah saya melihat pattern yang sama berulang: kesalahan yang sama, dilakukan oleh orang yang berbeda.
Budi bukan satu-satunya. Hampir setiap student private class yang baru mulai vibe coding melakukan kesalahan serupa. Dan honestly, saya sendiri juga pernah melakukan beberapa di antaranya ketika pertama kali explore vibe coding.
Bedanya: saya sudah belajar dari kesalahan itu. Dan sekarang saya mau share pembelajaran tersebut ke kamu.
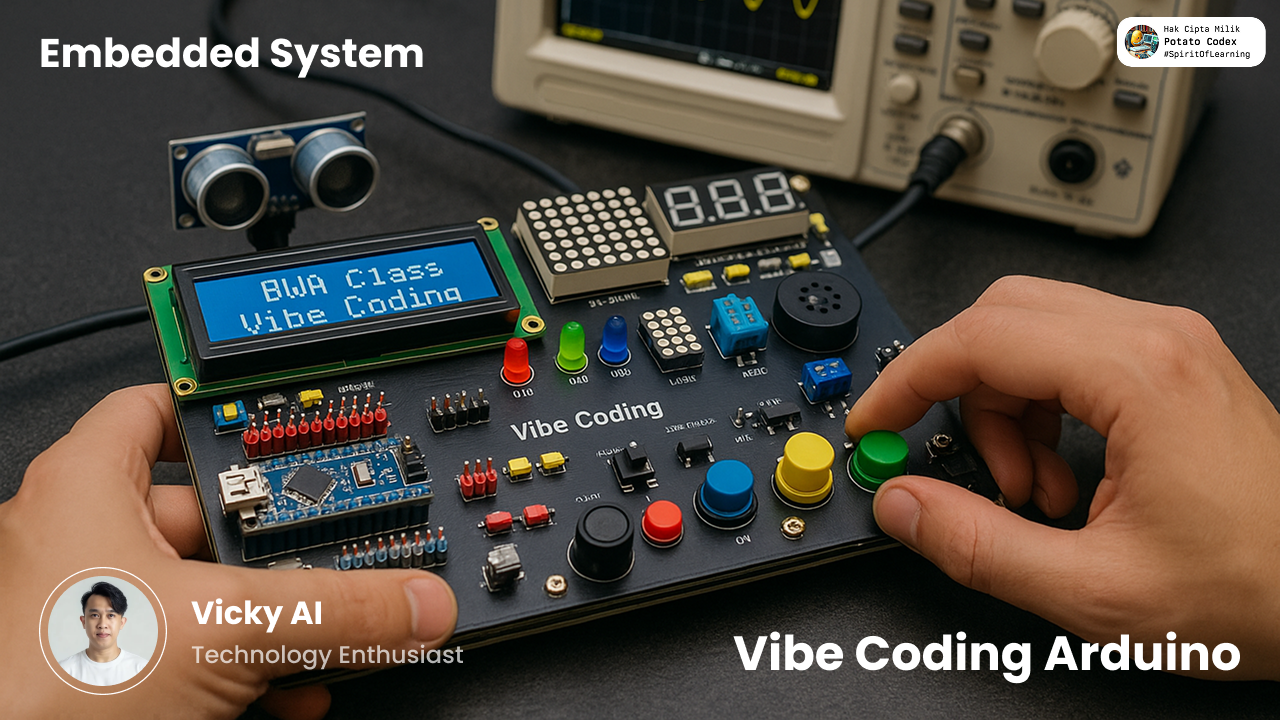
Apa Itu Vibe Coding?
Sebelum kita masuk ke kesalahan-kesalahannya, let's align dulu tentang apa itu vibe coding.
VIBE CODING EXPLAINED:

Vibe coding adalah cara membangun software dengan bantuan AI,
di mana kamu mendeskripsikan apa yang mau dibuat dalam bahasa
natural, dan AI membantu generate code-nya.

Tools yang biasa dipakai:
├── Cursor (AI-powered code editor)
├── Claude / ChatGPT (untuk conversation dan code generation)
├── GitHub Copilot (inline suggestions)
├── v0, Bolt, Lovable (untuk UI generation)
└── Dan berbagai AI tools lainnya

BUKAN berarti:
├── ❌ AI yang coding, kamu cuma nonton
├── ❌ Copy-paste tanpa understand
├── ❌ Gak perlu skill programming
└── ❌ Bisa bikin apa aja dalam 5 menit

YANG BENAR:
├── ✅ Collaboration antara kamu dan AI
├── ✅ Kamu tetap perlu understand code
├── ✅ AI accelerate, bukan replace skill
└── ✅ Masih butuh planning, debugging, testing
Vibe coding itu powerful — kalau dilakukan dengan benar. Masalahnya, banyak pemula yang salah approach dan akhirnya frustrated.
Kenapa Artikel Ini Penting
PATTERN YANG SAYA LIHAT:

Student baru discover vibe coding
            ↓
Excited! "AI bisa bikin semua!"
            ↓
Jump in tanpa guidance
            ↓
Make common mistakes
            ↓
Frustrated, stuck, want to give up
            ↓
"Vibe coding gak works untuk saya"

PADAHAL:

Masalahnya bukan di vibe coding-nya
Masalahnya di APPROACH-nya
Artikel ini adalah compilation dari 10 kesalahan paling umum yang saya lihat dari students private class — terutama dari perjalanan Budi. Setiap kesalahan akan saya jelaskan dengan:
- Cerita kasus — Apa yang terjadi pada Budi
- Kenapa ini masalah — Konsekuensi dari kesalahan ini
- Perbandingan — Table yang compare wrong vs right approach
- Solusi praktis — Step-by-step cara yang benar
- Contoh prompt — Bad prompt vs good prompt
- Key takeaway — Satu kalimat untuk diingat
Siapa Budi?
Untuk context, berikut profile Budi (dengan izin beliau untuk di-share sebagai pembelajaran):
| Aspect | Detail |
|---|---|
| Background | Junior developer, 1 tahun experience |
| Skills | HTML, CSS, JavaScript dasar |
| Goal | Build portfolio website dengan fitur lengkap |
| Tools | Cursor + Claude |
| Timeframe | Awalnya target 1 weekend 😅 |
| Reality | 3 minggu dengan banyak revision |
Budi bukan orang bodoh. Dia motivated, mau belajar, dan technically capable. Kesalahan yang dia buat bukan karena kurang pintar — tapi karena kurang guidance tentang cara yang benar untuk vibe coding.
Dan itu exactly kenapa saya tulis artikel ini.
Let's dive in ke kesalahan pertama.
Kesalahan 1: Langsung Coding Tanpa Planning
🎬 Cerita Kasus
Hari pertama private class, Budi langsung buka Cursor dengan semangat membara.
"Oke Mas, saya langsung mulai ya!"
Sebelum saya sempat bilang apa-apa, dia sudah ketik prompt:
"Buatkan portfolio website lengkap dengan homepage yang ada hero section
dengan animasi, about page dengan timeline experience, projects page dengan
grid layout dan filter by category, blog dengan MDX support, contact form
yang kirim email, dark mode toggle, responsive untuk semua device, navbar
yang sticky saat scroll, footer dengan social links, dan SEO yang bagus."
AI generate ratusan baris code.
Budi excited: "Wah banyak banget! Keren!"
Dia jalankan. Sebagian works, sebagian error. Dia fix error satu, muncul error lain. Dia tambahin fitur, fitur lain rusak.
Dua hari kemudian:
"Mas, code saya udah kayak spaghetti. Mau nambahin apa aja jadi ribet. Saya gak tau lagi structure-nya gimana. Kayaknya harus start over deh..."
Dan memang harus start over.
❌ Kenapa Ini Masalah
TANPA PLANNING, YANG TERJADI:

1. AI GAK PUNYA BIG PICTURE
   ├── Setiap response isolated
   ├── Gak ada architectural vision
   └── Components gak cohesive

2. KAMU GAK PUNYA ROADMAP
   ├── Gak tau urutan yang logical
   ├── Gak tau dependencies
   └── Gak tau scope yang realistic

3. TECHNICAL DEBT DARI HARI 1
   ├── Structure berantakan
   ├── Naming inconsistent
   └── Patterns gak uniform

4. HARDER TO FIX LATER
   ├── Refactoring massive codebase = nightmare
   ├── Gak tau mana yang bisa dibuang
   └── Semuanya interconnected in wrong ways
Analogi: Ini seperti bangun rumah tanpa blueprint. Kamu langsung pasang bata, bikin kamar, eh ternyata gak ada space untuk toilet. Tambah toilet, eh pintu depan kehalangan. Ujung-ujungnya harus bongkar dan mulai ulang.
📊 Perbandingan: Planning vs No Planning
| Aspect | ❌ Tanpa Planning | ✅ Dengan Planning |
|---|---|---|
| Day 1-2 | Feels very productive | Feels "slow" |
| Day 3-4 | Start seeing conflicts | Building on solid foundation |
| Week 1 | Chaos, multiple rewrites | Steady progress |
| Week 2 | Considering start over | Adding features smoothly |
| Final code | Spaghetti, unmaintainable | Clean, organized |
| Total time | 3x longer than expected | On schedule |
| Learning | Frustrated, confused | Confident, structured |
✅ Solusi: Planning Framework
Sebelum nulis satu baris code, spend minimal 30-60 menit untuk planning:
PLANNING FRAMEWORK:
STEP 1: DEFINE SCOPE
├── List semua features yang mau dibuat
├── Prioritize: Must have vs Nice to have
└── Be realistic dengan timeline
STEP 2: CHOOSE TECH STACK
├── Framework: Next.js? React? Astro?
├── Styling: Tailwind? CSS Modules? Styled-components?
├── Language: TypeScript? JavaScript?
└── Other tools: Database? Auth? etc.
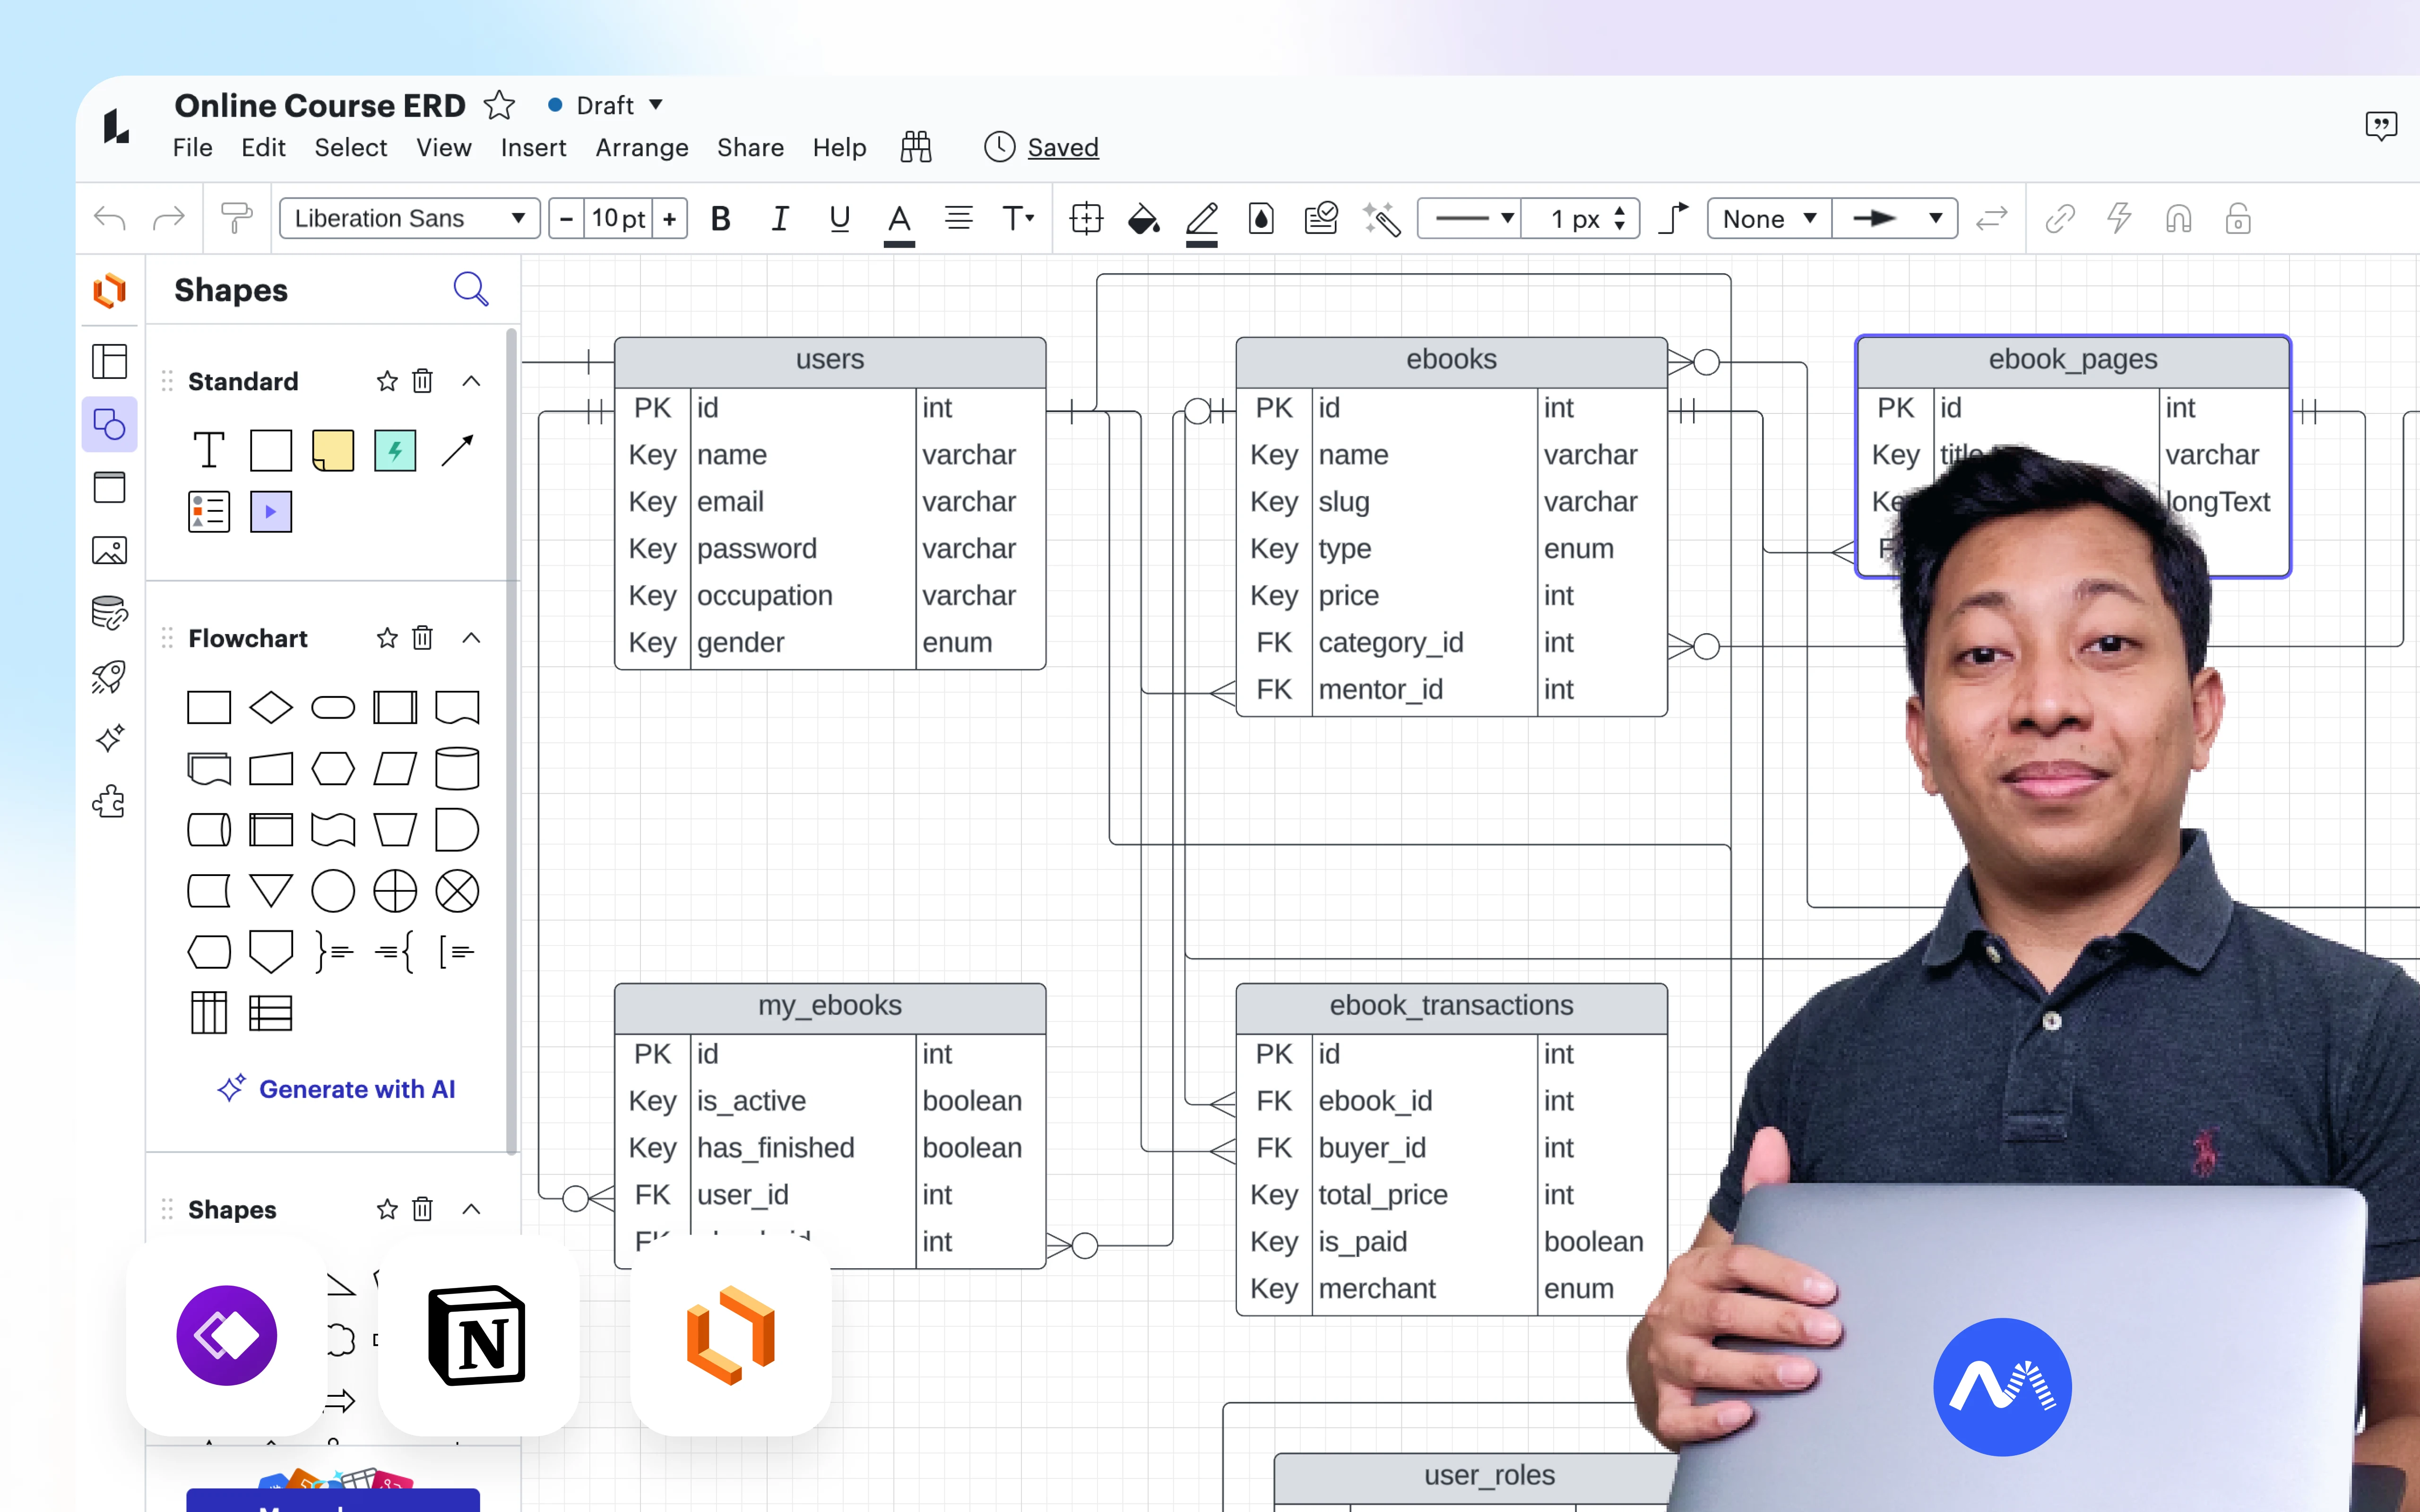
STEP 3: SKETCH ARCHITECTURE
├── Pages/routes apa saja
├── Shared components apa
├── Data flow gimana
└── Third-party integrations apa
STEP 4: FILE/FOLDER STRUCTURE
├── Tentukan di awal
├── Follow conventions (Next.js, etc)
├── Plan for scalability
└── Document the structure
STEP 5: COMPONENT BREAKDOWN
├── List semua components
├── Identify reusable vs specific
├── Define props/interfaces
└── Sketch relationships
STEP 6: DEVELOPMENT ORDER
├── Foundation first (layout, navigation)
├── Core features next
├── Polish last
└── Plan testing points
💬 Contoh Prompt: Planning dengan AI
❌ BAD — Langsung minta code:
Buatkan portfolio website lengkap dengan homepage, about, projects,
blog, contact, dark mode, responsive, SEO...
✅ GOOD — Minta planning dulu:
Saya mau build portfolio website dengan fitur:
- Homepage dengan hero section
- About page dengan experience timeline
- Projects page dengan grid dan filter
- Blog dengan MDX support
- Contact form
- Dark mode toggle
- Responsive design

Tech stack: Next.js 14 App Router, TypeScript, Tailwind CSS

SEBELUM generate code, tolong bantu saya:

1. Buat file/folder structure yang optimal dan scalable
2. List semua components yang akan dibutuhkan
3. Categorize components: layout, ui, sections, features
4. Suggest urutan development yang logical (apa dulu, apa nanti)
5. Identify potential challenges atau decisions yang perlu dibuat

Jangan generate code dulu. Fokus ke planning dan architecture.
📝 Contoh Output Planning
FOLDER STRUCTURE:
─────────────────
/src
├── /app
│   ├── layout.tsx
│   ├── page.tsx (homepage)
│   ├── /about
│   │   └── page.tsx
│   ├── /projects
│   │   └── page.tsx
│   ├── /blog
│   │   ├── page.tsx
│   │   └── /[slug]
│   │       └── page.tsx
│   └── /contact
│       └── page.tsx
├── /components
│   ├── /layout
│   │   ├── Navbar.tsx
│   │   ├── Footer.tsx
│   │   └── Container.tsx
│   ├── /ui
│   │   ├── Button.tsx
│   │   ├── Card.tsx
│   │   ├── Input.tsx
│   │   └── ThemeToggle.tsx
│   └── /sections
│       ├── Hero.tsx
│       ├── FeaturedProjects.tsx
│       └── ContactForm.tsx
├── /lib
│   ├── utils.ts
│   └── constants.ts
├── /hooks
│   └── useTheme.ts
└── /types
    └── index.ts

DEVELOPMENT ORDER:
──────────────────
Phase 1 - Foundation (Day 1-2):
├── Setup project dengan Next.js
├── Configure Tailwind
├── Create basic layout (Navbar, Footer)
├── Implement dark mode infrastructure
└── Create base UI components (Button, Card)

Phase 2 - Core Pages (Day 3-5):
├── Homepage dengan Hero
├── About page
├── Projects page dengan grid
└── Contact page dengan form

Phase 3 - Blog (Day 6-7):
├── Blog listing page
├── Blog detail dengan MDX
└── Related posts

Phase 4 - Polish (Day 8-10):
├── Animations
├── SEO optimization
├── Responsive fine-tuning
└── Testing
Dengan planning seperti ini, kamu punya roadmap yang jelas. Setiap kali minta AI generate code, kamu tau exactly di mana itu akan fit dalam bigger picture.
💡 Key Takeaway
"Plan for 1 hour, save 10 hours of confusion."
Waktu yang kamu spend untuk planning akan terbayar berkali lipat. Blueprint dulu, baru bangun.
Kesalahan 2: Prompt Terlalu Panjang dan Kompleks
🎬 Cerita Kasus
Setelah belajar pentingnya planning, Budi mulai lagi. Tapi sekarang dia punya "strategy" baru:
"Mas, saya tulis prompt yang super detail supaya AI langsung paham semua!"
Promptnya kurang lebih seperti ini (dan ini baru untuk satu component):
"Buatkan Navbar component yang responsive dengan logo di kiri yang clickable
ke homepage, lalu di tengah ada menu items yaitu Home, About, Projects dengan
dropdown yang isinya Web Projects dan Mobile Projects dan UI Design, lalu Blog,
dan Contact. Di kanan ada search icon yang kalau di-click muncul search bar
dengan animation slide down, terus ada dark mode toggle yang smooth transition
dan simpan preference ke localStorage, dan ada button CTA 'Hire Me' warna biru
dengan hover effect scale up. Untuk mobile harus ada hamburger menu yang kalau
di-click muncul full screen overlay dengan menu items ditampilkan vertical dengan
animation stagger, dan close button di pojok kanan atas. Navbar harus sticky
saat scroll tapi hide saat scroll down dan show saat scroll up, dengan shadow
yang muncul setelah scroll lebih dari 50px. Oh iya pakai TypeScript dan Tailwind
dan harus accessible dengan proper ARIA labels dan keyboard navigation dan
focus states yang visible."
Satu prompt. Satu paragraph. 15+ requirements.
AI generate code panjang. Budi implement. Hasilnya?
- Dropdown works, tapi styling off
- Dark mode toggle gak save ke localStorage
- Mobile menu animation gak stagger
- Scroll behavior buggy
- Accessibility incomplete
Budi frustrated: "AI-nya gak bener! Padahal udah saya jelasin detail banget!"
❌ Kenapa Ini Masalah
PROBLEM DENGAN MEGA PROMPTS:

1. AI ATTENTION GETS DILUTED
   ├── Context window besar, tapi attention gak merata
   ├── Earlier requirements dapat lebih "attention"
   ├── Later requirements sering missed atau incomplete
   └── Quality menurun seiring complexity naik

2. HARDER TO VERIFY
   ├── Output massive, hard to review
   ├── Gak tau mana yang benar, mana yang salah
   ├── Bugs tersembunyi di kedalaman code
   └── Debugging jadi nightmare

3. HARDER TO ITERATE
   ├── Mau fix satu bagian → affect bagian lain
   ├── Gak bisa isolate problems
   ├── Setiap iteration = regenerate everything
   └── Wasted tokens dan time

4. KAMU JUGA OVERWHELMED
   ├── Terlalu banyak moving parts
   ├── Hard to keep track
   ├── Easy to miss things
   └── Mental load tinggi
Analogi: Ini seperti minta teman tolong belanja 20 item sekaligus tanpa list tertulis. Pasti ada yang kelupaan, ada yang salah, ada yang gak sesuai. Lebih baik kasih list satu-satu, atau kelompokkan.
📊 Perbandingan: Prompt Size vs Quality
| Prompt Size | Requirements | AI Focus | Output Quality | Debug Ease |
|---|---|---|---|---|
| Short (1-2 items) | 1-2 | Highly focused | ✅ Excellent | Easy |
| Medium (3-5 items) | 3-5 | Good | ✅ Good | Manageable |
| Long (6-10 items) | 6-10 | Diluted | ⚠️ Inconsistent | Hard |
| Mega (10+ items) | 10+ | Lost | ❌ Poor | Nightmare |
✅ Solusi: Chunking Prompts
Principle: One task, one prompt. Build incrementally.
CHUNKING STRATEGY:

INSTEAD OF:
┌─────────────────────────────────────┐
│ One mega prompt dengan              │
│ 15+ requirements                    │
│                                     │
│ ──► Overwhelming, inconsistent      │
└─────────────────────────────────────┘

DO THIS:
┌─────────────┐     ┌─────────────┐     ┌─────────────┐
│ Prompt 1    │ ──► │ Prompt 2    │ ──► │ Prompt 3    │
│ Basic       │     │ Add feature │     │ Add feature │
│ structure   │     │ A           │     │ B           │
│             │     │             │     │             │
│ ✓ Verify    │     │ ✓ Verify    │     │ ✓ Verify    │
└─────────────┘     └─────────────┘     └─────────────┘
                           │
                           ▼
                    And so on...
💬 Contoh Prompt: Mega vs Chunked
❌ BAD — Mega Prompt:
Buatkan Navbar component yang responsive dengan logo di kiri yang clickable
ke homepage, lalu di tengah ada menu items yaitu Home, About, Projects dengan
dropdown yang isinya Web Projects dan Mobile Projects dan UI Design, lalu Blog,
dan Contact. Di kanan ada search icon yang kalau di-click muncul search bar
dengan animation slide down, terus ada dark mode toggle yang smooth transition
dan simpan preference ke localStorage, dan ada button CTA 'Hire Me' warna biru...
[continues for 200+ more words]
✅ GOOD — Chunked Prompts:
Prompt 1: Basic Structure
Buatkan Navbar component dengan struktur dasar:
- Logo di kiri (link ke homepage)
- Menu items di tengah: Home, About, Projects, Blog, Contact
- Mobile hamburger menu
- Sticky position

Tech: Next.js 14, TypeScript, Tailwind CSS
Style: Clean, modern, height 64px

Fokus ke structure dan basic responsive dulu.
Kita akan add features di prompt selanjutnya.
Verify → Works? Lanjut.
Prompt 2: Add Dropdown
Navbar basic sudah jadi. Sekarang tambahkan:
- Dropdown untuk menu "Projects"
- Dropdown items: Web Projects, Mobile Projects, UI Design
- Smooth animation saat open/close
- Close saat click outside

Jangan ubah structure yang sudah ada, hanya add dropdown feature.
Verify → Works? Lanjut.
Prompt 3: Mobile Menu
Sekarang improve mobile menu:
- Full screen overlay saat open
- Menu items tampil vertical dengan stagger animation
- Close button di pojok kanan atas
- Prevent body scroll saat menu open

Pastikan tetap compatible dengan dropdown yang sudah dibuat.
Verify → Works? Lanjut.
Prompt 4: Dark Mode Toggle
Tambahkan dark mode toggle di navbar:
- Position: di kanan, sebelum CTA button
- Icon: sun/moon
- Smooth transition saat switch
- Save preference ke localStorage
- Load saved preference saat initial render
Verify → Works? Lanjut.
Prompt 5: Polish
Final polish untuk navbar:
- Add CTA button "Hire Me" di kanan
- Scroll behavior: show shadow setelah scroll 50px
- Accessibility: ARIA labels, keyboard navigation, focus visible
- Pastikan semua features tetap working together
📊 Pros/Cons Comparison
| Approach | Pros | Cons |
|---|---|---|
| Mega Prompt | Feels faster initially | Quality inconsistent, hard to debug, frustrating iterations |
| Chunked Prompts | High quality, easy to debug, satisfying progress | Feels slower (but actually faster overall) |
📝 Contoh: Mana yang Lebih Efisien?
MEGA PROMPT TIMELINE:
─────────────────────
10:00 - Write mega prompt (15 min)
10:15 - AI generates (2 min)
10:17 - Review, find 5 issues (15 min)
10:32 - Ask AI to fix issues (5 min)
10:37 - New issues muncul (10 min debugging)
10:47 - Another fix attempt (5 min)
10:52 - Still broken, frustrated (10 min)
11:02 - Decide to start over 😭

Total: 1 hour+, still not done

CHUNKED PROMPTS TIMELINE:
─────────────────────────
10:00 - Prompt 1: Basic structure (3 min)
10:03 - Verify, works ✓ (2 min)
10:05 - Prompt 2: Dropdown (3 min)
10:08 - Verify, small fix needed (3 min)
10:11 - Fixed ✓ (2 min)
10:13 - Prompt 3: Mobile menu (3 min)
10:16 - Verify, works ✓ (2 min)
10:18 - Prompt 4: Dark mode (3 min)
10:21 - Verify, works ✓ (2 min)
10:23 - Prompt 5: Polish (3 min)
10:26 - Final verify ✓ (3 min)

Total: ~30 minutes, DONE!
💡 Key Takeaway
"Small prompts, big results. Chunk it down."
Satu task, satu prompt. Verify setiap step. Build incrementally. Ini feels slower tapi actually much faster dan less frustrating.
Kesalahan 3: Tidak Memahami Code yang Di-generate
🎬 Cerita Kasus
Week 2 di private class. Budi sudah mulai productive — chunked prompts, proper planning. Portfolio website-nya mulai terbentuk.
Tapi saya notice satu pattern concerning.
Setiap kali AI generate code, Budi langsung copy-paste, run, dan kalau works → move on. Gak pernah baca code-nya, gak pernah try to understand.
"Yang penting jalan, Mas!"
Sampai suatu hari ada bug yang muncul. User click tombol "Load More" di projects page, dan malah trigger dark mode toggle.
Budi panik: "Mas, ini kok bisa gini? Saya gak ngubah apa-apa!"
Saya minta dia jelaskan code-nya. Dia blank.
"Saya... gak tau ini ngapain sebenernya. AI yang bikin."
Saya tanya lebih detail:
- "Ini useState buat apa?" — Gak tau
- "useEffect ini trigger kapan?" — Gak tau
- "Event handler ini di-attach ke mana?" — Gak tau
Budi gak paham code yang dia sendiri "tulis".
Dan karena gak paham, dia gak bisa debug. Gak bisa modify. Gak bisa extend. Stuck total.
❌ Kenapa Ini Masalah SERIUS
KONSEKUENSI TIDAK PAHAM CODE SENDIRI:

1. DEBUGGING IMPOSSIBLE
   ├── Gak tau apa yang code lakukan
   ├── Gak tau di mana masalahnya
   ├── Gak tau gimana cara fix
   └── 100% dependent on AI untuk setiap bug

2. EXTENDING IMPOSSIBLE
   ├── Mau tambah fitur tapi gak tau caranya
   ├── Afraid to touch existing code
   ├── Setiap addition bisa break things
   └── Codebase jadi "black box"

3. LEARNING = ZERO
   ├── Kamu gak belajar apa-apa
   ├── Skill programming gak berkembang
   ├── After months, masih gak bisa tanpa AI
   └── Valuable skill tidak ter-acquire

4. PROFESSIONAL CONSEQUENCES
   ├── Interview: "Jelaskan code ini" → 😰
   ├── Code review: Gak bisa defend decisions
   ├── Collaboration: Gak bisa explain ke team
   └── Career: Stuck di level entry

5. OWNERSHIP HILANG
   ├── Ini bukan "code kamu" kalau kamu gak paham
   ├── Kamu cuma jadi "copy-paste operator"
   └── AI bisa digantiin siapa saja
Analogi: Bayangkan kamu "nulis" essay dengan Google Translate dari bahasa yang gak kamu mengerti. Ya, essay-nya ada. Tapi kalau ditanya apa artinya, kamu gak bisa jawab. Itu bukan essay kamu — itu essay Google Translate.
📊 Understanding Levels
| Level | Description | Can Debug? | Can Extend? | Can Explain? | Acceptable? |
|---|---|---|---|---|---|
| 0 | No idea apa yang code ini lakukan | ❌ | ❌ | ❌ | ❌ No |
| 1 | Tau WHAT it does, tapi bukan HOW | ⚠️ Limited | ❌ | ⚠️ Surface | ❌ No |
| 2 | Understand logic flow | ✅ | ⚠️ Careful | ✅ Basic | ⚠️ Minimum |
| 3 | Bisa explain ke orang lain | ✅ | ✅ | ✅ Clear | ✅ Good |
| 4 | Bisa improve dan optimize | ✅ | ✅ | ✅ Deep | ✅ Excellent |
Target: Minimal Level 2 untuk setiap code yang kamu use. Ideal: Level 3.
✅ Solusi: The Explain-Before-Accept Rule
Sebelum copy-paste code apapun dari AI, minta AI explain dulu.
EXPLAIN-BEFORE-ACCEPT WORKFLOW:

STEP 1: AI generates code
         ↓
STEP 2: SEBELUM copy, minta explanation
         ↓
STEP 3: Read and understand explanation
         ↓
STEP 4: Kalau gak paham → ask follow-up questions
         ↓
STEP 5: Still gak paham → minta simpler version atau learn concept dulu
         ↓
STEP 6: BARU copy setelah understand
💬 Contoh Prompt: Meminta Penjelasan
Setelah AI generate code:
Tolong jelaskan code yang baru kamu generate:

[paste code di sini]

Yang saya butuhkan:
1. Apa yang code ini lakukan secara keseluruhan? (high-level)
2. Jelaskan bagian-bagian penting line by line
3. Kenapa kamu pilih approach ini? Ada alternatif lain?
4. Apa potential issues atau edge cases yang perlu saya aware?
5. Bagian mana yang paling likely bermasalah kalau ada bug?
📝 Contoh: Code dengan Penjelasan
AI Generated Code:
// useDebounce.ts
import { useState, useEffect } from 'react';

export function useDebounce<T>(value: T, delay: number): T {
  const [debouncedValue, setDebouncedValue] = useState<T>(value);

  useEffect(() => {
    const timer = setTimeout(() => {
      setDebouncedValue(value);
    }, delay);

    return () => {
      clearTimeout(timer);
    };
  }, [value, delay]);

  return debouncedValue;
}
Minta Penjelasan:
Jelaskan code useDebounce ini. Saya pemula dan butuh understand setiap bagian.
AI Explanation:
USEDEOUNCE HOOK EXPLANATION:

📌 APA YANG DILAKUKAN:
Debounce adalah teknik untuk "menunda" eksekusi sampai user berhenti
melakukan action selama waktu tertentu. Commonly used untuk search input —
supaya gak API call setiap keystroke.

Contoh: User ketik "react" di search box
- Tanpa debounce: API call di "r", "re", "rea", "reac", "react" (5 calls!)
- Dengan debounce 300ms: API call hanya di "react" (1 call!)

📌 LINE BY LINE:

const [debouncedValue, setDebouncedValue] = useState<T>(value);
└── State untuk simpan nilai yang sudah di-debounce
└── Initial value = value yang di-pass ke hook

useEffect(() => { ... }, [value, delay]);
└── Effect akan run setiap kali 'value' atau 'delay' berubah

const timer = setTimeout(() => { setDebouncedValue(value); }, delay);
└── Set timer: setelah 'delay' ms, update debouncedValue
└── Kalau user masih typing, timer ini akan di-cancel

return () => { clearTimeout(timer); };
└── Cleanup function: cancel timer kalau effect run ulang
└── Ini yang bikin "debounce" work — timer lama di-cancel,
    timer baru dibuat

return debouncedValue;
└── Return nilai yang sudah di-debounce

📌 FLOW EXAMPLE:
User types "abc" dengan delay 300ms:
- "a" typed → timer set for 300ms → (user types "b")
- "ab" → timer "a" cancelled, new timer for 300ms → (user types "c")
- "abc" → timer "ab" cancelled, new timer for 300ms → (user stops)
- 300ms passes → debouncedValue becomes "abc"

📌 USAGE:
const [searchTerm, setSearchTerm] = useState('');
const debouncedSearch = useDebounce(searchTerm, 300);

// API call only when debouncedSearch changes
useEffect(() => {
  if (debouncedSearch) {
    searchAPI(debouncedSearch);
  }
}, [debouncedSearch]);
Dengan explanation seperti ini, sekarang kamu own code tersebut.
📊 Practice Technique: Rubber Duck with AI
RUBBER DUCK TECHNIQUE:

Setelah dapat penjelasan, EXPLAIN BACK ke AI untuk verify understanding:

"Jadi kalau saya pahami:
1. useDebounce itu untuk delay update value
2. Setiap kali value berubah, timer di-reset
3. Cleanup function clearTimeout itu yang bikin debounce work
4. Return value adalah yang sudah di-delay

Apakah pemahaman saya benar? Ada yang kurang?"

AI akan:
├── Confirm yang benar
├── Correct yang salah
├── Add yang kurang
└── Reinforce understanding kamu
🚩 Red Flags: Kapan Harus STOP dan Learn Fundamentals
STOP VIBE CODING DULU kalau kamu:

□ Gak tau apa itu useState dan kapan pakainya
□ Gak paham useEffect dan dependency array
□ Bingung bedanya props vs state
□ Gak ngerti async/await
□ Gak bisa baca basic TypeScript types
□ Gak paham component lifecycle

BUKAN berarti kamu gak boleh vibe coding.
TAPI: Spend time learn fundamentals dulu.

Vibe coding AMPLIFY skill, bukan REPLACE skill.
Kalau fundamentals gak ada, amplify × 0 = 0.
💬 Contoh Prompt: Learning Mode
Kalau ketemu concept yang gak paham:
Saya encounter code yang pakai useEffect tapi saya gak paham
fundamentals-nya.

Tolong jelaskan useEffect dari NOL:
1. Apa itu useEffect dan kenapa ada?
2. Kapan useEffect dijalankan?
3. Apa itu dependency array dan gimana cara kerjanya?
4. Apa itu cleanup function?
5. Common mistakes yang pemula sering buat?

Jelaskan dengan analogi dan contoh sederhana.
Saya prefer understand deeply daripada cepat.
💡 Key Takeaway
"If you can't explain it, you don't own it."
Code yang kamu gak paham = bukan code kamu. Selalu minta penjelasan, selalu verify understanding. Own every line.
Lanjut ke Bagian 2: Kesalahan 4-7 →
Kesalahan 4: Mengabaikan Struktur Folder dan File
🎬 Cerita Kasus
Week 2 setengah. Budi sudah lumayan productive. Website mulai terbentuk — navbar, hero, about page, projects grid.
Saya minta dia share repository-nya untuk review. Yang saya lihat:
/src
├── page.tsx (1,847 lines)
├── components.tsx (1,203 lines)
├── styles.css (534 lines)
└── utils.ts (267 lines)
Empat file. Total hampir 4,000 baris code.
Saya buka components.tsx:
// components.tsx

export function Navbar() { /* 150 lines */ }
export function Hero() { /* 120 lines */ }
export function AboutSection() { /* 180 lines */ }
export function ProjectCard() { /* 80 lines */ }
export function ProjectGrid() { /* 200 lines */ }
export function ContactForm() { /* 250 lines */ }
export function Footer() { /* 100 lines */ }
export function Button() { /* 40 lines */ }
export function Card() { /* 60 lines */ }
// ... 8 more components
Semua components dalam SATU FILE.
"Budi, kenapa semua di satu file?"
"Biar gampang, Mas. Gak ribet pindah-pindah file. Lagian kan AI yang generate, saya tinggal scroll aja."
Tapi kemudian masalah mulai muncul:
- Scroll fatigue — Mau edit Footer harus scroll 1000+ lines
- AI confused — Context terlalu besar, AI mulai inconsistent
- Gak bisa find apa-apa — "ContactForm di line berapa ya?"
- Collaboration impossible — Kalau ada team member, pasti conflict
Dan yang paling parah: ketika Budi mau refactor, dia realize betapa terrifying-nya menyentuh file 1,800 lines yang interconnected.
"Mas, ini udah gak bisa di-maintain..."
❌ Kenapa Ini Masalah
PROBLEMS DENGAN FILE STRUCTURE BERANTAKAN:

1. NAVIGATION NIGHTMARE
   ├── Scroll ratusan/ribuan lines untuk find sesuatu
   ├── Search results overwhelming
   ├── Mental model hilang — "ini di mana ya?"
   └── Productivity drop significantly

2. AI GETS CONFUSED
   ├── Context window terisi file massive
   ├── AI kesulitan maintain consistency
   ├── Edits di satu tempat bisa affect tempat lain
   └── Generate code yang conflict

3. DEBUGGING HARDER
   ├── Bug di mana? Good luck finding it
   ├── console.log di line 847... which component?
   ├── Stack traces jadi meaningless
   └── Isolation impossible

4. COLLABORATION IMPOSSIBLE
   ├── Merge conflicts guaranteed
   ├── Two people can't work on same file
   ├── Code review = nightmare
   └── Onboarding new team member = weeks

5. REFACTORING TERRIFYING
   ├── Touching one thing might break everything
   ├── No isolation between components
   ├── Testing individual components = impossible
   └── Technical debt maximum
Analogi: Bayangkan semua baju, celana, sepatu, aksesoris kamu ditaruh di SATU lemari tanpa sekat, tanpa hanger, tanpa organisasi. Finding anything = chaos. Mau ambil kaos kaki harus bongkar semua.
📊 Perbandingan: Bad vs Good Structure
❌ BAD STRUCTURE:
/src
├── page.tsx (2000 lines - EVERYTHING)
├── components.tsx (1500 lines - all components)
├── styles.css (800 lines - all styles)
└── utils.ts (500 lines - all utilities)

Problems:
├── Giant files
├── No separation of concerns
├── Impossible to navigate
└── Can't scale
✅ GOOD STRUCTURE:
/src
├── /app
│   ├── layout.tsx
│   ├── page.tsx
│   ├── /about
│   │   └── page.tsx
│   ├── /projects
│   │   └── page.tsx
│   ├── /blog
│   │   └── page.tsx
│   └── /contact
│       └── page.tsx
├── /components
│   ├── /layout
│   │   ├── Navbar.tsx
│   │   ├── Footer.tsx
│   │   └── Container.tsx
│   ├── /ui
│   │   ├── Button.tsx
│   │   ├── Card.tsx
│   │   ├── Input.tsx
│   │   └── Modal.tsx
│   └── /sections
│       ├── Hero.tsx
│       ├── FeaturedProjects.tsx
│       └── Testimonials.tsx
├── /lib
│   ├── utils.ts
│   └── constants.ts
├── /hooks
│   ├── useDebounce.ts
│   └── useLocalStorage.ts
└── /types
    └── index.ts

Benefits:
├── Each file has one responsibility
├── Easy to find anything
├── Easy to test
├── Easy to collaborate
└── Scales beautifully
✅ Solusi: Structure-First Approach
STRUCTURE-FIRST WORKFLOW:

BEFORE writing any code:
1. Decide on folder structure
2. Create empty folders
3. Create empty files dengan nama yang jelas
4. THEN start filling with code

RULE OF THUMB:
├── One component = One file
├── File > 200 lines? Consider splitting
├── File > 500 lines? MUST split
└── Folder grouping by feature atau type
💬 Contoh Prompt: Generate Structure First
Saya mau build portfolio website dengan Next.js 14 App Router.

Pages: Home, About, Projects, Blog, Contact
Components needed:
- Layout: Navbar, Footer
- UI: Button, Card, Input, Modal
- Sections: Hero, FeaturedProjects, ContactForm

Buatkan folder/file structure yang:
1. Mengikuti Next.js 14 App Router conventions
2. One component per file
3. Logical grouping
4. Scalable untuk future

Output format: tree structure dengan penjelasan singkat per folder.
Jangan generate code dulu, hanya structure.
💬 Contoh Prompt: Refactoring Big Files
Kalau sudah terlanjur punya file besar:
File components.tsx saya sudah 1,500 lines dengan 15 components.
Ini tidak maintainable dan saya mau refactor.

Tolong bantu:
1. List semua components dalam file ini (saya paste di bawah)
2. Suggest bagaimana split ke files terpisah
3. Tentukan folder structure yang tepat
4. Generate setiap component sebagai file terpisah

Current file content:
[paste file atau describe components]

Note: Pastikan imports antar component tetap benar setelah split.
📊 Rule of Thumb: File Size
| File Size | Status | Action |
|---|---|---|
| < 100 lines | ✅ Excellent | Keep it |
| 100-200 lines | ✅ Good | Monitor |
| 200-300 lines | ⚠️ Getting big | Consider splitting |
| 300-500 lines | 🟡 Too big | Should split |
| > 500 lines | ❌ Way too big | MUST split immediately |
📝 Contoh: Splitting Component
Before (in giant components.tsx):
export function ContactForm() {
  // 250 lines of form logic, validation, submission, UI...
}
After (dedicated file):
/components
└── /sections
    └── /ContactForm
        ├── ContactForm.tsx (main component, ~80 lines)
        ├── ContactFormFields.tsx (form fields, ~60 lines)
        ├── useContactForm.ts (form logic hook, ~70 lines)
        └── contactFormSchema.ts (validation, ~40 lines)
Even better: complex component bisa di-split lagi ke sub-components.
💡 Key Takeaway
"Good structure today = maintainable code tomorrow."
Spend 10 minutes organizing now, save hours of chaos later. One component, one file. No exceptions.
Kesalahan 5: Tidak Iterative — Mau Sempurna Sekali Jadi
🎬 Cerita Kasus
Setelah disaster dengan file structure, Budi mulai lebih careful. Tapi muncul masalah baru.
Saya observe dia crafting prompt untuk Contact Form.
"Mas, bentar ya. Saya mau tulis prompt yang perfect supaya AI langsung generate yang bagus."
Dia spend 45 menit menulis prompt yang mencakup:
- Semua form fields dengan validation rules
- Error states untuk setiap field
- Loading state saat submit
- Success dan error notifications
- Email integration
- Spam protection
- Accessibility requirements
- Mobile responsiveness details
- Animation specifications
- Unit tests
Prompt-nya 600+ words. Extremely detailed.
AI generate code panjang. Budi implement.
Result:
- Form basic works ✓
- Validation ada tapi incomplete
- Error states missing beberapa
- Loading state buggy
- Email integration gak connect
- Tests gak jalan
"Loh, padahal saya udah detail banget promptnya!"
Dia frustrated. Decide to start over dengan prompt yang "lebih detail lagi".
Cycle repeats. Perfection → Disappointment → Start over → Perfection → Disappointment...
Tiga hari untuk satu Contact Form.
❌ Kenapa Ini Masalah
PERFECTIONISM TRAP:

1. IMPOSSIBLE EXPECTATIONS
   ├── AI rarely gets everything right first time
   ├── Complex features have many edge cases
   ├── Perfect prompt ≠ Perfect output
   └── You're setting yourself up for disappointment

2. WASTED EFFORT ON WRONG THINGS
   ├── 45 min crafting prompt for uncertain outcome
   ├── Details yang mungkin berubah setelah implementation
   ├── Over-specifying sebelum tau what works
   └── Premature optimization

3. NO LEARNING LOOP
   ├── Gak tau apa yang works vs doesn't
   ├── Gak bisa isolate problems
   ├── Each attempt = complete restart
   └── No incremental progress

4. DEMORALIZING
   ├── Big effort → disappointing result
   ├── Feels like failure every time
   ├── Motivation drops
   └── Want to give up
Analogi: Bayangkan sculptor yang mau carve perfect statue dalam satu cut. Gak mungkin. Sculptor work iteratively — rough shape first, then refine, then detail. Vibe coding sama: build rough first, then iterate.
📊 Perbandingan: Perfectionist vs Iterative
| Aspect | ❌ Perfectionist | ✅ Iterative |
|---|---|---|
| Prompt time | 45 min per feature | 5 min per chunk |
| First output | 60% right | 80% right |
| When issues found | Start over | Fix incrementally |
| Total time | 3 days for 1 feature | 3 hours for 1 feature |
| Emotional state | Frustrated | Satisfied |
| Learning | "AI sucks" | "I understand patterns" |
| End result | Maybe works | Definitely works |
✅ Solusi: The 70% Rule
THE 70% RULE:

INSTEAD OF aiming for 100% perfect first time:

Round 1: Aim for 70%
├── Basic structure
├── Core functionality
├── Happy path works
└── IGNORE edge cases for now

Round 2: Improve to 85%
├── Add validation
├── Handle common errors
├── Basic edge cases
└── Improve UX

Round 3: Polish to 95%
├── All edge cases
├── Error handling complete
├── Animations
├── Accessibility

Round 4: Final 95-98%
├── Testing
├── Performance
├── Final polish
└── Ship it!

NOTE: 100% doesn't exist. Ship at 95%+.
💬 Contoh Prompt: Iterative Workflow
Round 1: Basic Structure
Buatkan ContactForm component dengan:
- Fields: Name, Email, Message
- Submit button
- Basic Tailwind styling

Tech: Next.js, TypeScript, Tailwind
Simple version dulu, kita improve step by step.
Test → Works? Good. Move to Round 2.
Round 2: Add Validation
Contact Form sudah jadi basic-nya. Sekarang tambahkan:
- Required validation untuk semua fields
- Email format validation
- Error messages di bawah setiap field
- Submit button disabled kalau ada error

Jangan ubah structure yang sudah ada.
Test → Works? Good. Move to Round 3.
Round 3: States & UX
Validation sudah works. Sekarang tambahkan:
- Loading state saat submit (spinner di button)
- Success message setelah submit berhasil
- Error message kalau submit gagal
- Clear form setelah success

Keep existing validation logic.
Test → Works? Good. Move to Round 4.
Round 4: Polish
Core functionality complete. Final polish:
- Smooth transitions untuk error/success messages
- Focus management (focus ke first error)
- Accessibility: proper labels, ARIA attributes
- Mobile keyboard handling (email keyboard untuk email field)
Test → All good? Ship it!
📊 Timeline Comparison
PERFECTIONIST APPROACH:
────────────────────────
Day 1:
├── 9:00 - Start writing detailed prompt (45 min)
├── 9:45 - AI generates code (5 min)
├── 9:50 - Testing, found 8 issues (30 min)
├── 10:20 - Try to fix, more issues (1 hour)
├── 11:20 - Frustrated, decide to rewrite prompt
├── 12:00 - Lunch, still thinking about "perfect prompt"
├── 13:00 - Write even more detailed prompt (1 hour)
├── 14:00 - AI generates, still issues
├── 14:30 - Give up for the day
└── Progress: 40% done, frustrated

Day 2:
├── Continue struggle...
└── Progress: 60% done, more frustrated

Day 3:
├── Finally "works" with hacks
└── Progress: 80% done, code quality poor

Total: 3 days, questionable result

ITERATIVE APPROACH:
───────────────────
Day 1:
├── 9:00 - Round 1: Basic form (15 min)
├── 9:15 - Test, works ✓
├── 9:20 - Round 2: Validation (20 min)
├── 9:40 - Test, small fix needed (10 min)
├── 9:50 - Round 3: States & UX (20 min)
├── 10:10 - Test, works ✓
├── 10:15 - Round 4: Polish (25 min)
├── 10:40 - Final test, works ✓
├── 10:45 - Done! 🎉
└── Progress: 100% done, confident

Total: 1 hour 45 minutes, quality result
📊 Pros/Cons Analysis
| Approach | Pros | Cons |
|---|---|---|
| Perfectionist | - Feels thorough | - Rarely works<br>- Wastes time<br>- Frustrating<br>- No learning loop |
| Iterative | - Actually works<br>- Faster total time<br>- Learn what works<br>- Satisfying progress<br>- Easy to debug | - Feels slower (but isn't) |
💡 Key Takeaway
"Progress over perfection. Iterate, don't ruminate."
Build in layers. 70% → 85% → 95%. Ship, then improve. Perfection is the enemy of done.
Kesalahan 6: Skip Error Messages, Langsung Minta AI Fix
🎬 Cerita Kasus
Setelah belajar iterate, Budi jadi lebih productive. Tapi saya notice another problematic pattern.
Setiap kali muncul error di terminal atau browser, Budi langsung:
- Screenshot error
- Paste ke Claude: "Fix this"
- Apply whatever fix AI suggests
- New error muncul
- Repeat
Satu session debugging, saya hitung: 12 kali bolak-balik AI dengan pola yang sama.
"Mas, error-nya gak habis-habis. AI-nya kok gak bisa fix?"
Saya minta lihat salah satu error:
TypeError: Cannot read properties of undefined (reading 'map')
    at ProjectGrid (src/components/sections/ProjectGrid.tsx:23:18)
    at renderWithHooks (react-dom.development.js:14985:18)
    at mountIndeterminateComponent (react-dom.development.js:17811:13)
"Budi, error ini bilang apa?"
"Ummm... TypeError something..."
"Di file mana?"
"Hmm... gak tau."
"Line berapa?"
"Gak tau juga, Mas."
Dia bahkan gak baca error message-nya. Langsung screenshot → "fix this" → hope for the best.
❌ Kenapa Ini Masalah
PROBLEM DENGAN "FIX THIS" TANPA BACA:

1. ERROR MESSAGES CONTAIN VALUABLE INFO
   ├── Error TYPE → kategori masalah
   ├── Error MESSAGE → apa yang salah
   ├── FILE:LINE → exactly where to look
   ├── STACK TRACE → how we got here
   └── Sometimes even SUGGESTIONS!

2. AI WITHOUT CONTEXT = GUESSING
   ├── AI cuma lihat screenshot
   ├── Gak tau history of changes
   ├── Gak tau broader context
   ├── Sering guess wrong
   └── Fix satu masalah, create another

3. YOU DON'T LEARN
   ├── Same errors akan muncul lagi
   ├── Kamu gak build pattern recognition
   ├── Forever dependent on AI untuk setiap error
   └── Never develop debugging skill

4. TIME WASTED ON WRONG FIXES
   ├── AI kasih fix untuk symptom, bukan root cause
   ├── Error "hilang" tapi problem tetap ada
   ├── Problem muncul lagi di tempat lain
   └── Cycle repeats
Analogi: Bayangkan ke dokter dengan sakit kepala, tapi kamu tutup mata dan cuma bilang "sakit, fix this" tanpa jelasin di mana sakitnya, udah berapa lama, sakit kayak gimana. Dokter bisa kasih obat, tapi mungkin salah diagnosa.
📊 Error Message Anatomy
TypeError: Cannot read properties of undefined (reading 'map')
    at ProjectGrid (src/components/sections/ProjectGrid.tsx:23:18)
    at renderWithHooks (react-dom.development.js:14985:18)

BREAKDOWN:
──────────

TypeError
└── Error TYPE: Trying to do operation on wrong type

Cannot read properties of undefined (reading 'map')
└── Error MESSAGE: Trying to call .map() on something that is undefined

src/components/sections/ProjectGrid.tsx:23:18
└── LOCATION: File ProjectGrid.tsx, line 23, column 18

at renderWithHooks...
└── STACK TRACE: Error happened during React render
📊 Common Errors Table
| Error | Biasanya Artinya | First Check |
|---|---|---|
Cannot read properties of undefined | Variable undefined saat diakses | Cek apakah variable ada nilainya |
Module not found | Import path salah | Cek spelling dan path |
Unexpected token | Syntax error | Cek typos di file yang disebutkan |
Hydration mismatch | Server/client render beda | Cek conditional rendering |
404 Not Found | Route gak exist | Cek routing dan file names |
Type error (TypeScript) | Type gak match | Cek types yang expected vs actual |
Unhandled Promise Rejection | Async error gak di-catch | Tambahkan try-catch |
✅ Solusi: READ → UNDERSTAND → THEN Ask
PROPER DEBUGGING FLOW:

Step 1: READ the error completely
        ├── Jangan cuma glance
        ├── Read every line
        └── Note the file and line number

Step 2: IDENTIFY key parts
        ├── What type of error?
        ├── What's the message saying?
        ├── Where exactly? (file, line)
        └── Any suggestions?

Step 3: GO to the location
        ├── Open the file mentioned
        ├── Go to exact line number
        └── Look at the code

Step 4: TRY to understand
        ├── What is this code trying to do?
        ├── What could cause this error?
        ├── Recent changes yang mungkin related?
        └── Google the error message

Step 5: THEN ask AI WITH context
        ├── Include full error message
        ├── Include relevant code
        ├── Include what you've tried/observed
        └── Ask specific questions
💬 Contoh Prompt: Bad vs Good
❌ BAD:
[screenshot of error]
Fix this
✅ GOOD:
Saya dapat error ini:

TypeError: Cannot read properties of undefined (reading 'map')
at ProjectGrid (src/components/sections/ProjectGrid.tsx:23:18)

CONTEXT:
- ProjectGrid component menerima `projects` dari parent via props
- Error terjadi saat page pertama kali load
- Kalau saya refresh, kadang works kadang error

CODE YANG RELEVANT (line 23):
{projects.map(project => (
  <ProjectCard key={project.id} project={project} />
))}

YANG SUDAH SAYA COBA:
- Cek parent component, sepertinya data di-fetch async
- Console.log projects: pertama undefined, lalu ada data

ANALISIS SAYA:
Sepertinya `projects` undefined saat initial render karena data
belum selesai di-fetch. Tapi saya gak yakin cara fix yang proper.

PERTANYAAN:
1. Apakah analisis saya benar?
2. Apa best practice untuk handle undefined props yang async?
3. Bagaimana prevent error serupa di masa depan?
📝 Contoh: Learning from Error
Error:
Error: Hydration failed because the initial UI does not match
what was rendered on the server.
Instead of "fix this", LEARN:
Saya dapat Hydration error di Next.js. Sebelum minta fix,
saya mau understand dulu.

Tolong jelaskan:
1. Apa itu Hydration di React/Next.js?
2. Kenapa mismatch antara server dan client bisa terjadi?
3. Common causes dari error ini?
4. Bagaimana cara debug untuk find source of mismatch?

Setelah saya paham, baru saya akan share specific case saya.
📊 Debugging Checklist
Sebelum ask AI untuk fix, pastikan sudah:
PRE-AI DEBUGGING CHECKLIST:

□ Did I read the FULL error message?
□ Did I identify the file and line number?
□ Did I go to that location and look at the code?
□ Did I try to understand what the code is doing?
□ Did I Google the error message?
□ Did I check recent changes (git diff)?
□ Did I try console.log to trace the issue?
□ Did I spend at least 10-15 minutes trying myself?

If all checked and still stuck → Ask AI WITH all this context
💡 Key Takeaway
"Error messages are your friend. Read them first."
Setiap error adalah clue. Baca, pahami, investigate, THEN ask AI dengan context. You'll learn faster dan fix better.
Kesalahan 7: Tidak Version Control (Git)
🎬 Cerita Kasus
Day 5. Portfolio website Budi sudah lumayan bagus — navbar done, hero done, about page done, projects grid working.
"Mas, website udah 70% nih! Besok saya mau tambahin animations."
Day 6. Budi excited experiment dengan Framer Motion untuk animations.
Tapi something went wrong.
"Mas... SOS... website saya rusak total. Semua page error. Saya gak tau kenapa."
"Coba rollback ke kemarin."
"Rollback gimana?"
"Git checkout ke commit sebelumnya."
"...Saya gak pakai Git, Mas."
Silence.
No Git = No backup = No history = No undo.
Budi spend 2 hari trying to remember dan recreate what was working. Banyak yang hilang. Progress mundur significantly.
"Ini pelajaran paling mahal selama belajar coding, Mas."
❌ Kenapa Ini CRITICAL
TANPA GIT:

1. NO UNDO BUTTON
   ├── Code rusak? Good luck
   ├── Deleted something? Gone forever
   ├── No way to go back
   └── Recreate from memory? Almost impossible

2. AI EXPERIMENTS ARE RISKY
   ├── Vibe coding = lots of experiments
   ├── Experiments often break things
   ├── Without Git, every experiment is gamble
   └── One wrong move = disaster

3. NO HISTORY
   ├── "What did I change?" → No idea
   ├── "When did this break?" → No idea
   ├── "What was working before?" → No idea
   └── Debugging tanpa context

4. COLLABORATION IMPOSSIBLE
   ├── Can't share code properly
   ├── Can't work dengan team
   ├── Can't contribute to open source
   └── Can't show code di interview

5. DEPLOYMENT BLOCKED
   ├── Most hosting requires Git
   ├── Vercel, Netlify, Railway = Git-based
   ├── CI/CD = Git-based
   └── Professional workflow = Git-based
Analogi: Coding tanpa Git seperti nulis dokumen penting tanpa Ctrl+S dan tanpa versioning. One power outage atau one mistake = everything gone.
📊 Perbandingan: With vs Without Git
| Scenario | ❌ Without Git | ✅ With Git |
|---|---|---|
| Code rusak | Panic, recreate manually | git checkout . |
| Experiment gagal | Stuck dengan broken code | git checkout main |
| "What changed?" | No idea | git diff |
| "Who changed?" | No idea | git blame |
| Team collaboration | Send files via email? | Push/Pull |
| Want to try risky change | Scared | Branch, try safely |
| Deployment | FTP? Manual copy? | CI/CD pipeline |
| Show code to others | Zip file? | GitHub link |
✅ Solusi: Git Basics for Vibe Coding
Kamu gak perlu master Git. Cukup tau 6 commands ini:
# SETUP (sekali di awal project)
git init                    # Start tracking project
git add .                   # Stage semua files
git commit -m "Initial"     # Save checkpoint

# DAILY USAGE
git add .                   # Stage changes
git commit -m "message"     # Save checkpoint
git status                  # Check what changed

# SAFETY NET
git checkout .              # Undo uncommitted changes
git checkout main           # Go back to main branch
git log --oneline           # See history

# BONUS: BRANCHING (untuk experiments)
git checkout -b experiment  # Create new branch
# ... do risky stuff ...
git checkout main           # Back to safety if needed
git merge experiment        # Merge if it worked
📝 Vibe Coding Git Workflow
RECOMMENDED WORKFLOW:

SEBELUM MULAI CODING:
git init
git add .
git commit -m "Initial setup"

SETIAP SELESAI SATU FEATURE:
git add .
git commit -m "Add navbar component"

SEBELUM EXPERIMENT RISKY:
git checkout -b experiment/framer-motion
# ... experiment ...
# If works:
git checkout main
git merge experiment/framer-motion
# If broken:
git checkout main  # Safe!

SETIAP HARI SEBELUM TUTUP LAPTOP:
git add .
git commit -m "WIP: progress hari ini"
💬 Contoh Prompt: Git Setup Help
Saya baru setup project Next.js dan mau mulai pakai Git.

Tolong buatkan:
1. File .gitignore yang proper untuk Next.js project
2. Initial commit workflow
3. Commit message convention yang simple tapi descriptive
4. Branching strategy sederhana untuk solo developer

Saya pemula dengan Git, jadi jelaskan dengan simple.
📊 Commit Message Convention
| Prefix | Kapan Pakai | Contoh |
|---|---|---|
feat: | New feature | feat: add contact form |
fix: | Bug fix | fix: navbar mobile menu |
style: | Styling changes | style: improve button hover |
refactor: | Code restructure | refactor: split components |
docs: | Documentation | docs: update README |
chore: | Maintenance | chore: update dependencies |
wip: | Work in progress | wip: working on blog |
📝 Contoh: Recovery dengan Git
# Situation: Kamu experiment dan semuanya rusak

# Check status
git status
# "Modified: 15 files"

# See what changed
git diff
# "Oh no, semua berubah"

# Option 1: Undo EVERYTHING (uncommitted changes)
git checkout .
# Back to last commit!

# Option 2: Undo specific file
git checkout -- src/components/Navbar.tsx
# Just navbar back to last commit

# Option 3: See history dan go back further
git log --oneline
# a1b2c3d feat: add navbar (2 hours ago)
# x4y5z6 feat: add hero (yesterday)

git checkout a1b2c3d
# Now at "add navbar" state
📊 Git Commands Cheatsheet
ESSENTIAL (Wajib tau):
──────────────────────
git init              → Start tracking
git add .             → Stage all changes
git commit -m "msg"   → Save checkpoint
git status            → What changed?
git checkout .        → Undo all uncommitted
git log --oneline     → See history

USEFUL (Bagus untuk tau):
─────────────────────────
git diff              → See exact changes
git checkout -- file  → Undo specific file
git branch            → List branches
git checkout -b name  → Create new branch
git checkout main     → Switch to main
git merge branch      → Merge branch

REMOTE (Untuk GitHub):
──────────────────────
git remote add origin url  → Connect to GitHub
git push -u origin main    → Push to GitHub
git pull                   → Get latest from GitHub
💡 Key Takeaway
"No Git = No safety net. Commit early, commit often."
Git adalah insurance policy untuk code kamu. 5 menit setup bisa save days of work. Never code without it.
Kesalahan 8: Prompt Tanpa Context yang Cukup
🎬 Cerita Kasus
Week 3. Budi sudah pakai Git, sudah iterate properly, sudah baca error messages. Great progress!
Tapi masih ada satu pattern yang bikin dia frustrated.
"Mas, kok AI sering generate code yang gak sesuai ya? Padahal prompt saya udah jelas."
Saya minta lihat contoh prompt-nya:
Buatkan button component
AI generate button... dengan vanilla CSS. Padahal project Budi pakai Tailwind.
Prompt lain:
Buatkan card untuk project
AI generate card... dengan style yang completely different dari components yang sudah ada. Inconsistent dengan design system yang sudah dibangun.
Another one:
Buatkan navbar dropdown
AI generate dropdown... tapi pakai library yang gak ada di project, dengan patterns yang beda dari navbar yang existing.
"Kenapa AI-nya gak tau saya pakai Tailwind? Kenapa style-nya beda-beda?"
"Budi, AI gak bisa baca pikiran. AI juga gak bisa lihat project kamu. Kalau kamu gak kasih context, AI akan assume."
"Oh... jadi saya harus kasih tau semuanya?"
"Yang relevant, iya."
❌ Kenapa Ini Masalah
TANPA CONTEXT, AI AKAN:

1. ASSUME TECH STACK
   ├── Mungkin pakai CSS biasa instead of Tailwind
   ├── Mungkin pakai JavaScript instead of TypeScript
   ├── Mungkin pakai patterns yang gak sesuai framework
   └── You'll spend time fixing/converting

2. ASSUME DESIGN STYLE
   ├── Generate dengan style AI's "default"
   ├── Inconsistent dengan existing components
   ├── Colors, spacing, typography semua beda
   └── You'll have to restyle everything

3. ASSUME STRUCTURE
   ├── File placement yang gak sesuai convention
   ├── Import patterns yang beda
   ├── Naming conventions berbeda
   └── You'll have to restructure

4. ASSUME REQUIREMENTS
   ├── Features yang mungkin gak kamu mau
   ├── Missing features yang kamu expect
   ├── Different behavior dari intended
   └── Frustrating back-and-forth
Analogi: Minta desainer bikin logo tanpa kasih tau nama perusahaan, industri, target market, warna preference, style preference. Pasti hasilnya gak sesuai expectation.
📊 Context Elements Table
| Context Type | Example | Why Important |
|---|---|---|
| Tech Stack | Next.js 14, TypeScript, Tailwind | Correct syntax dan patterns |
| Design Style | Minimalist, monochrome, rounded corners | Visual consistency |
| Existing Code | "Button component sudah ada, style seperti ini" | Component consistency |
| Constraints | Mobile-first, max 500 lines, accessible | Requirements met |
| Reference | "Like Stripe's pricing cards" | Clearer expectations |
| Project Context | "Portfolio website untuk designer" | Appropriate tone/style |
📊 Context Level vs Output Quality
| Level | Context Given | AI Accuracy | Revisions Needed |
|---|---|---|---|
| None | "Buatkan X" | ~30% match | Many |
| Basic | + tech stack | ~50% match | Several |
| Good | + design style | ~70% match | Few |
| Great | + existing code reference | ~85% match | Minor |
| Excellent | + visual reference | ~95% match | Minimal |
✅ Solusi: Context Template
Buat template yang bisa kamu copy-paste ke setiap prompt:
CONTEXT TEMPLATE:
─────────────────

PROJECT CONTEXT:
- Project: [nama project dan deskripsi singkat]
- Tech: [framework, language, styling]
- Design: [style keywords, color scheme]

EXISTING COMPONENTS:
- [list components yang related]
- [atau note kalau ini component pertama]

SPECIFIC CONTEXT:
- [constraints atau requirements specific]
- [reference jika ada]

TASK:
[actual request kamu]
💬 Contoh Prompt: Bad vs Good
❌ BAD (No context):
Buatkan button component
⚠️ OKAY (Basic context):
Buatkan button component dengan React dan Tailwind CSS
✅ GOOD (Rich context):
PROJECT CONTEXT:
- Project: Portfolio website untuk UI designer
- Tech: Next.js 14, TypeScript, Tailwind CSS
- Design: Minimalist, monochrome (black/white) dengan
  accent color blue-500, rounded-lg corners, subtle shadows

EXISTING COMPONENTS:
- Card component: bg-white rounded-lg shadow-sm p-6
- Input component: border border-gray-200 rounded-lg px-4 py-2

TASK:
Buatkan Button component dengan:
- Variants: primary (filled), secondary (outline), ghost (text only)
- Sizes: sm, md, lg
- States: default, hover, active, disabled, loading
- Props: variant, size, disabled, loading, children, onClick

Style harus consistent dengan existing components.
Include TypeScript types.
✅✅ EXCELLENT (With visual reference):
[same as above, plus:]

REFERENCE:
Style mirip button di Linear.app — clean, subtle hover effect,
smooth transitions.
📝 Pro Tip: Project Context File
Untuk project yang ongoing, buat file PROJECT_CONTEXT.md:
# Project Context for AI

## Overview
Portfolio website untuk Budi, Junior Developer yang mau showcase projects.

## Tech Stack
- Framework: Next.js 14 (App Router)
- Language: TypeScript (strict mode)
- Styling: Tailwind CSS
- Icons: Lucide React
- Animations: Framer Motion

## Design System
- Colors:
  - Primary: slate-900 (text), white (bg)
  - Accent: blue-500
  - Gray scale: slate-100 to slate-900
- Border radius: rounded-lg (8px)
- Shadows: shadow-sm for cards
- Spacing: 4px base unit (p-4 = 16px)
- Font: Inter (sans-serif)

## Component Patterns
- All components use TypeScript with explicit types
- Props interface named [Component]Props
- Use cn() helper for conditional classes
- Client components marked with 'use client'

## Existing Components
- Button: variants (primary, secondary, ghost), sizes (sm, md, lg)
- Card: bg-white rounded-lg shadow-sm overflow-hidden
- Input: border border-slate-200 rounded-lg focus:ring-2
- Container: max-w-6xl mx-auto px-4

## File Structure
/components
├── /ui (reusable primitives)
├── /layout (navbar, footer, etc)
└── /sections (page sections)
Setiap kali mulai conversation baru, paste relevant part dari file ini.
💬 Contoh Prompt: Using Context File
[paste PROJECT_CONTEXT.md atau relevant sections]

---

TASK:
Berdasarkan context di atas, buatkan ProjectCard component:
- Display: thumbnail, title, description, tags, link
- Hover effect: subtle scale dan shadow increase
- Responsive: full width on mobile, grid on desktop

Follow existing patterns dan design system.
📊 Before/After Results
WITHOUT CONTEXT:
────────────────
Prompt: "Buatkan project card"

AI Output:
- Uses CSS modules (wrong styling)
- Blue gradient background (wrong design)
- No TypeScript (wrong language)
- Different border radius (inconsistent)
- 30+ minutes fixing to match project

WITH CONTEXT:
─────────────
Prompt: [with full context]

AI Output:
- Uses Tailwind CSS ✓
- Matches color scheme ✓
- TypeScript with proper types ✓
- Consistent border radius ✓
- 5 minutes minor tweaks
💡 Key Takeaway
"More context = less revision. Front-load the details."
AI gak bisa baca pikiran. Every assumption AI makes is probably wrong. Give context, save time.
Kesalahan 9: Terlalu Bergantung pada AI untuk Debugging
🎬 Cerita Kasus
Week 4. Budi sudah jauh lebih baik. Tapi saya notice satu hal yang concerning untuk long-term growth-nya.
Setiap kali ada bug, workflow-nya:
- Error muncul
- Copy error ke AI
- AI kasih fix
- Apply fix
- Another error
- Repeat
Dia SELALU langsung ke AI. Gak pernah coba sendiri dulu.
"Mas, ini lebih efisien kan? Daripada saya struggle sendiri, mending langsung tanya AI."
Fast forward 3 bulan kemudian, Budi chat saya:
"Mas, saya interview kemarin. Dikasih live coding test, debug simple issue. Saya blank. Gak ada AI, saya gak bisa apa-apa. Gagal interview. 😢"
This is the danger.
Ketika kamu selalu rely on AI untuk debugging, kamu gak develop the skill yourself. Dan debugging adalah core skill yang employers test.
❌ Kenapa Ini Masalah SERIUS
CONSEQUENCES OF AI-ONLY DEBUGGING:

1. SKILL DOESN'T DEVELOP
   ├── Debugging = learned skill
   ├── Need practice to improve
   ├── AI shortcuts this learning
   └── After months, still can't debug alone

2. INTERVIEW FAILURES
   ├── Live coding = no AI allowed
   ├── Debugging questions common
   ├── "Walk me through how you'd debug this"
   ├── Can't fake this skill
   └── Career limiter

3. COMPLEX BUGS NEED HUMAN
   ├── AI good untuk common bugs
   ├── Complex bugs need understanding
   ├── Need to trace, investigate, reason
   └── AI often gives wrong fixes for complex issues

4. ENVIRONMENT DEPENDENCY
   ├── AI might not be available
   ├── Company might restrict AI tools
   ├── Working offline?
   └── What do you do?

5. NEVER TRULY UNDERSTAND CODEBASE
   ├── Debugging = learning codebase
   ├── When you debug, you understand flow
   ├── Skip debugging = skip understanding
   └── Always surface-level knowledge
Analogi: Bayangkan belajar matematika tapi setiap soal langsung lihat kunci jawaban. Ya, PR selesai. Tapi saat ujian tanpa kunci jawaban? Blank.
📊 Debugging Dependency Spectrum
| Approach | Short-term | Long-term | Skill Growth | Interview Ready? |
|---|---|---|---|---|
| AI Only | Fast | Stuck | ❌ None | ❌ No |
| Self Only | Slow | Capable | ⚠️ Good but inefficient | ✅ Yes |
| Balanced | Medium | Capable | ✅ Optimal | ✅ Yes |
✅ Solusi: The 15-Minute Rule
THE 15-MINUTE RULE:

Bug muncul
    ↓
Set timer 15 menit
    ↓
TRY TO SOLVE YOURSELF:
├── Read error message completely
├── Check file/line mentioned
├── Console.log to trace
├── Google the error
├── Check recent changes (git diff)
├── Try to understand WHY
└── Attempt a fix
    ↓
Timer selesai dan masih stuck?
    ↓
NOW ask AI — WITH all the context kamu gathered

WHY 15 MINUTES:
├── Forces you to actually try
├── Builds debugging muscle
├── Often you'll solve it yourself
├── If not, you have good context for AI
└── Either way, you learned something
📝 Debugging Skills to Develop
| Skill | Description | How to Practice |
|---|---|---|
| Read errors | Extract info dari error messages | Every error = study it |
| Console.log | Trace data flow dan execution | Add logs, observe, learn |
| Binary search | Narrow down where bug is | Comment out code, test |
| Rubber duck | Explain problem aloud | Talk through the issue |
| Git bisect | Find which commit broke things | Use git history |
| Google-fu | Find answers effectively | Practice search queries |
| Dev tools | Browser debugging tools | Explore Network, Console tabs |
💬 Contoh Prompt: Learning-focused Debugging
❌ BAD (Lazy):
[error screenshot]
Fix this
✅ GOOD (Learning-focused):
Error: Cannot read properties of undefined (reading 'title')
at ProjectCard (ProjectCard.tsx:15)

WHAT I TRIED:
1. Console.log the `project` prop → first render is undefined
2. Check parent component → data comes from async fetch
3. Tried adding optional chaining → error gone but card empty

MY HYPOTHESIS:
Component renders before data loads. Optional chaining fixes
error but doesn't fix the empty state issue.

QUESTIONS:
1. Is my understanding correct?
2. What's the best pattern to handle async data di React?
3. Should I use loading state? Conditional render? Suspense?
4. Explain WHY the solution works, not just HOW to implement it
📝 Debugging Checklist
Sebelum ask AI, check semua ini dulu:
DEBUGGING CHECKLIST:
────────────────────

□ Read the FULL error message
□ Identify error type dan message
□ Go to file:line yang disebutkan
□ Understand what the code is trying to do
□ Add console.log before dan after problematic line
□ Check nilai variables yang terlibat
□ Google the exact error message
□ Check recent git changes
□ Try to reproduce consistently
□ Attempt at least one fix yourself
□ Spent at least 15 minutes

ALL CHECKED → Now ask AI with context
📊 Example: Building Debug Muscle
SCENARIO: Button click gak working

AI-ONLY APPROACH:
─────────────────
"Button gak works. Fix."
AI: "Add onClick handler"
Apply fix... still gak works.
"Still gak works"
AI: "Check event propagation"
Apply fix... still issues.
Repeat 10x, frustrated.

BALANCED APPROACH:
──────────────────
1. Inspect button di browser DevTools
2. Notice: onClick ada di DOM ✓
3. Add console.log in handler → gak ke-trigger
4. Check: ada element lain di atas button?
5. Found: invisible overlay blocking clicks!
6. Solved in 5 minutes, LEARNED something

NEXT TIME similar issue, you'll check overlays first.
📊 When to Use AI vs Self
| Situation | Try Self First | Go to AI |
|---|---|---|
| Common error message | 10 min | After 10 min |
| Logic bug | 15-20 min | After 20 min |
| New concept/pattern | Quick research | For learning |
| Same bug 3rd time | You should know! | Only if truly stuck |
| Time-critical fix | 5 min | After 5 min |
| Learning opportunity | Always try first | For verification |
💡 Key Takeaway
"Debug yourself first. AI is coach, not crutch."
15 minutes of struggle = months of skill building. AI should augment your debugging, not replace it.
Kesalahan 10: Tidak Testing Secara Berkala
🎬 Cerita Kasus
Final week of private class. Budi sudah avoid semua kesalahan sebelumnya. Website hampir selesai.
"Mas, tinggal polishing aja. Saya mau test semuanya di akhir sebelum deploy."
"Kamu belum test sama sekali?"
"Belum, Mas. Saya fokus build dulu. Test-nya nanti kalau semua feature udah jadi."
🚩 Red flag.
Budi spend seminggu building without testing. Semua features "selesai".
Day of testing:
"Mas... saya nemu 23 bugs."
Problems:
- Navbar dropdown gak nutup kalau click outside
- Mobile menu conflict dengan scroll behavior
- Contact form validation gak show errors
- Dark mode gak persist after refresh
- Projects filter gak reset properly
- Blog page error kalau gak ada posts
- Image loading broken di Safari
- Dan 16 lainnya...
Some bugs were in code dari 2 weeks ago. Finding root cause = nightmare karena banyak code yang sudah dibangun di atas buggy foundation.
"Kalau saya test dari awal, pasti gak se-chaos ini ya, Mas?"
"Exactly."
❌ Kenapa Ini Masalah
PROBLEMS WITH "TEST LATER":

1. BUGS ACCUMULATE
   ├── Week 1 bug still there di Week 3
   ├── Built features ON TOP of buggy code
   ├── Foundation shaky
   └── Everything interconnected wrongly

2. ROOT CAUSE HARDER TO FIND
   ├── "When did this break?" → weeks ago
   ├── "What change caused it?" → hundreds of changes
   ├── Git history too long to bisect easily
   └── Hours of investigation

3. CASCADE EFFECTS
   ├── Fixing bug A breaks feature B
   ├── Because B was built assuming A's buggy behavior
   ├── "Fixed" something and now 3 things broken
   └── Whack-a-mole

4. DEMORALIZING
   ├── "I'm done!" → "I have 23 bugs"
   ├── Expected celebration → got debugging marathon
   ├── Motivation crashes
   └── Feels like starting over

5. DEADLINE MISSED
   ├── Expected: "Ready to deploy!"
   ├── Reality: "2 more weeks of bug fixing"
   └── Scope creep dari bug fixes
Analogi: Build 10-floor building, THEN check if foundation is level. If not? You can't fix foundation without affecting all 10 floors. Versus: check level after each floor, fix immediately when small.
📊 Test Frequency Impact
| Test Frequency | Bugs Found Per Session | Time to Fix Each | Total Pain |
|---|---|---|---|
| After each feature | 1-2 bugs | Minutes | 😊 Minimal |
| Daily | 3-5 bugs | ~30 min | 😐 Manageable |
| Weekly | 10-15 bugs | Hours | 😰 Stressful |
| At the end | 20-30+ bugs | Days | 😭 Nightmare |
✅ Solusi: Test-As-You-Go
TEST-AS-YOU-GO WORKFLOW:

After EVERY component/feature:

1. VISUAL CHECK
   └── Does it look right?

2. FUNCTIONAL CHECK
   └── Does it do what it should?

3. EDGE CASES
   ├── Empty state?
   ├── Loading state?
   ├── Error state?
   ├── Too much data?
   └── No data?

4. RESPONSIVE CHECK
   ├── Mobile (375px)
   ├── Tablet (768px)
   └── Desktop (1024px+)

5. CONSOLE CHECK
   └── Any errors or warnings?

ONLY move to next feature after current one passes all checks.
📝 Testing Checklist (Per Component)
COMPONENT TESTING CHECKLIST:
────────────────────────────

VISUAL:
□ Looks correct on desktop
□ Looks correct on tablet
□ Looks correct on mobile
□ Matches design/expectation
□ Consistent dengan komponen lain

FUNCTIONAL:
□ Main functionality works
□ Click handlers work
□ Form submissions work
□ Navigation works
□ Animations smooth

STATES:
□ Default state correct
□ Hover state works
□ Active/pressed state works
□ Disabled state works
□ Loading state shows properly
□ Error state displays correctly
□ Empty state handled
□ Success state shows

EDGE CASES:
□ Works dengan no data
□ Works dengan lots of data
□ Works dengan special characters
□ Works dengan very long text
□ Works dengan very short text

TECHNICAL:
□ No console errors
□ No console warnings
□ No network errors
□ Performance acceptable
□ No memory leaks obvious

ACCESSIBILITY:
□ Keyboard navigable
□ Focus states visible
□ Screen reader friendly (basic)
□ Color contrast okay
💬 Contoh Prompt: Generate Test Cases
Saya baru selesai build ContactForm component dengan:
- Fields: name (required), email (required, must be valid), message (required, min 10 chars)
- Submit button dengan loading state
- Success/error messages

Tolong buatkan comprehensive test checklist:
1. Happy path test cases
2. Validation test cases
3. Edge cases
4. State transitions
5. Common bugs untuk form yang harus saya cek

Format sebagai checklist yang bisa saya centang.
📝 Contoh: AI-Generated Test Cases
CONTACT FORM TEST CASES:
════════════════════════

HAPPY PATH:
□ Fill all fields correctly → submit → success message appears
□ Form clears after successful submission
□ Can submit another form after success

VALIDATION - EMPTY FIELDS:
□ Submit empty form → all 3 error messages show
□ Fill name only → email dan message error show
□ Fill name + email → only message error shows
□ Fix all errors → errors disappear

VALIDATION - INVALID DATA:
□ Invalid email "test" → email error shows
□ Invalid email "test@" → email error shows
□ Invalid email "test@test" → should this pass?
□ Message < 10 chars → message error shows
□ Message exactly 10 chars → should pass

EDGE CASES:
□ Very long name (100+ chars) → handled gracefully?
□ Name with special chars (é, ü, 中文) → works?
□ Email with + sign ([email protected]) → works?
□ Message with HTML tags → escaped properly?
□ Paste very long text → truncated or error?

STATE TRANSITIONS:
□ Click submit → button shows loading state
□ During loading → form inputs disabled
□ During loading → can't submit again
□ After success → loading stops, success shows
□ After error → loading stops, error shows, can retry

RAPID ACTIONS:
□ Double-click submit → only one submission
□ Click submit, immediately click again → handled
□ Type fast during submission → no issues

BROWSER/DEVICE:
□ Works on Chrome
□ Works on Firefox
□ Works on Safari
□ Works on mobile Chrome
□ Works on mobile Safari
□ Keyboard (Tab, Enter) works properly
📊 Browser DevTools for Testing
DEVTOOLS TESTING HABIT:
───────────────────────

CONSOLE TAB:
├── Check for red errors
├── Check for yellow warnings
├── Look for failed assertions
└── Add your own console.logs

NETWORK TAB:
├── Check API calls succeed (200)
├── Look for failed requests (4xx, 5xx)
├── Check response data is correct
└── Monitor loading times

RESPONSIVE MODE:
├── Test 375px (mobile)
├── Test 768px (tablet)
├── Test 1024px (desktop)
├── Test 1440px (large desktop)
└── Check all breakpoints

LIGHTHOUSE:
├── Performance score
├── Accessibility score
├── Best practices score
└── SEO score

BUILD THIS HABIT:
After each feature, spend 2 minutes in DevTools checking these.
💡 Key Takeaway
"Test early, test often. Future you says thanks."
2 minutes of testing after each feature = hours saved at the end. Find bugs when they're small.
Closing: Transformasi Budi
Dua Bulan Kemudian
Budi chat saya setelah 2 bulan selesai private class:
"Mas Angga, saya mau share progress. Portfolio website udah launch! 🚀 Dan lebih penting, saya sekarang comfortable vibe coding without the chaos."
"What changed?"
"Everything, Mas. Dulu saya pikir vibe coding itu AI yang ngerjain semuanya. Sekarang saya paham — AI itu partner, bukan replacement. Saya tetap harus think, plan, understand, test. AI cuma accelerate."
Here's what Budi does differently now:
BUDI'S TRANSFORMATION:
──────────────────────

BEFORE (Week 1):
├── Jump straight ke coding
├── Mega prompts, hope for the best
├── Copy-paste tanpa understand
├── Files berantakan
├── Expect perfect sekali jadi
├── "Fix this" untuk setiap error
├── No Git
├── No context in prompts
├── AI-only debugging
└── Test at the end

AFTER (Month 3):
├── Plan first, code later
├── Chunked prompts, iterate
├── Explain-before-accept
├── Clean structure dari awal
├── 70% → iterate → ship
├── Read errors first, then ask AI
├── Commit after every feature
├── Rich context in every prompt
├── 15-minute rule for debugging
└── Test as you go
Summary: 10 Kesalahan dan Solusi
| # | Kesalahan | Solusi | Key Principle |
|---|---|---|---|
| 1 | Langsung coding tanpa planning | Plan dulu 30-60 menit | Blueprint before building |
| 2 | Prompt mega & kompleks | Chunk jadi prompts kecil | One task, one prompt |
| 3 | Gak paham code yang di-generate | Minta explain sebelum accept | Own what you use |
| 4 | Struktur folder berantakan | Structure first, one file per component | Clean house, clean code |
| 5 | Mau sempurna sekali jadi | 70% rule, iterate to 95% | Progress over perfection |
| 6 | Skip error messages | Baca dan understand error dulu | Errors are friends |
| 7 | Tidak pakai Git | Commit setiap feature selesai | Safety net required |
| 8 | Prompt tanpa context | Template context di setiap prompt | More context, less revision |
| 9 | AI-only debugging | 15-minute rule, try self first | Build debugging muscle |
| 10 | Tidak testing berkala | Test setiap feature selesai | Catch bugs early |
Quick Self-Assessment
Sekarang honest check — berapa kesalahan yang kamu lakukan?
SELF-ASSESSMENT:
────────────────

□ Saya sering langsung coding tanpa planning
□ Prompt saya biasanya panjang dengan banyak requirements
□ Saya copy-paste code tanpa benar-benar understand
□ File structure project saya berantakan
□ Saya expect AI generate perfect output sekali jadi
□ Saya screenshot error dan langsung minta AI fix
□ Saya tidak pakai Git (atau jarang commit)
□ Prompt saya jarang include context lengkap
□ Saya selalu langsung ke AI untuk setiap bug
□ Saya baru testing setelah semua feature selesai

SCORING:
─────────
0-2 checked: Great habits! You're on the right track.
3-5 checked: Room for improvement. Focus on these areas.
6-8 checked: Time to change approach. Re-read this article.
9-10 checked: Start fresh dengan mindset baru. You can do this!
The Right Mindset
VIBE CODING MINDSET YANG BENAR:
──────────────────────────────

❌ WRONG:
"AI yang coding, saya yang directing"
"Saya gak perlu paham code, yang penting jalan"
"AI should give me perfect code"

✅ RIGHT:
"AI adalah partner, saya tetap engineer"
"Saya harus paham setiap line code"
"AI accelerates, I still need to think, plan, test, debug"
AI adalah tool yang luar biasa powerful. Tapi seperti semua tools, effectiveness-nya tergantung pada siapa yang memakainya.
Chainsaw di tangan lumberjack = efficient tree cutting. Chainsaw di tangan yang gak trained = disaster.
Vibe coding di tangan yang paham best practices = 10x productivity. Vibe coding di tangan yang asal-asalan = chaos dan frustration.
Belajar Vibe Coding yang Terarah
Budi's journey bisa lebih smooth kalau dari awal dia belajar dengan struktur yang benar.
Kalau kamu mau belajar vibe coding tanpa harus make semua mistakes ini sendiri, saya punya rekomendasi.
Di BuildWithAngga, kamu bisa belajar vibe coding dengan:
✅ Step-by-step curriculum — Gak loncat-loncat, ada urutan yang logical
✅ Project-based learning — Langsung praktik, bukan cuma teori
✅ Best practices dari awal — Avoid mistakes yang dibahas di artikel ini
✅ Real-world projects — Portfolio-worthy outputs
✅ Support dan community — Gak belajar sendirian
Akses kelas vibe coding terarah di:
👉 **https://buildwithangga.com/belajar/vibe-coding**
Final Message
Setiap orang yang belajar vibe coding pasti akan make mistakes. Itu normal. Itu bagian dari learning.
Yang penting bukan avoid all mistakes — itu impossible.
Yang penting adalah:
- Aware tentang common mistakes
- Learn dari mistakes (sendiri maupun orang lain)
- Improve dan gak repeat the same mistakes
Budi's story bisa jadi ceritamu juga. Bedanya: sekarang kamu sudah aware. Kamu sudah tau kesalahan apa yang harus di-avoid.
The rest is up to you.
Build, learn, iterate. See you di dunia AI! 🚀
Angga Risky Setiawan AI Product Engineer & Founder BuildWithAngga
Punya pengalaman atau kesalahan lain saat vibe coding? Share di kolom komentar!
Artikel ini helpful? Share ke teman yang juga lagi belajar vibe coding.